troubleshooting
WARNING: For your own safety, Push
TROUBLE
Motor will not run.
Blade does not run in the approximate center of the upper wheel.
PROBABLE CAUSE
1.Damaged
2.Motor damaged.
1. Not tracking properly.
REMEDY
1.Replace damaged parts before using Band Saw again.
. Consult Sears Service. Any attempt to repair this motor may create a HAZARD unless repair
is done by a qualified service technician. Repair service is available at your nearest Sears Store.
1.Adjust tracking, see Assembly Section, "Tracking the Blade."
Band Saw slows down when cutting.
Blades breaking.
Saw is noisy when running.
1.Cutting too small a radius.
2.Dull blade.
1. Too much tension.
,Kink in blade caused by cutting too small a radius or turning the material too fast when cutting.
1. Too much blade tension
1.Stop feeding, and back up the material slightly, until the band saw speeds up.
2.Replace blade.
1.Adjust tension. See Assembly section "Tensioning The Blade."
2.Use correct cutting technique. See Basic Band Saw Operation Section.
1.Adjust blade tension. See Assembly section "Tensioning The Blade."
Blade will not cut straight.
Blade guides will not stay in position
Motor stops during cut
2.Blade guides and
1.Blade guides and bearings not properly adjusted.
2.Worn or damaged blade.
,Patch on blade guide threads has deteriorated
allowing them to rotate with the blade.
1.Aggressive feeding causes Current Protector to shut motor off.
2.Adjust upper and lower blade guides and bearings. See assembly section "Adjusting the Blade Guides and
1.Adjust upper and lower blade guides and bearings. See Assembly section "Adjusting Guides and
2.Replace blade.
1.Replace blade guides.
1.Turn machine "OFF" and then back "ON" to continue cutting.
2.Slow down the feed rate of material into blade.
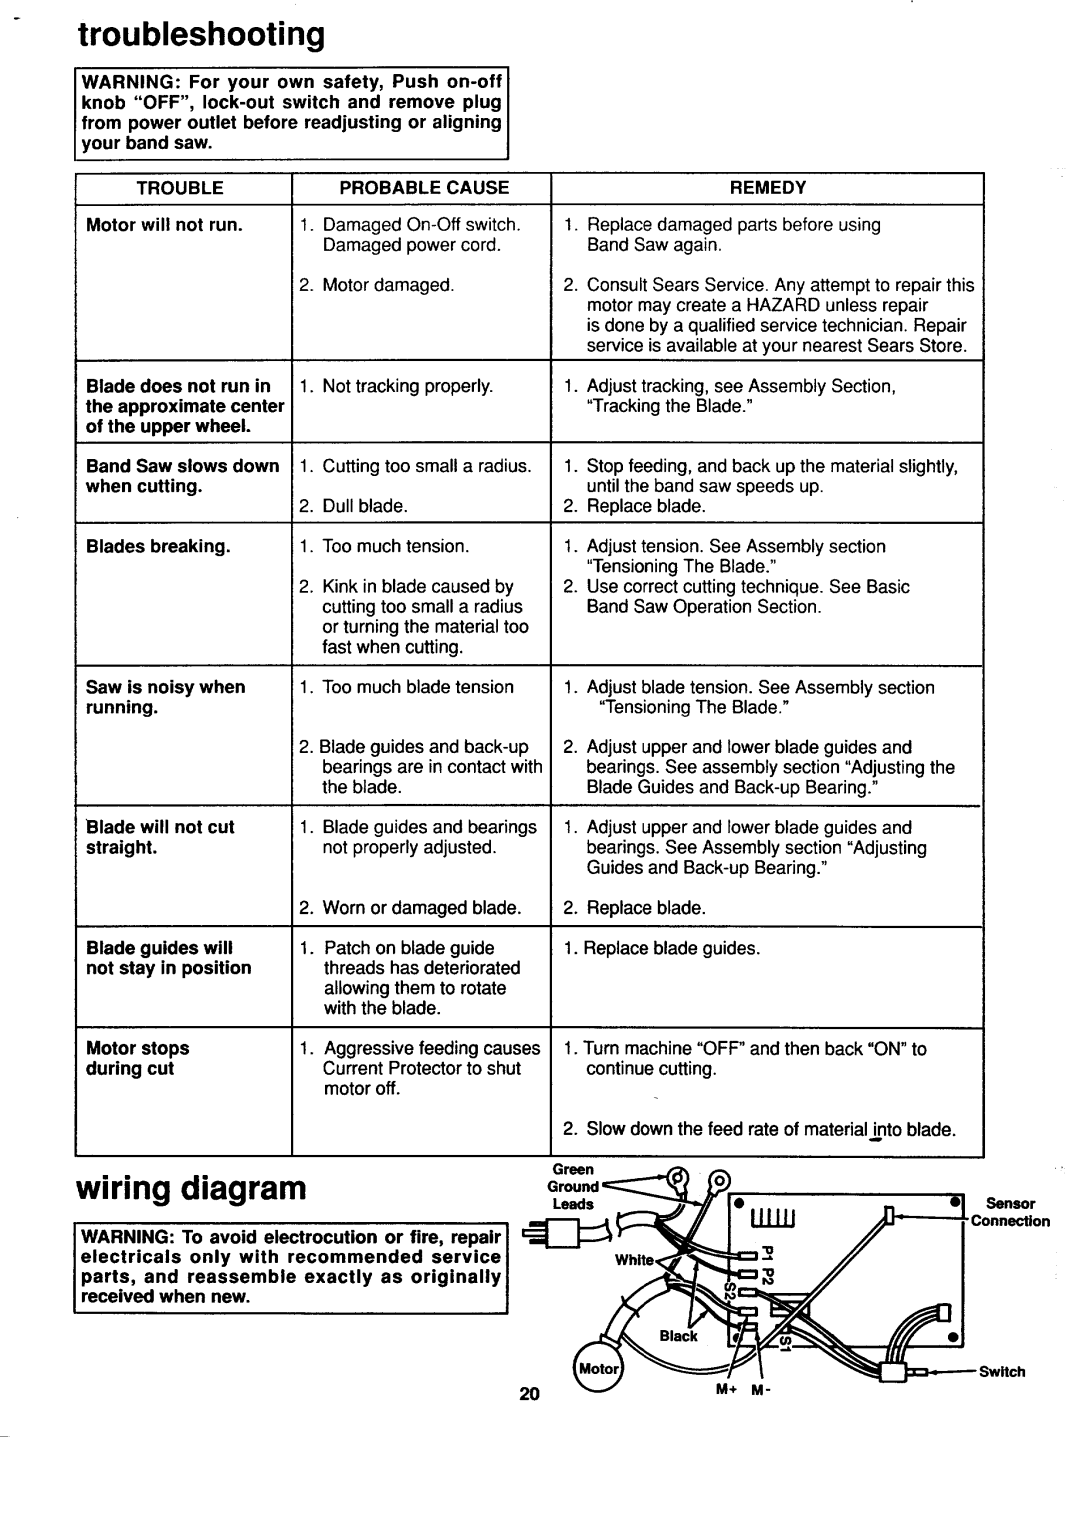
wiring diagram
WARNING: To avoid electrocution or fire, repair
electricals only with recommended service
parts, and reassemble exactly as originally received when new.
Green |
|
|
Leads | e | Sensor |
|
| IIIIIi |
| White, |
|
Black
._witch
20 | M+ M- |