maintenance
MOTOR/ELECTRICAL
Frequently vacuum or blow out any sawdust from the motor.
damaged in any way, have it replaced immedi- I I WARNING: If the power cord is worn, cut, or
ately,
WARNING: To avoid fire or electrocution, reassemble electric parts with only approved service parts. Reassemble exactly as originally assembled.
LUBRICATION
All of the BEARINGS are permanently lubricated: They require no further lubrication.
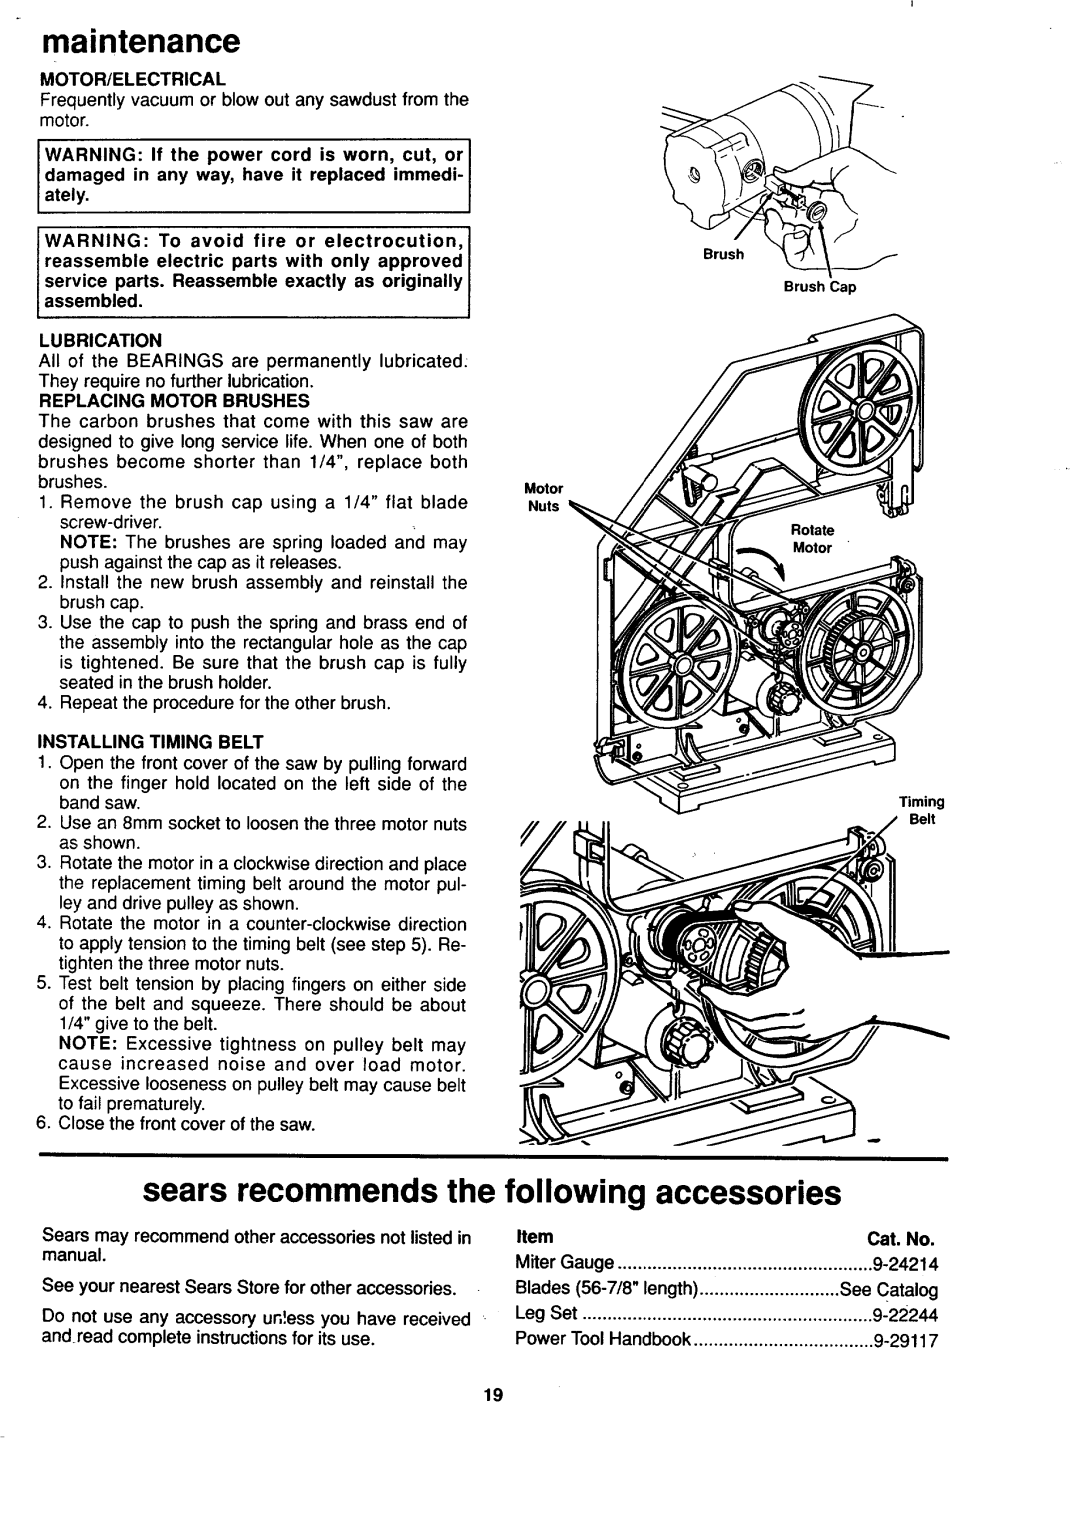
REPLACING MOTOR BRUSHES
The carbon brushes that come with this saw are designed to give long service life. When one of both
brushes become shorter than 1/4", replace both brushes.
1.Remove the brush cap using a 1/4" flat blade
NOTE: The brushes are spring loaded and may push against the cap as it releases.
2.Install the new brush assembly and reinstall the brush cap.
3.Use the cap to push the spring and brass end of
the assembly into the rectangular hole as the cap is tightened. Be sure that the brush cap is fully seated in the brush holder.
4.Repeat the procedure for the other brush.
INSTALLING TIMING BELT
1.Open the front cover of the saw by pulling forward
on the finger hold located on the left side of the band saw.
2.Use an 8mm socket to loosen the three motor nuts as shown.
3.Rotate the motor in a clockwise direction and place the replacement timing belt around the motor pul- ley and drive pulley as shown.
4.Rotate the motor in a
to apply tension to the timing belt (see step 5). Re- tighten the three motor nuts.
5.Test belt tension by placing fingers on either side of the belt and squeeze. There should be about 1/4" give to the belt.
NOTE: Excessive tightness on pulley belt may cause increased noise and over load motor.
Excessive looseness on pulley belt may cause belt to fail prematurely.
6.Close the front cover of the saw.
Brush
Brush Cap
Motor
Nuts
Rotate
Timing
Belt
sears recommends the following accessories
Sears may recommend other accessories not listed in manual.
See your nearest Sears Store for other accessories.
Do not use any accessory un!ess you have received andread complete instructions for its use.
Item | Cat. No. |
Miter Gauge | |
Blades | See Catalog |
Leg Set | |
Power Tool Handbook |
19