USING HOLD DOWN/PUSH BLOCKS
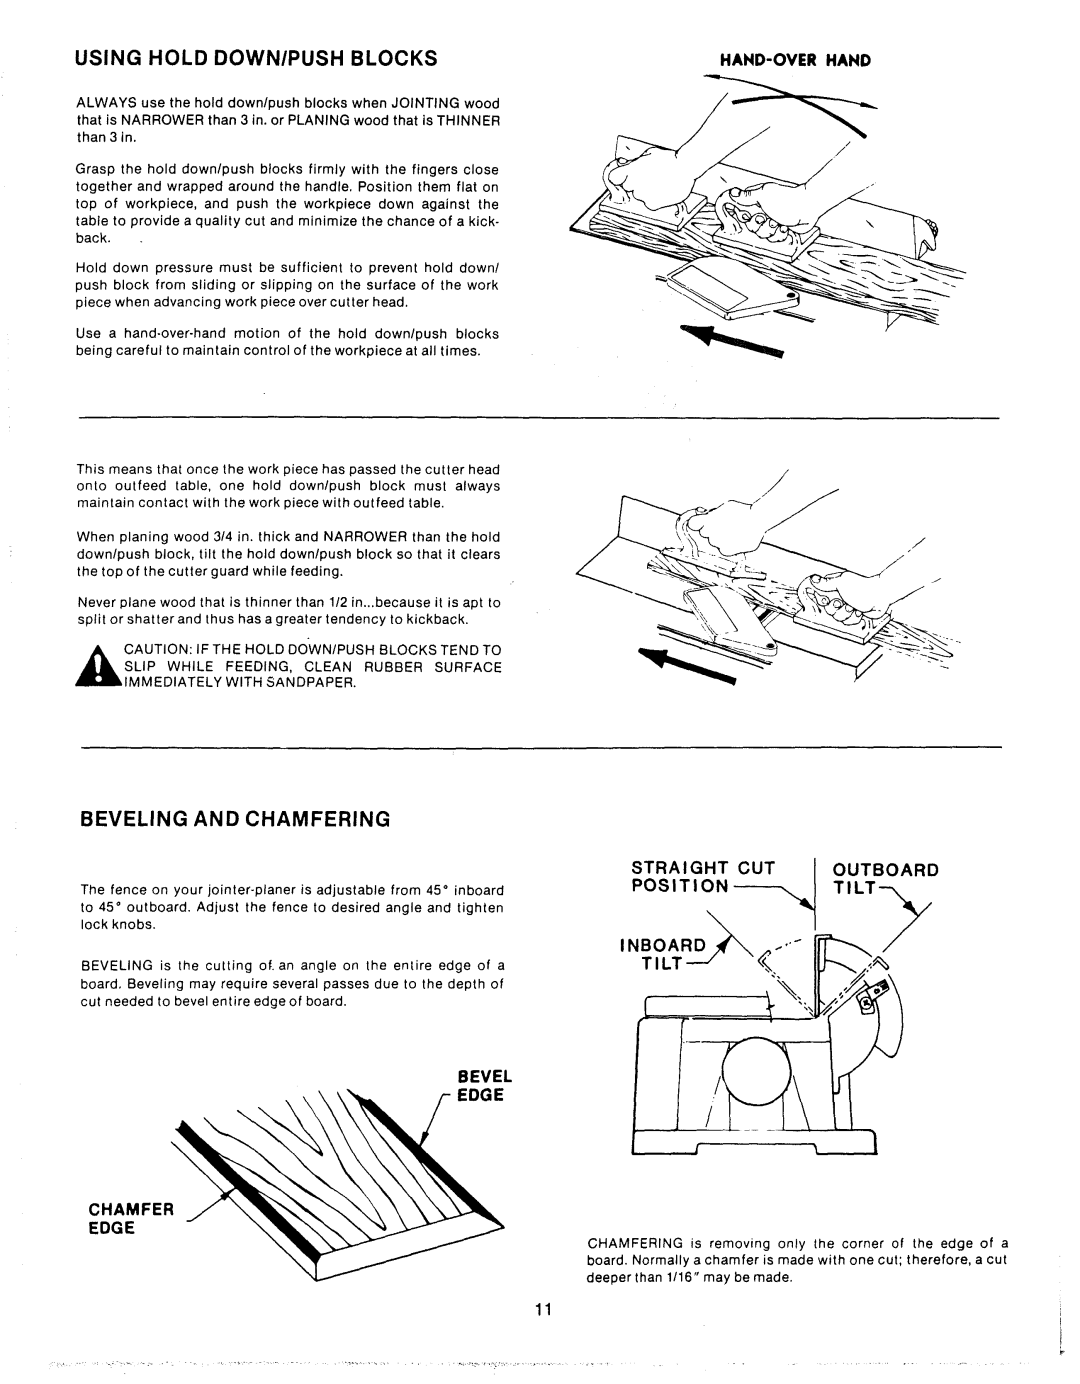
ALWAYS use the hold down/push blocks when JOINTING wood that is NARROWER than 3 in. or PLANING wood that is THINNER than 3 in.
Grasp the hold down/push blocks firmly with the fingers close together and wrapped around the handle. Position them flat on top of workpiece, and push the workpiece down against the table to provide a quality cut and minimize the chance of a kick- back.
Hold down pressure must be sufficient to prevent hold down/ push block from sliding or slipping on the surface of the work piece when advancing work piece over cutter head.
Use a
This means that once the work piece has passed the cutter head
onto outfeed table, one hold down/push block must always maintain contact with the work piece with outfeed table.
When planing wood 3/4 in. thick and NARROWER than the hold down/push block, tilt the hold down/push block so that it clears the top of the cutter guard while feeding.
Never plane wood that is thinner than 1/2 in.,.because it is apt to split or shatter and thus has a greater tendency to kickback.
IF THE HOLD
SLIP WHILE FEEDING, CLEAN RUBBER SURFACE
_CAUTION:DOWN/PUSH BLOCKS TEND TO IMMEDIATELY WITH SANDPAPER.
/
/
BEVELING AND CHAMFERING
The fence on your
BEVELING is the cutting of. an angle on the entire edge of a board, Beveling may require several passes due to the depth of cut needed to bevel entire edge of board.
OUTBOARD
TILT-_
BEVEL
EDGE
CHAMFER
EDGE
CHAMFERING is removing only the corner of the edge of a board. Normally a chamfer is made with one cut; therefore, a cut deeper than 1/16" may be made.
11
I
