BLADE REPLACEMENT AND ADJUSTMENT
NOTE: To rotate the cutterhead or to hold it steady, use a screwdriver in the slot in the cutter shaft through the small hole in the rear of the machine just above the vacuum port.
1.Unplug your
2.Block the cutter guard open.
3.Using the 5/32" hex key (Allen wrench), remove the three (3) blade lock screws securing blade and blade clamp.
4.Lift blade and blade clamp from cutter head.
5.Clean any sawdust from cutterhead and any parts you have removed.
6.Place blade clamp against the replacement blade and replace
in cutterhead with the (3) blade lock screws. NOTE: Retighten blade lock screws so that the blade is held by friction butstill allows for blade movement.
7.Place a straight edge across the out feed table and across the cutterhead opening.
8.Rotate the cutterhead until the blade contacts the straight
edge (rotate backwards to prevent damage to the cutting edge). A properly adjusted blade will lightly tick (touch) the
straight edge.
9.BLADE TOO HIGH: If the straight edge is lifted by the blade, it must be lowered. Tap the blade lightly with a scrap piece of wood to lower it.
10.BLADE TOO LOW: If the blade does not touch the straight edge, it should be raised. Pry the lower edge of the blade with a screwdriver against the edge of the outfeed table. Always protect the edge of the table with a scrap of wood or piece of cardboard.
11.Tighten blade lock screws.
12.Recheck blade adjustment, making sure blade is still level with outfeed table.
13.Recheck screws to be sure they are secure.
,_ | DANGER: FAILURE TO TIGHTEN BLADE LOCK |
| SCREWS COULD RESULT IN SERIOUS INJURY. |
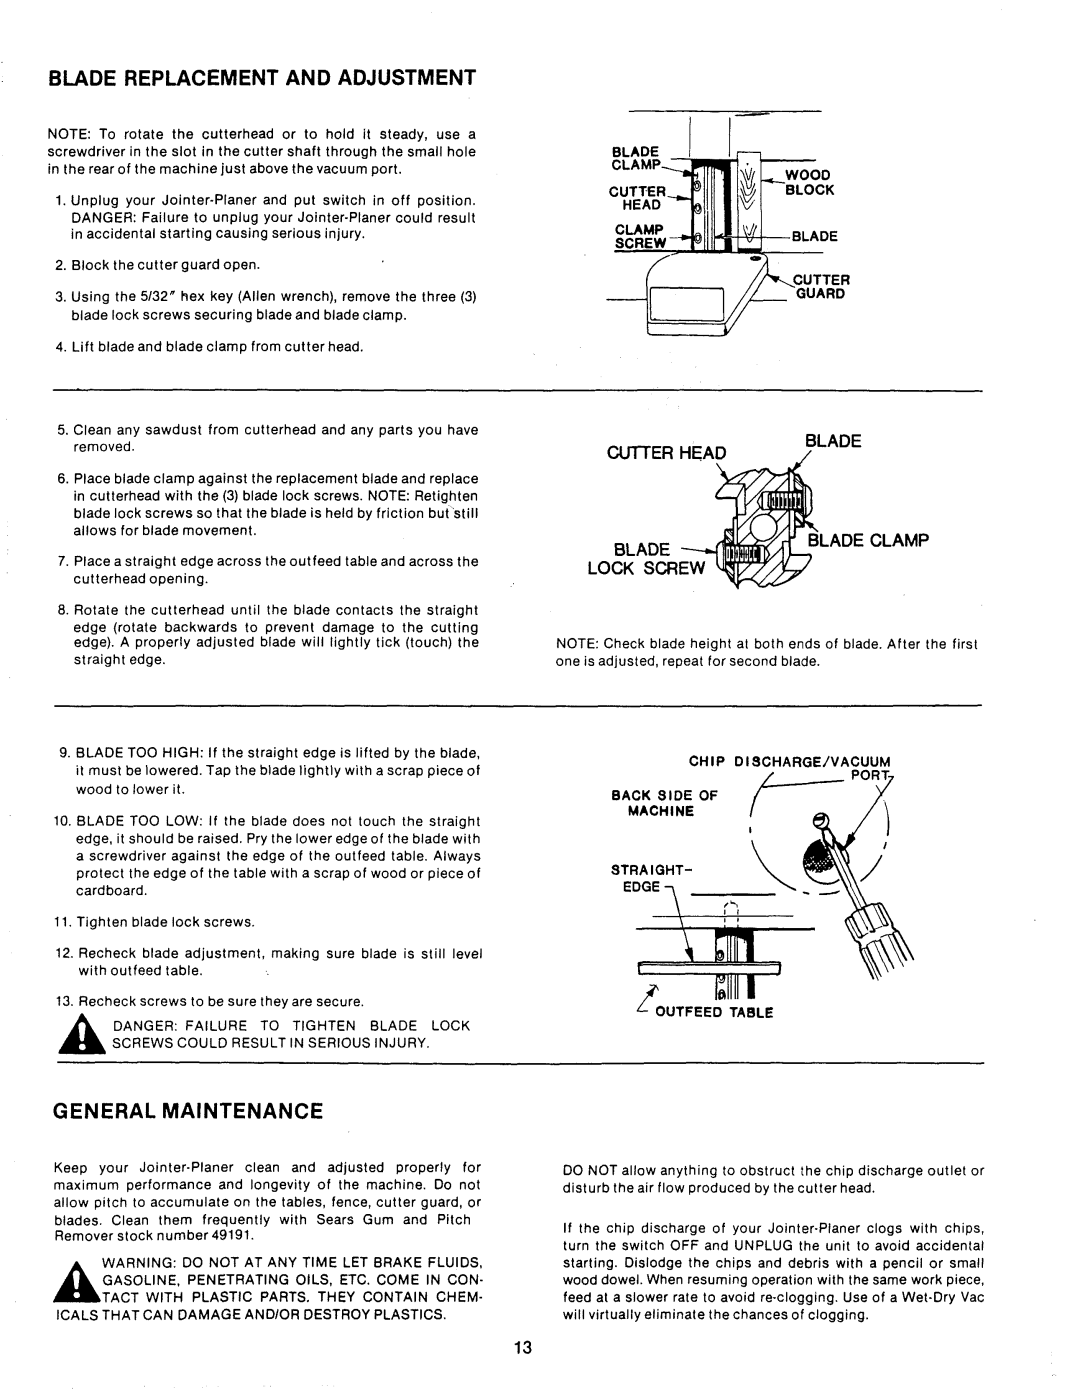
BLADE
WOOD
CUTTERBLOCK
HEAD
CLAMP.ADE
CUTTER
BLADE
CUTTER HEA_
BLADE _i_BLADE | CLAMP |
LOCK SCREW
NOTE: Check blade height at both ends of blade. After the first one is adjusted, repeat for second blade.
CHIP DISCHARGE/VACUUM
/
BACK 81DE OF
MACHINE
8TRA I GHT-
EDGE
OUTFEED TABLE
GENERAL MAINTENANCE
Keep your
maximum performance and longevity of the machine. Do not allow pitch to accumulate on the tables, fence, cutter guard, or
blades. Clean them frequently with Sears Gum and Pitch Remover stock number 49191.
,_WARNING:DO NOT AT ANY TIME LET BRAKE FLUIDS, GASOLINE, PENETRATING OILS, ETC. COME IN CON- TACT WITH PLASTIC PARTS. THEY CONTAIN CHEM-
ICALS THAT CAN DAMAGE AND/OR DESTROY PLASTICS.
DO NOT allow anything to obstruct the chip discharge outlet or disturb the air flow produced by the cutter head.
If the chip discharge of your
starting. Dislodge the chips and debris with a pencil or small wood dowel. When resuming operation with the same work piece, feed at a slower rate to avoid
13