385. 17526 specifications
The Sears 385.17526 is a versatile sewing machine that exemplifies durability and ease of use, making it a favored choice among hobbyists and seasoned seamstresses. This sewing machine is known for its straightforward design and solid performance, designed to handle various fabrics and sewing tasks with efficiency.One of the standout features of the Sears 385.17526 is its range of stitch options. The machine typically offers multiple built-in stitches, including straight, zigzag, and decorative stitches, which can be easily selected through a simple dial or control mechanism. This variety allows users to explore creative projects, from garment construction to quilting and home décor.
The sewing machine is characterized by its robust construction. The metal frame ensures stability while sewing, minimizing vibrations and providing a consistent sewing experience. This feature is crucial for working with heavier fabrics, as it helps maintain accuracy and precision, especially when tackling ambitious sewing projects.
Another notable aspect of the Sears 385.17526 is its adjustable pressure foot. This characteristic allows sewists to work with a variety of materials, from lightweight silks to heavy canvas, by adjusting the pressure applied to the fabric. This adaptability is critical for achieving professional-looking results.
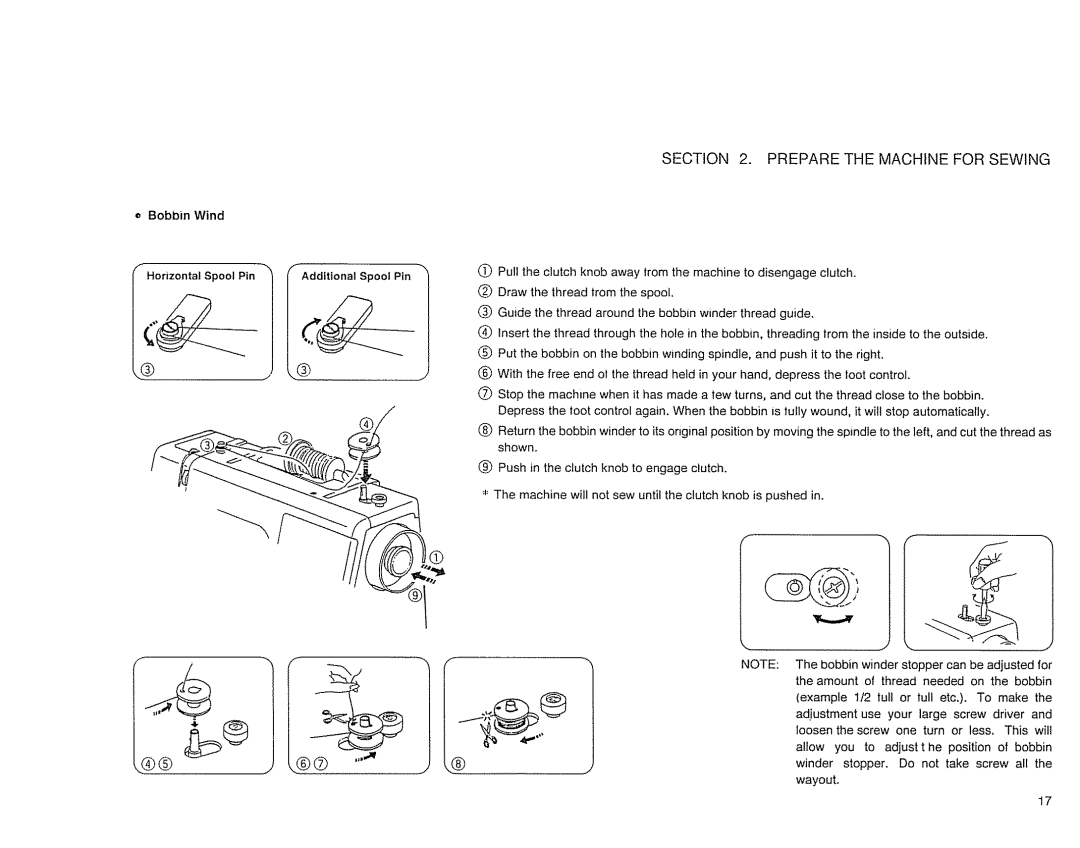
In terms of technology, the machine often comes equipped with a top drop-in bobbin system. This intuitive design simplifies the threading process and allows for easy monitoring of thread levels, reducing downtime during projects. Additionally, some models may feature a built-in needle threader, making it easier for users to set up their machine quickly.
Other helpful features include a free arm function, which facilitates sewing cuffs and collars, making it easier to work on small or circular sewing projects. A built-in carrying handle adds portability, making it easy for users to transport the machine to sewing classes or workshops.
Overall, the Sears 385.17526 represents a perfect blend of functionality, user-friendliness, and solid construction. Whether you are a beginner looking to start your sewing journey or an experienced crafter seeking a dependable machine, the Sears 385.17526 stands out as a reliable tool that can adapt to various sewing needs while delivering consistent performance.

