ASSEMBLY
Before beginning assembly, carefully read the following Information and instructions:
•Place all parts in a cleared area and remove the packing materials; do not dispose of the packing materials until assembly is completed.
•Read each assembly step before you begin.
•Be sure that all pads are oriented as shown in the drawings.
•"nghten all parts as you assemble them, unless instructed to do otherwise.
4Note: Before you attach the 1/2" Dome Caps
(29)in assembly steps I and 2, be sure that all parts are in the correct positions. The Dome Caps can be used only once; if a part is incor-
rectly assembled, it will be necessary to remove the Dome Caps and order new ones.
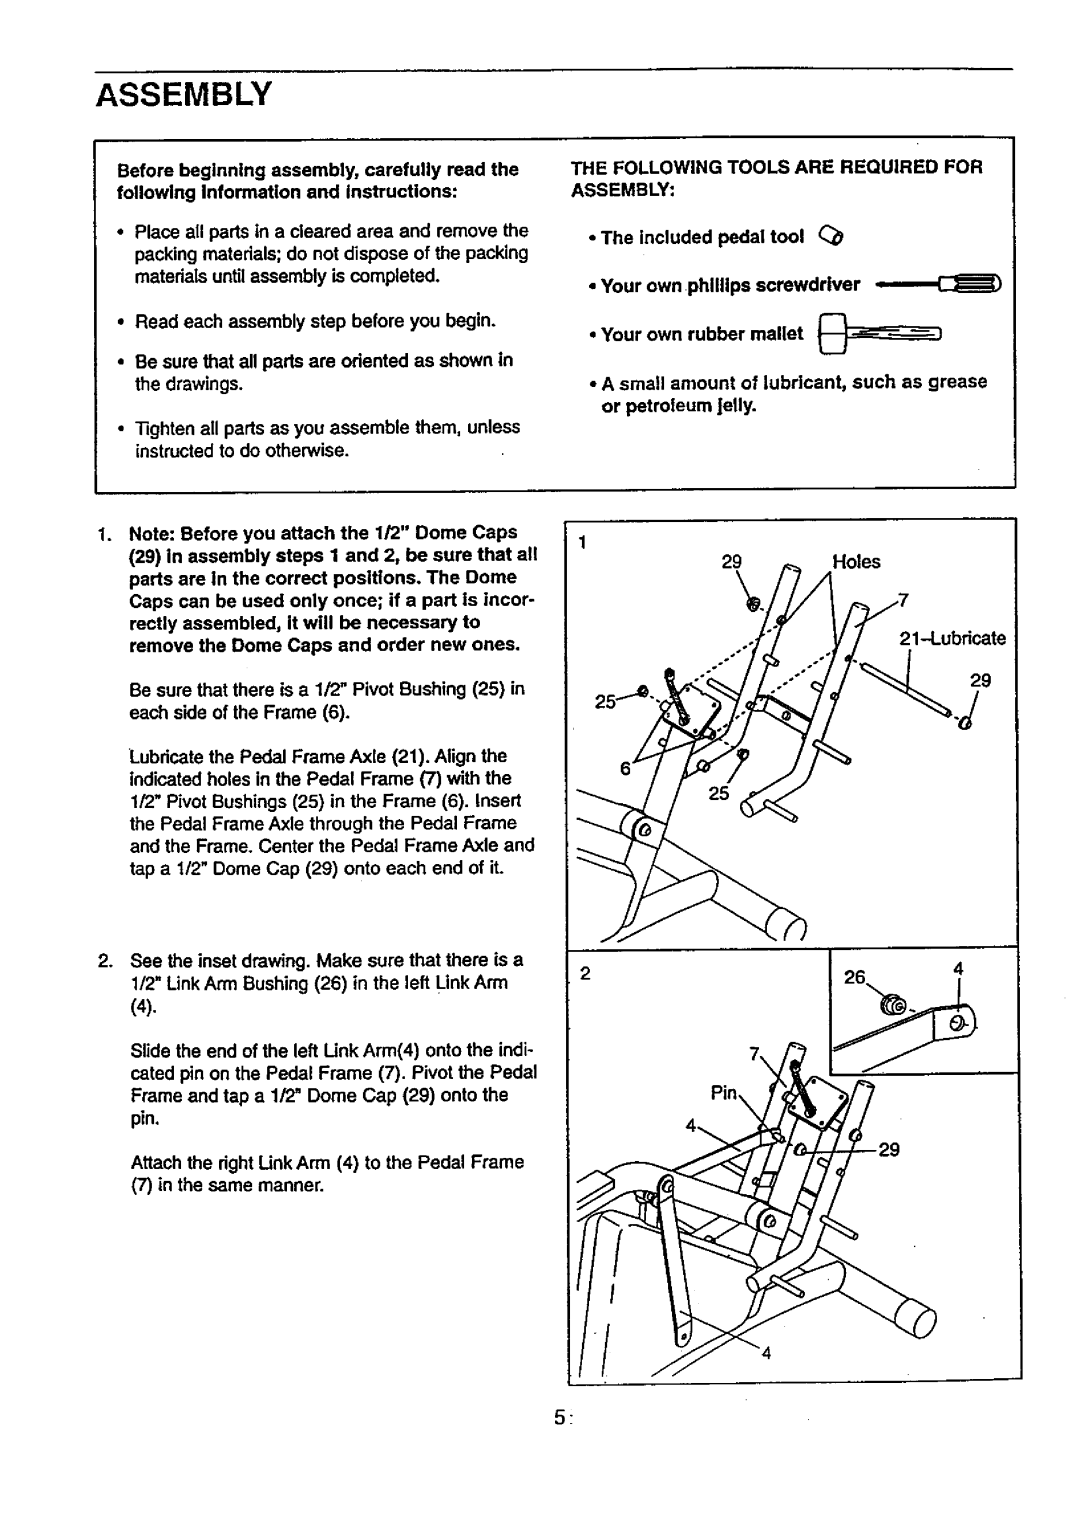
Be sure that there is a 1/2" Pivot Bushing (25) in each side of the Frame (6).
Lubricate the Pedal Frame Axle (21). Align the indicated holes in the Pedal Frame (7) with the 1/2" Pivot Bushings (25) in the Frame (6). Insert the Pedal Frame Axle through the Pedal Frame and the Frame. Center the Pedal Frame Axle and tap a t/2" Dome Cap (29) onto each end of it.
2.See the inset drawing. Make sure that there is a
1/2" Link Arm Bushing (26) in the left Link Arm
(4).
Slide the end of the left Unk Arm(4) onto the indi- cated pin on the Pedal Frame (7). Pivot the Pedal
Frame and tap a 1/2" Dome Cap (29) onto the pin.
Attach the dght Link Arm (4) to the Pedal Frame
(7) in the same manner.
THE FOLLOWING TOOLS ARE REQUIRED FOR ASSEMBLY:
•The included pedal tool
•Your own phillips screwdriver
•Your own rubber mallet
•A small amount of lubricant, such as grease or petroleum jelly.
29Holes
21
29
2
5_