REMOVABLEPARTScontinued
CLEANING MATERIALS
• Dishwashing detergent
•Warm water
•Scouring pad or
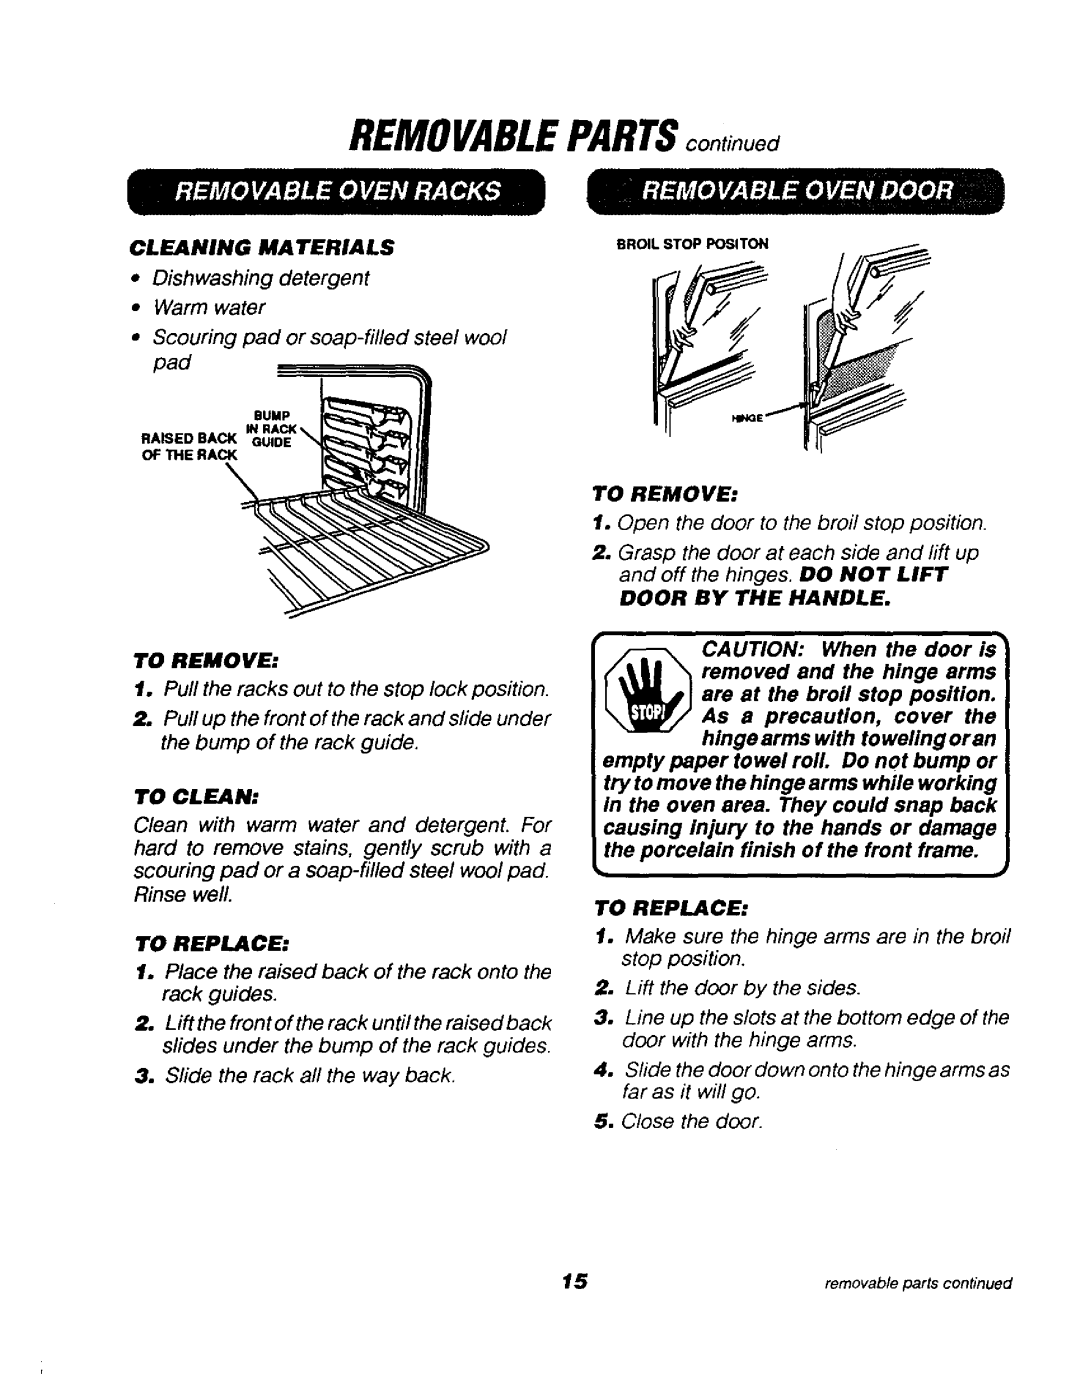
BUMP
RAISED BACK
OF THE RACK
TO REMOVE:
1.Pull the racks out to the stop lock position.
2.Pull up the front of the rack and slide under the bump of the rack guide.
TO CLEAN:
Clean with warm water and detergent. For hard to remove stains, gently scrub with a scouring pad or a
TO REPLACE:
1.Place the raised back of the rack onto the rack guides.
2.Lift the front of the rack until the raised back slides under the bump of the rack guides.
3.Slide the rack all the way back,
BROIL STOP POSITON
TO REMOVE:
1.Open the door to the broil stop position.
2.Grasp the door at each side and lift up and off the hinges. DO NOT LIFT
DOOR BY THE HANDLE.
removed and the hinge arms
are at the broil stop position.
_CAUTION: When the door is
As a precaution, cover the hinge arms with toweling or an empty paper towel roll. Do not bump or
try to move the hinge arms while working in the oven area. They could snap back causing injury to the hands or damage the porcelain finish of the front frame.
TO REPLACE:
1.Make sure the hinge arms are in the broil stop position.
2.Lift the door by the sides.
3.Line up the slots at the bottom edge of the door with the hinge arms.
4.Slide the door down on to the hinge arms as far as it will go.
5.Close the door.
15 | removable parts continued |