INSTALLATION
INSTRUCTIONS
Read the "Dryer Safety" section of this Owner's Manual and completely read these Installation Instructions before beginning installation.
IMPORTANT: Observe all governing codes and ordinances.
•The dryer must not be installed where it can be exposed to water and/or weather.
•Check code requirements. Some codes limit or do not permit installation of clothes dryers in garages, closets, mobile homes, or sleeping quarters. Contact your local building inspector.
Tools needed for installation:
Adjustable wrench or Pliers
Wire stripper
Duct tape
Phillips screwdriver
Level
A
This dryer is manufactured with the
Use a
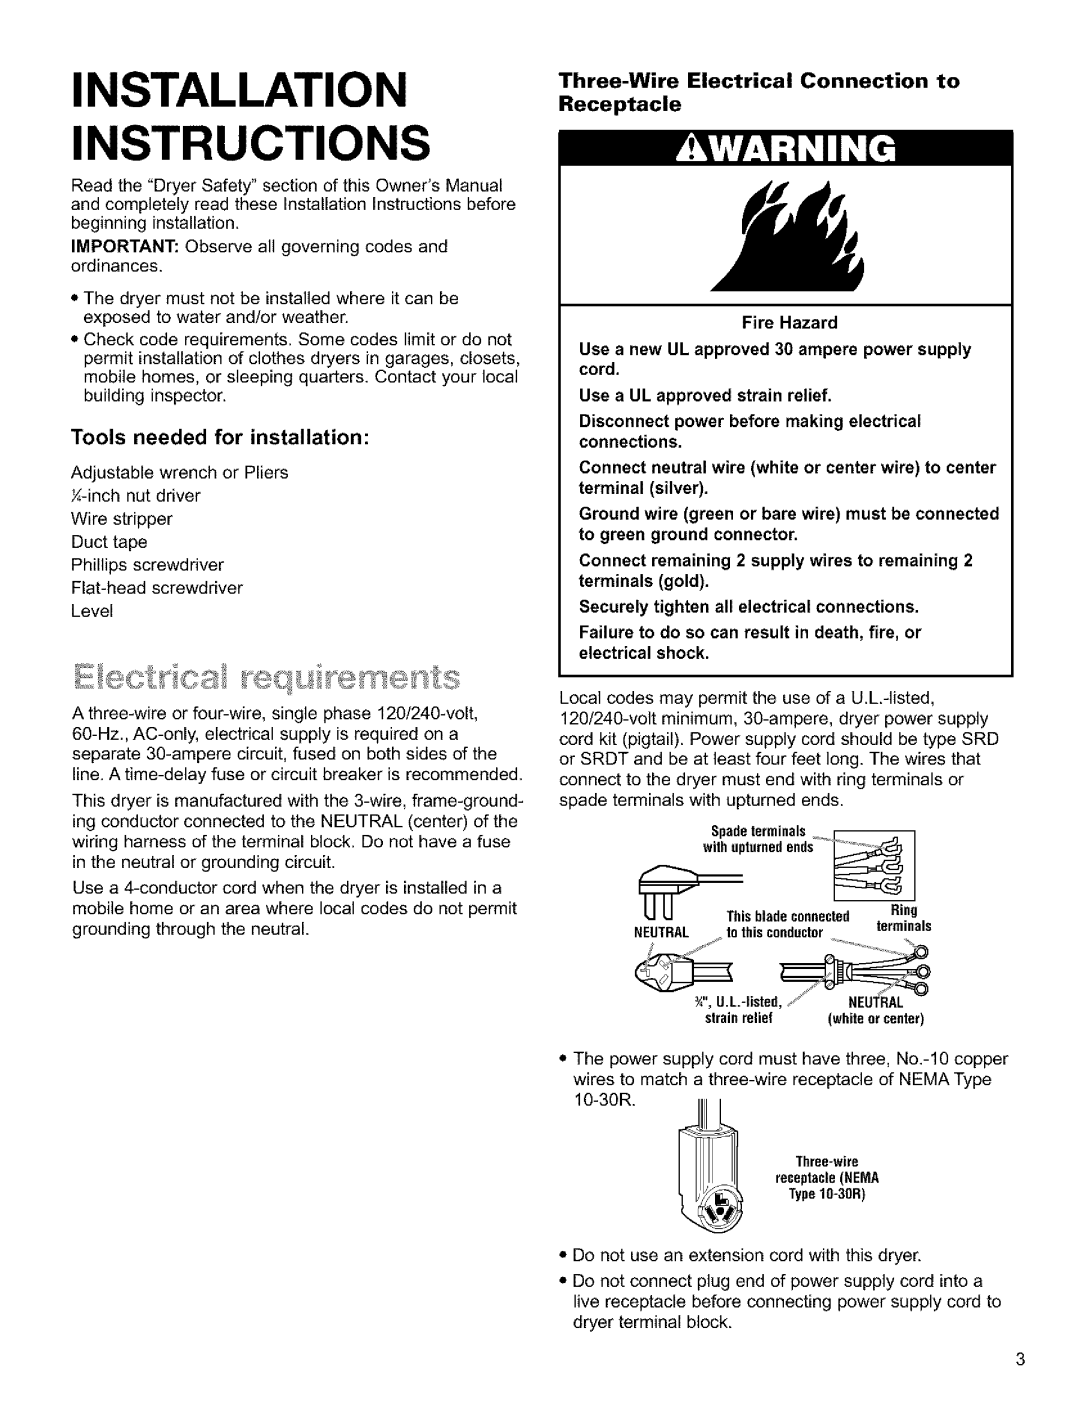
Three-Wire Electrical Connection to Receptacle
Fire Hazard
Use a new UL approved 30 ampere power supply cord.
Use a UL approved strain relief.
Disconnect power before making electrical connections.
Connect neutral wire (white or center wire) to center terminal (silver).
Ground wire (green or bare wire) must be connected to green ground connector.
Connect remaining 2 supply wires to remaining 2 terminals (gold).
Securely tighten all electrical connections.
Failure to do so can result in death, fire, or electrical shock.
Local codes may permit the use of a
| Spade terminals |
| 1 |
with upturnedends |
| J | |
|
| ||
| This blade connected | Ring | |
NEUTRAL | _ to this conductor |
| terminals |
/f,+ |
| % | |
¾, | NEUTRAL | ||
strainrelief (whiteorcenter)
•The power supply cord must have three,
receptacle (NEMA Type
•Do not use an extension cord with this dryer.
•Do not connect plug end of power supply cord into a live receptacle before connecting power supply cord to dryer terminal block.
3