SETTINGS
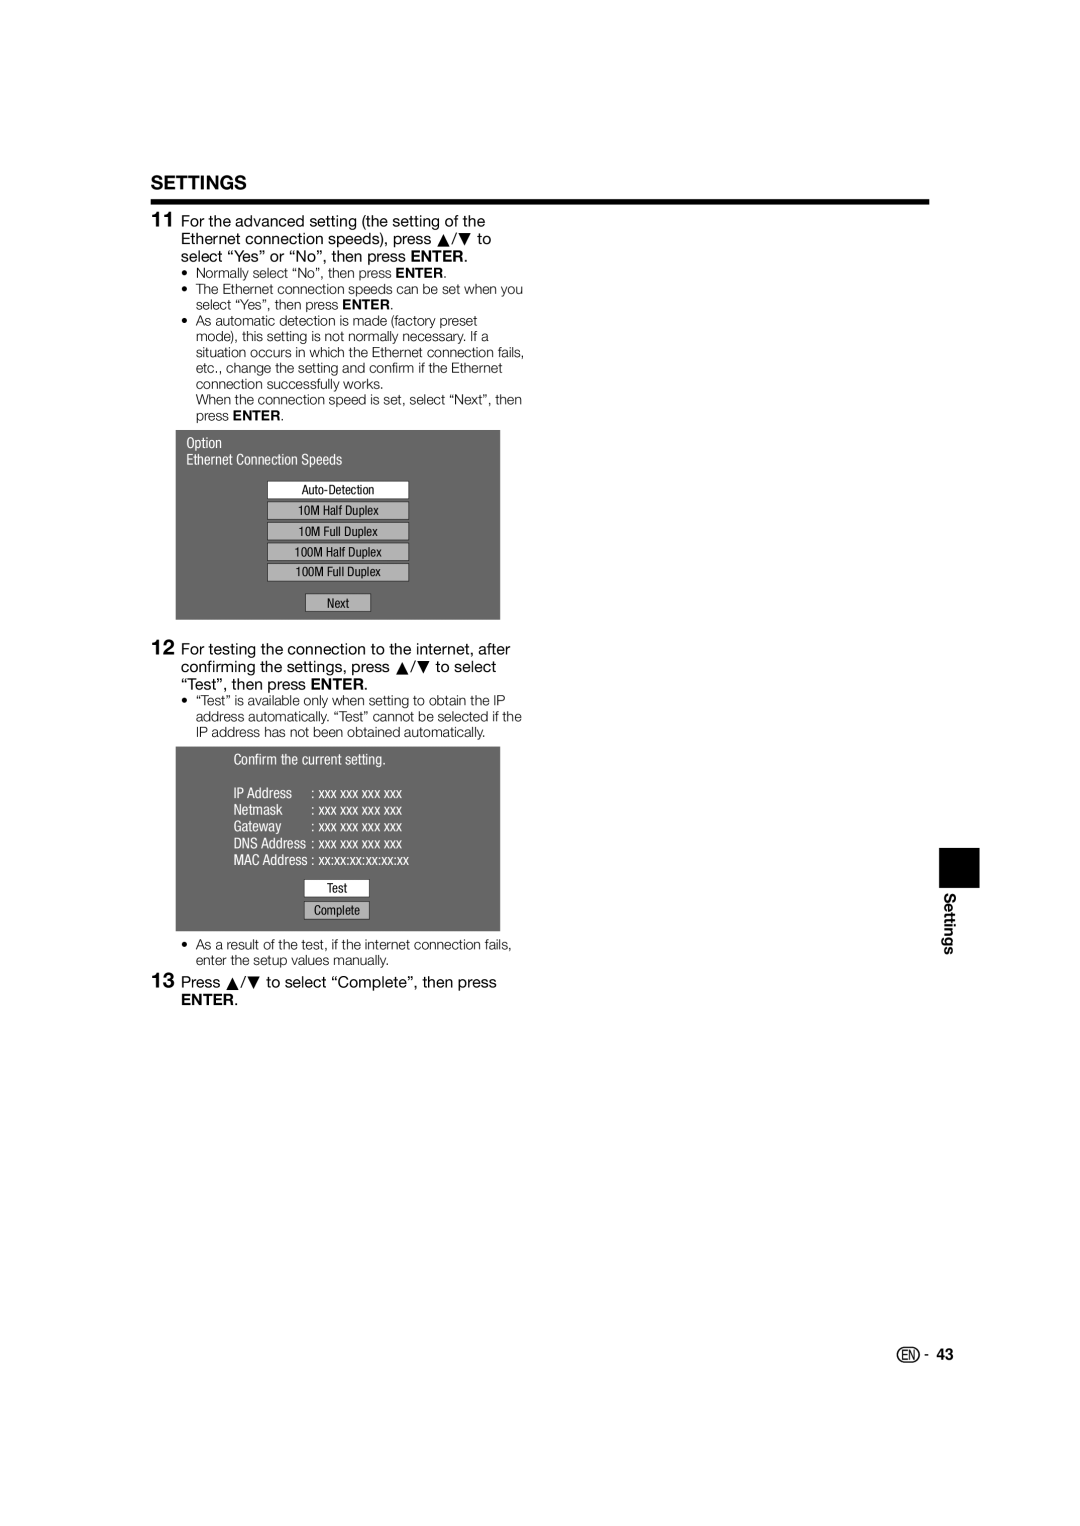
11For the advanced setting (the setting of the Ethernet connection speeds), press a/b to select “Yes” or “No”, then press ENTER.
•Normally select “No”, then press ENTER.
•The Ethernet connection speeds can be set when you select “Yes”, then press ENTER.
•As automatic detection is made (factory preset mode), this setting is not normally necessary. If a situation occurs in which the Ethernet connection fails, etc., change the setting and confirm if the Ethernet connection successfully works.
When the connection speed is set, select “Next”, then press ENTER.
Option
Ethernet Connection Speeds
10M Half Duplex
10M Full Duplex
100M Half Duplex
100M Full Duplex
Next
12For testing the connection to the internet, after confirming the settings, press a/b to select “Test”, then press ENTER.
•“Test” is available only when setting to obtain the IP address automatically. “Test” cannot be selected if the IP address has not been obtained automatically.
Confirm the current setting.
IP Address | : xxx xxx xxx xxx |
Netmask | : xxx xxx xxx xxx |
Gateway | : xxx xxx xxx xxx |
DNS Address : xxx xxx xxx xxx
MAC Address : xx:xx:xx:xx:xx:xx
Test
Complete
•As a result of the test, if the internet connection fails, enter the setup values manually.
13Press a/b to select “Complete”, then press
ENTER.
Settings
![]()
![]() 43
43
