HUMIDIFYING TRAY
|
| Frequency of maintenance cycle will depend on the hardness | |
Care Cycle | 1 month | ||
of the water. Avoid spilling water when removing or cleaning | |||
|
| ||
|
| the tray. |
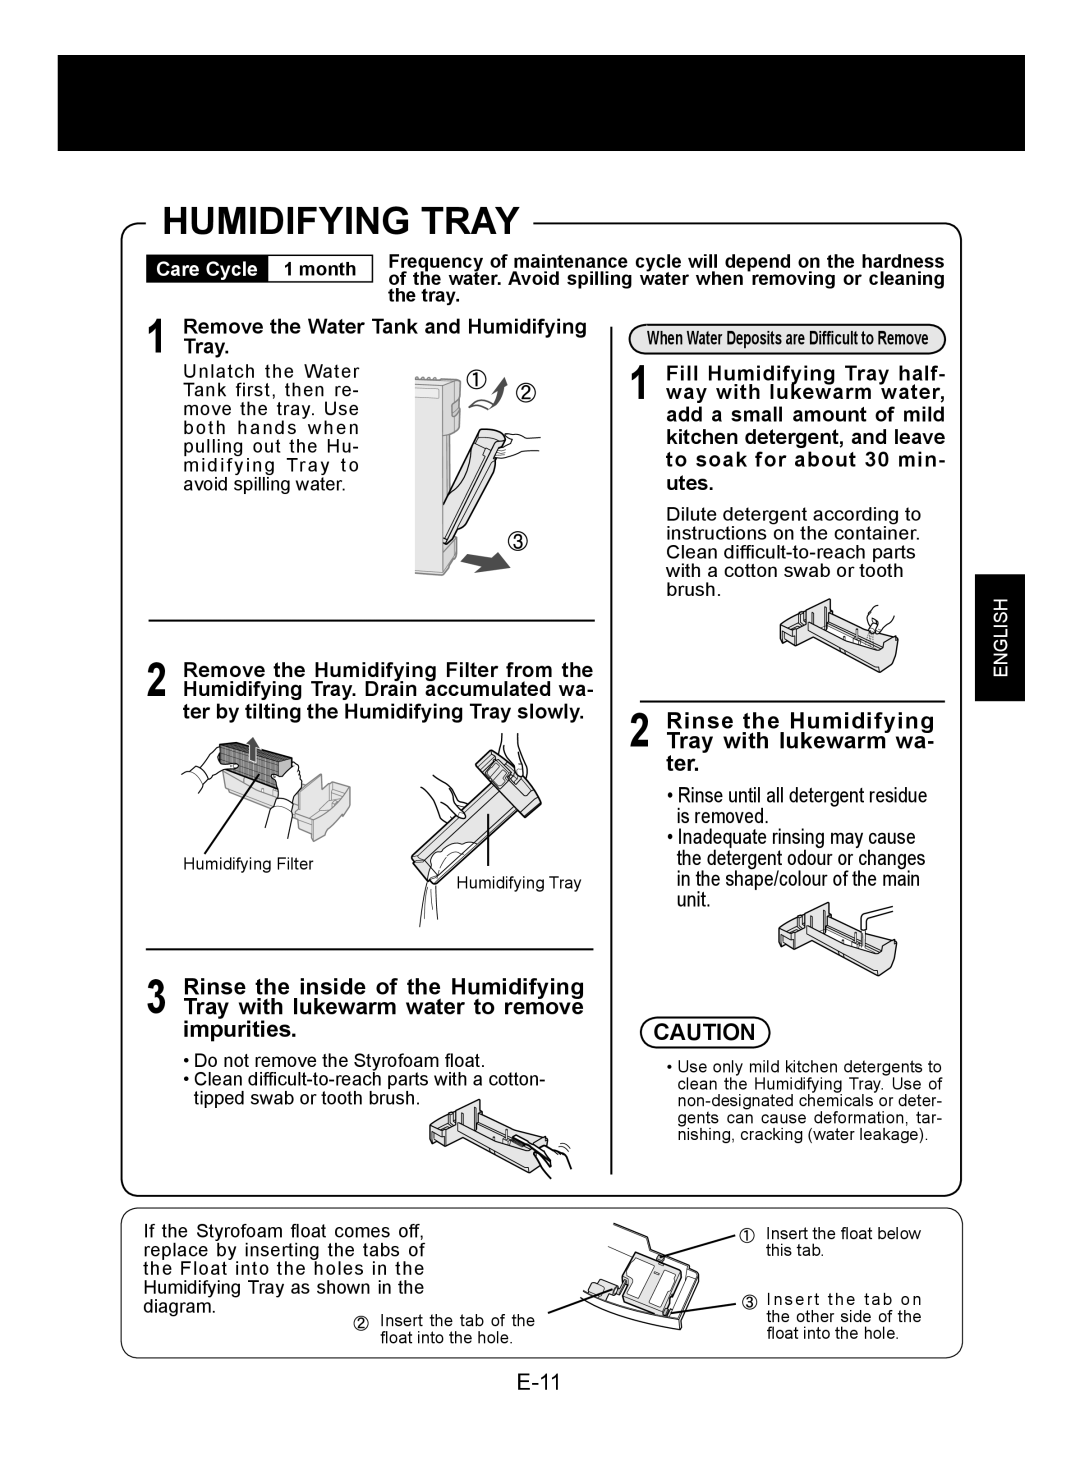
1 Remove the Water Tank and Humidifying Tray.
Unlatch the Water Tank first, then re- move the tray. Use both hands when pulling out the Hu- midifying Tray to avoid spilling water.
2 Remove the Humidifying Filter from the Humidifying Tray. Drain accumulated wa- ter by tilting the Humidifying Tray slowly.
Humidifying Filter
Humidifying Tray
3 Rinse the inside of the Humidifying Tray with lukewarm water to remove impurities.
•Do not remove the Styrofoam float.
•Clean
If the Styrofoam float comes off, replace by inserting the tabs of the Float into the holes in the Humidifying Tray as shown in the diagram.
When Water Deposits are Difficult to Remove
1 Fill Humidifying Tray half- way with lukewarm water, add a small amount of mild kitchen detergent, and leave to soak for about 30 min- utes.
Dilute detergent according to instructions on the container. Clean
2 Rinse the Humidifying Tray with lukewarm wa- ter.
•Rinse until all detergent residue is removed.
•Inadequate rinsing may cause the detergent odour or changes in the shape/colour of the main unit.
CAUTION
•Use only mild kitchen detergents to clean the Humidifying Tray. Use of
Insert the float below this tab.
Insert the tab on the other side of the float into the hole.
ENGLISH
