Attaching the stand
•Before attaching (or detaching) the stand, unplug the AC cord from the AC outlet.
•Before performing work spread cushioning over the base area to lay the TV on. This will prevent it from being damaged.
CAUTION
•Attach the stand in the correct direction.
•Be sure to follow the instructions. Incorrect installation of the stand may result in the TV falling over.
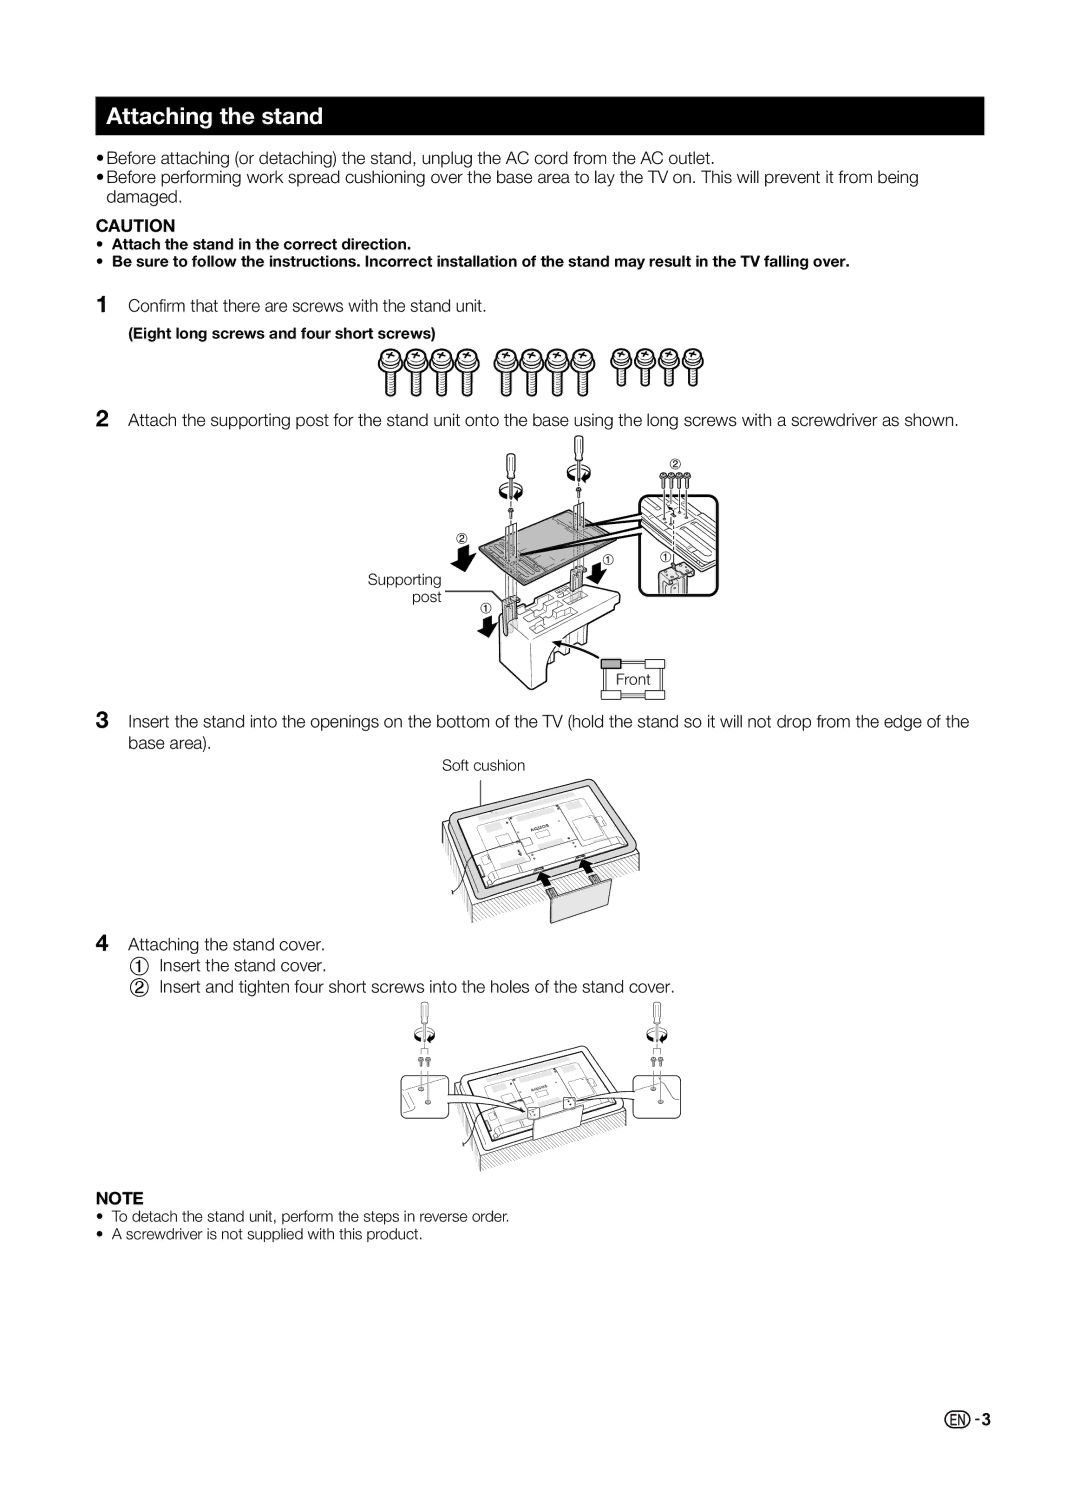
1Confi rm that there are screws with the stand unit.
(Eight long screws and four short screws)
2Attach the supporting post for the stand unit onto the base using the long screws with a screwdriver as shown.
Supporting |
post |
Front
3
4
Insert the stand into the openings on the bottom of the TV (hold the stand so it will not drop from the edge of the base area).
Soft cushion
Attaching the stand cover.
1Insert the stand cover.
2Insert and tighten four short screws into the holes of the stand cover.
NOTE
•To detach the stand unit, perform the steps in reverse order.
•A screwdriver is not supplied with this product.
![]()
![]() 3
3