Instructions for attaching a VESA-compliant arm
An arm or stand based on the VESA standard (commercially available) can be attached to the monitor. Procurement of the arm or stand is at the customer's discretion.
Arms or stands able to be used
Attachments must satisfy the following.
-Compatible with the VESA standard.
-Have a gap of 100 mm x 100 mm between the screw holes on the section to be attached.
-Not be likely to fall off or break off after being attached to the monitor.
How to attach the arm or stand
-Be careful not to over bend the cable or add extension cords as this could lead to malfunction.
-While following these instructions, please also refer to the installation instructions in the operation manual included with the arm or stand.
CAUTION!
-Be careful not to get your fingers pinched between the display and stand nor to let the stand drop. These could lead to injury.
1.Remove the cables.
2.Spread out a soft cloth on a suitable horizontal surface.
3.Being careful not to damage the monitor, gently lay the monitor on it
-For the
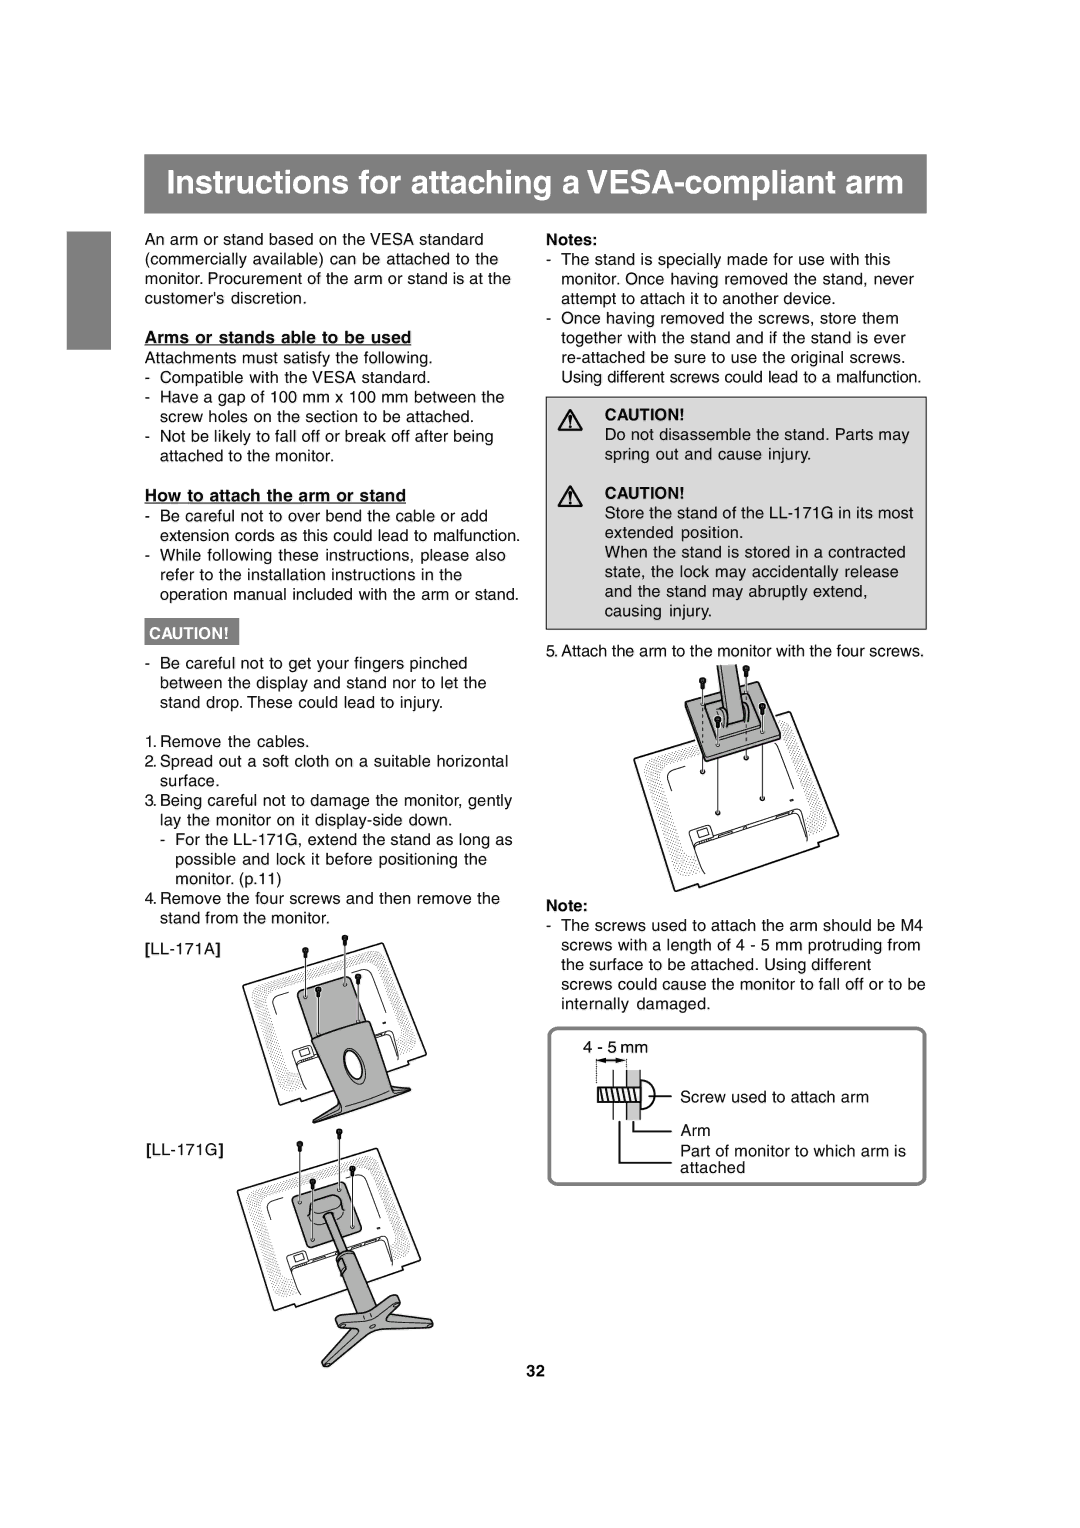
4.Remove the four screws and then remove the stand from the monitor.
Notes:
-The stand is specially made for use with this monitor. Once having removed the stand, never attempt to attach it to another device.
-Once having removed the screws, store them together with the stand and if the stand is ever
Using different screws could lead to a malfunction.
CAUTION!
Do not disassemble the stand. Parts may spring out and cause injury.
CAUTION!
Store the stand of the
When the stand is stored in a contracted state, the lock may accidentally release and the stand may abruptly extend, causing injury.
5. Attach the arm to the monitor with the four screws.
Note:
-The screws used to attach the arm should be M4 screws with a length of 4 - 5 mm protruding from the surface to be attached. Using different screws could cause the monitor to fall off or to be internally damaged.
Screw used to attach arm
Arm
Part of monitor to which arm is attached
32