Contents
Accessories
Model
Important Safeguards
Special Notes
Precautions
Volume control
General
Condensation
Names of Controls and Indicators
21 22 24 25 26
Speaker
Preparation for USE
Antenna connection
Speaker connection
Connecting the AC power cord
Removing the speaker grilles
Mounting the speaker grilles
Placing the system
Remote control
Precautions for battery use
Display Section
To change the contrast of the display
Character display
Menus for the timer and MD editing
Multi Control Button
To select CD or MD track numbers
Setting the Clock
To change the setting
When the power is off, the time appears on the display
To check the time
Volume
Sound Control
Pre-programmed equalizer
Extra bass X-BASS
Adjusting the sense of width or depth
When Wide is selected
When Center is selected
About 3D surround
HOW to Enter Characters
Message displayed when the power is on or off pages
Entering characters
MD disc names or track namespages 36
Entering standard size characters
To correct, add, or delete a character
E p a r a t i o n
Entering extra large characters
Preparation
To enter characters from a computer keyboard
Keys you can use
Compact Disc Operation
Loading and playing CD
Minidisc Operation
Loading and playing MiniDiscs
To remove a MiniDisc
After use
Tuning
Auto tuning
Manual tuning
Radio Operation
Preset tuning
To recall a preset station
To select preset numbers 11 to 40 using the remote control
Wwwwwwwwwwwwwwwwww
Programming Radio Station Names
Press the NAME/TOC Edit button Enter a radio station name
Then, press the NAME/TOC Edit button
For details about entering characters, see pages
Various CD and MD Operations
Direct-selection play
Cue and review
Apss Auto Program Search System
Automatic Programmable Music Selector
To cancel repeat playback or random play
Repeat and random play
To repeat playback of selected tracks
Switching the time display
Elapsed play time
Remaining play time
Total remaining time
Basic Information on Minidiscs
Differences from tape recordings
Information TOC to be recored on an
About track numbers
About monaural long-play mode
Recording
Recording from a CD onto a MiniDisc One-Touch Editing
Track editing
Press the Track button
To rerecord
Press the REC I button
Recording from the built-in radio onto a MiniDisc
To interrupt recording
To record the track number during recording
Connect the unit to a portable MD player.Page
Press the MD 0 MD button on the main unit
To record a particular track
Editing
Using the editing function
Edit Menu
Recording the editing results
When both tracks have a name
Unit will enter the pause mode
To cancel the operation, press the MD H button
Press the Enter button again
Move
Programmed move
Example
To erase tracks one at a time
To erase all of the tracks at once
To erase tracks one at a time
To erase all of the tracks at once
To create a disc name
To create a track name
To create a disc name
To create a track name
To erase disc names or track names
Disc name
Perform steps 1-3 of To create a disc name, on
Track name
HOW to USE the BUILT-IN Timer
What the timer can do
To set up the timer for playback
Timer in this product can do the following
Performing timer playback
After making all required settings, press the Enter button
Stopping timer playback in the middle
To change a setting
To set up the timer for recording
Stopping timer recording in the middle
Performing timer recording
To check the timer setting
To cancel the timer operation
To check the timer setting
To confirm or change the sleep timer setting
To cancel the sleep operation
Sleep operation will be canceled. Sleep will disappear
Sleep operation
Using timer playback and sleep operation in combination
Using timer recording and sleep operation in combination
Using External Units
Connecting a personal computer
Connecting to digital audio sources
Digital sound card Digital sound card connecting cable
Connecting analog units
Headphones
Adjust the input sound level using the Input Level control
Synchro recording
Listening to sound from an external unit
To listen to digital sound
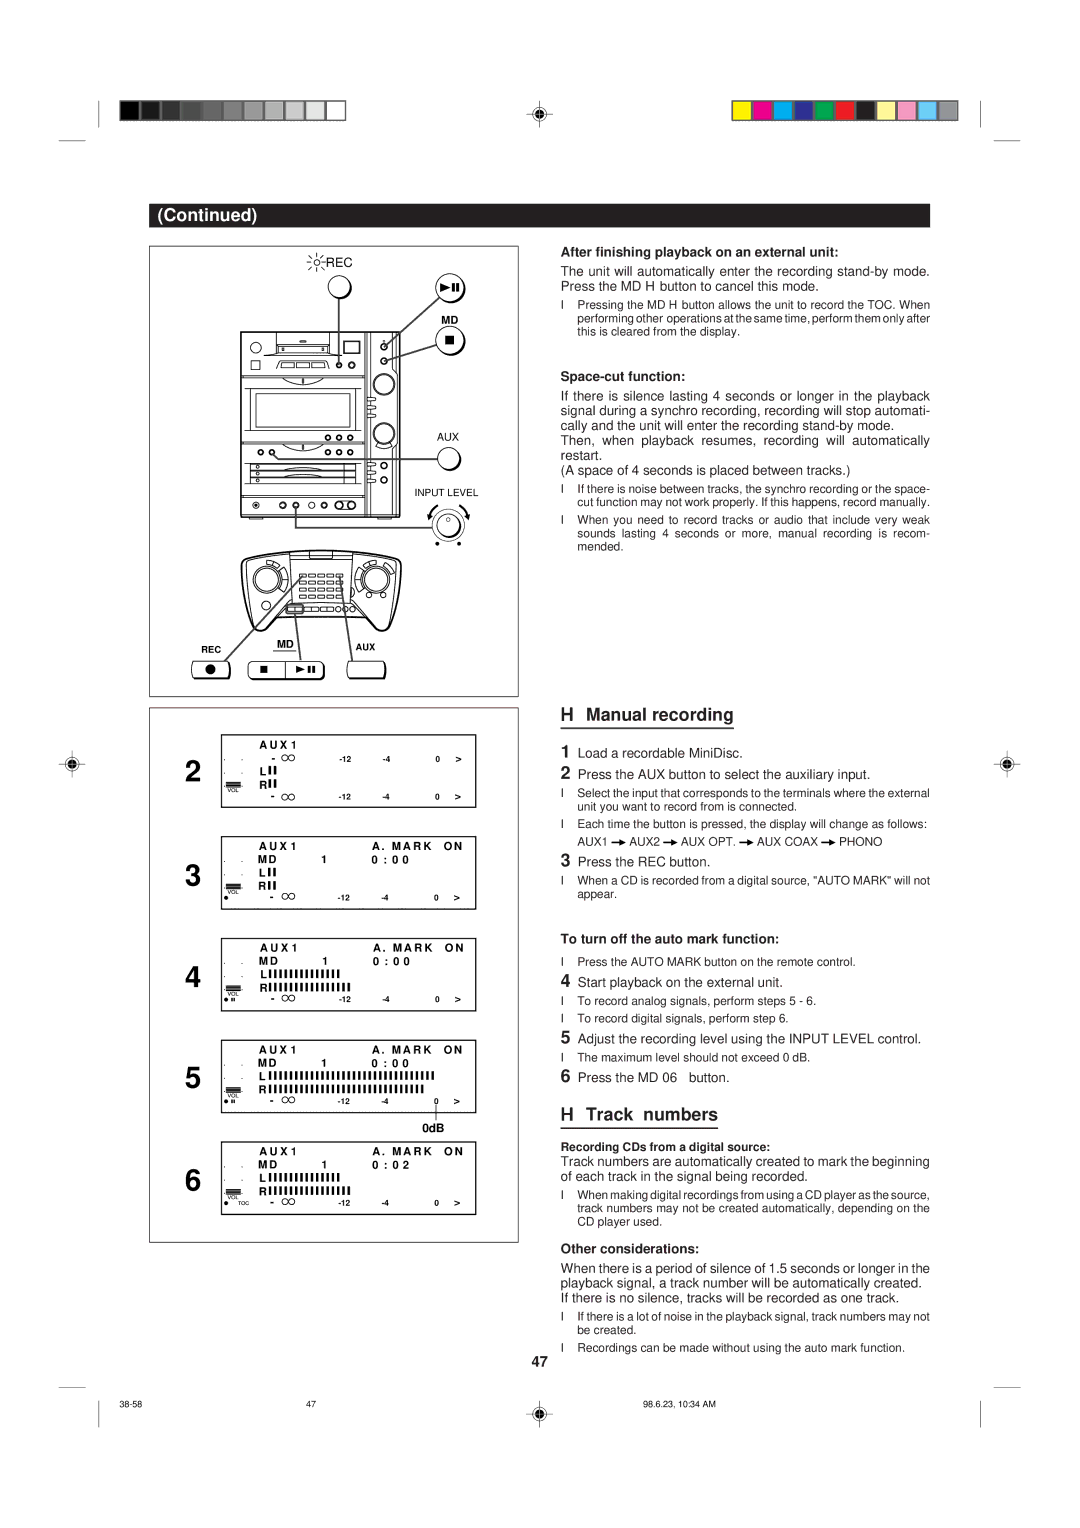
Manual recording
Track numbers
Using the microphone
Using the microphone as a loudspeaker
Listening to stereo turntable
Mixing with music
To return to the default common message
To change the common message
While in the stop mode, press the Message button
Common message will return to Lets Enjoy Music
For details on how to enter the month and day, see
Storing a special message in memory
Types of fixed messages stored in memory
Built-in messages stored in memory will appear
When creating your own message
To cancel the special message setting
To create a new message based on a built-in message
Finally, press the Message button
What is a MINIDISC?
What is a MiniDisc?
Handling MiniDiscs
Adaptive TRansform Acoustic Coding Atrac
High-speed access
Types of discs
Shock-Resistant Memory
Minidisc System Limitations
Troubleshooting
If a problem occurs
When an error message is displayed, proceed as follows
Blank MD
If a power failure occurs during recording
Reseting the Microcomputer
Moisture condensation
Following cases, condensation may form inside the unit
Maintenance
Specifications
Internal care
External care
38-58 98.6.23, 1034 AM
Calling for Service
Limited Warranty
Sharp Plaza, Mahwah, New Jersey