How to Install the Monitor
Mounting precautions
•Since the monitor is heavy, consult your dealer before installation.
•Installing or moving the monitor must be done by two or more people.
•A stand and mounting bracket compliant with VESA specifications is required. Do not use any screw holes other than VESA holes for installation.
•When moving the monitor, be sure to hold it with the handles both on the rear and the unit bottom. Do not hold the LCD panel. This may cause product damage, failure, or injury.
•Install the monitor with the surface perpendicular to a level surface. If necessary, limit the tilt between 0 and 20 degrees downward.
•Mounting the monitor on the wall requires special expertise and the work must be performed by an authorised SHARP dealer. You should never attempt to perform any of this work yourself. Our company will bear no responsibility
for accidents or injuries caused by improper mounting or mishandling.
•This monitor should be used at an ambient temperature between 0°C and 40°C. Provide enough space around the monitor to prevent heat from accumulating inside.
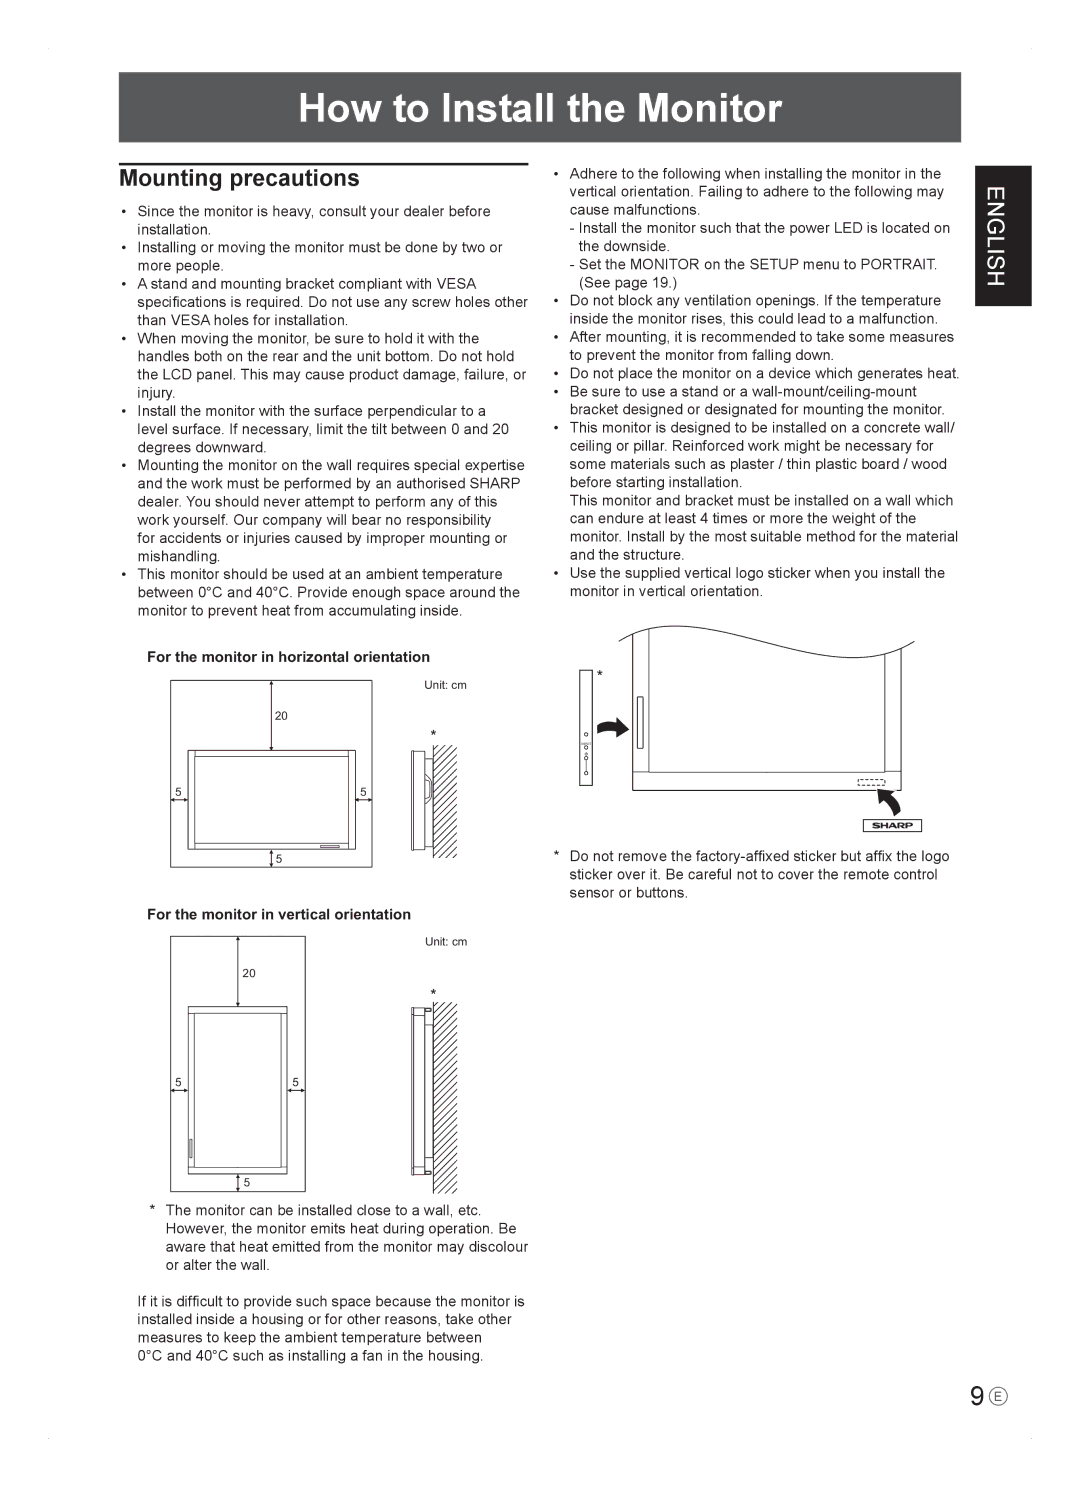
For the monitor in horizontal orientation
| Unit: cm |
| 20 |
| * |
5 | 5 |
| 5 |
For the monitor in vertical orientation
| Unit: cm |
| 20 |
| * |
5 | 5 |
| 5 |
*The monitor can be installed close to a wall, etc. However, the monitor emits heat during operation. Be aware that heat emitted from the monitor may discolour or alter the wall.
If it is difficult to provide such space because the monitor is installed inside a housing or for other reasons, take other measures to keep the ambient temperature between
0°C and 40°C such as installing a fan in the housing.
•Adhere to the following when installing the monitor in the vertical orientation. Failing to adhere to the following may cause malfunctions.
-Install the monitor such that the power LED is located on the downside.
-Set the MONITOR on the SETUP menu to PORTRAIT. (See page 19.)
•Do not block any ventilation openings. If the temperature inside the monitor rises, this could lead to a malfunction.
•After mounting, it is recommended to take some measures to prevent the monitor from falling down.
•Do not place the monitor on a device which generates heat.
•Be sure to use a stand or a
•This monitor is designed to be installed on a concrete wall/ ceiling or pillar. Reinforced work might be necessary for some materials such as plaster / thin plastic board / wood before starting installation.
This monitor and bracket must be installed on a wall which can endure at least 4 times or more the weight of the monitor. Install by the most suitable method for the material and the structure.
•Use the supplied vertical logo sticker when you install the monitor in vertical orientation.
*
INPUT
*Do not remove the
ENGLISH
9E