![]() Caution
Caution
•Do not switch off the main power after setting the
SCHEDULE.
•Set the time for both
Schedule ON and then OFF only take place in power standby mode and signal standby mode.
•Specify the correct date and time. (See page 27.)
SCHEDULE does not function unless the date and time are specified.
•Check regularly that the set date and time are correct.
•If there is a file in the play list that is not in the USB flash drive, the file is skipped during playback.
•If none of the files in the play list are in the USB flash drive, the screen will turn black. Press INPUT to exit.
•Before configuring playlist settings, be sure to insert a USB flash drive.
TIPS
•Up to 3 SCHEDULE items can be registered.
•Setting the SCHEDULE flashes the power LED alternately in red and orange in standby mode.
•A SCHEDULE that has a small number has precedence over that of a large number when schedules overlap.
•The play list is saved in “usb_schedulinglist.txt” in the USB flash drive.
Menu Items
nScreen display for adjustment
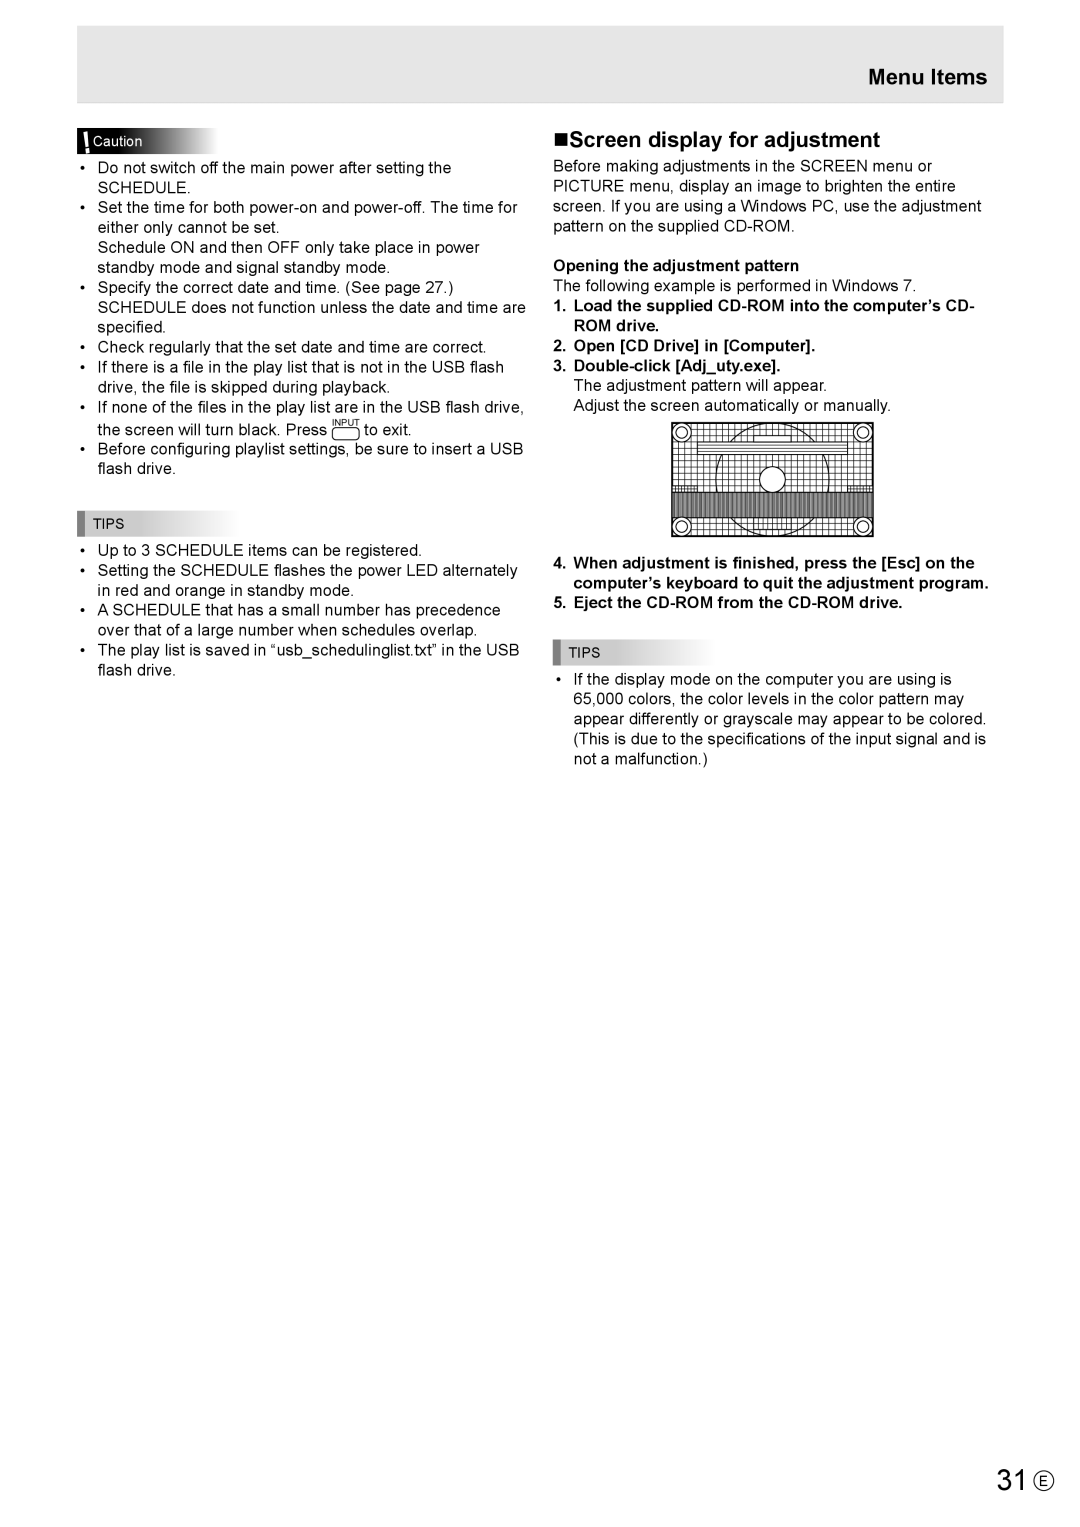
Before making adjustments in the SCREEN menu or PICTURE menu, display an image to brighten the entire screen. If you are using a Windows PC, use the adjustment pattern on the supplied
Opening the adjustment pattern
The following example is performed in Windows 7.
1.Load the supplied
ROM drive.
2.Open [CD Drive] in [Computer].
3.
The adjustment pattern will appear.
Adjust the screen automatically or manually.
4.When adjustment is finished, press the [Esc] on the computer’s keyboard to quit the adjustment program.
5.Eject the
TIPS
•If the display mode on the computer you are using is
65,000 colors, the color levels in the color pattern may appear differently or grayscale may appear to be colored.
(This is due to the specifications of the input signal and is not a malfunction.)