Connecting Peripheral Equipment

4

9 10

5

8

6

1

2

7

11

3

Caution

Be sure to turn off the main power switch and disconnect the plug from the power outlet before connecting/ disconnecting cables. Also, read the manual of the equipment to be connected.

Be careful not to confuse the input terminal with the output terminal when connecting cables. Accidentally reversing cables connected to the input and output terminals may cause malfunctions and the other problems.

Do not use any cable that has a damaged or deformed terminal. Using such cables may cause malfunctions.

TIPS

Images may not be displayed properly depending on the computer (video card) to be connected.

Use the automatic screen adjustment when a PC screen is displayed for the first time using D-SUB, or when the setting of the PC is changed. The screen is adjusted automatically when AUTO in the SCREEN menu is set to ON.

If the audio output from the playback device is connected directly to speakers or other devices, the video on the monitor may appear delayed from the audio portion. Audio should be played through this monitor by connecting the playback device to the monitor’s audio input, and connecting the monitor’s audio output to the speakers or other devices.

The audio input terminals used in each input mode are factory-set as follows.

Input mode

Audio input terminal

DVI-D

Audio1 input terminal

HDMI[PC], HDMI[AV]

HDMI input terminal /

Audio1 input terminal


D-SUB[RGB]

Audio1 input terminal

D-SUB[COMPONENT],

Audio2 input terminals

D-SUB[VIDEO]


USB

USB port

1. HDMI input terminal

Use a commercially available HDMI cable (conforming to the HDMI standard).

Set HDMI of INPUT SELECT on the SETUP menu according to the device to be connected.

2. DVI-D input terminal

• Use a commercially available signal cable (DVI-D 24 pin).

3. D-sub input terminal

Set D-SUB of INPUT SELECT on the SETUP menu according to the device to be connected.

4. USB port

Connect a USB flash drive to the USB port.

Do not connect a USB device other than a USB flash drive.

Turn off the power of the monitor when removing a USB flash drive.

After you have connected a USB flash drive, create “data. db” and “db.info” in the root folder.

Supported USB flash drives

File System

FAT32

Capacity

Up to 32 GB

(maximum file size 2 GB)


Do not use a USB flash drive with a security function or a write protection function.

Use a USB flash drive with a shape that can be inserted in the USB port. Some USB flash drives with special shapes cannot be inserted. Do not forcibly insert a USB flash drive. This may damage the connector and cause failure.

E12

Page 12
Image 12
Sharp PN-Y555, PN-Y475, PN-Y425 operation manual Connecting Peripheral Equipment

PN-Y425, PN-Y475, PN-Y555 specifications

The Sharp PN-Y475, PN-Y555, and PN-Y425 are part of Sharp's range of professional displays designed to meet the demands of contemporary business and educational environments. These displays boast impressive features and advanced technologies, making them ideal for various applications, including digital signage, presentations, and collaborative work.

One of the standout features across this series is their superior image quality. The displays utilize full HD (1920 x 1080) resolution, ensuring that images, videos, and text are sharp and vibrant. The PN-Y555, with its 55-inch screen size, is perfect for medium to large meeting rooms, while the PN-Y475 offers a 47-inch option for spaces where a slightly smaller display is required. The PN-Y425, featuring a 42-inch screen, is ideal for smaller settings or areas with limited space.

All three models incorporate advanced LED backlighting technology, which delivers energy-efficient performance and reliable brightness levels. This ensures consistent performance over long periods, making these displays suitable for extended use. Additionally, the anti-glare coating minimizes reflections and enhances visibility, making content easily viewable even in brightly lit environments.

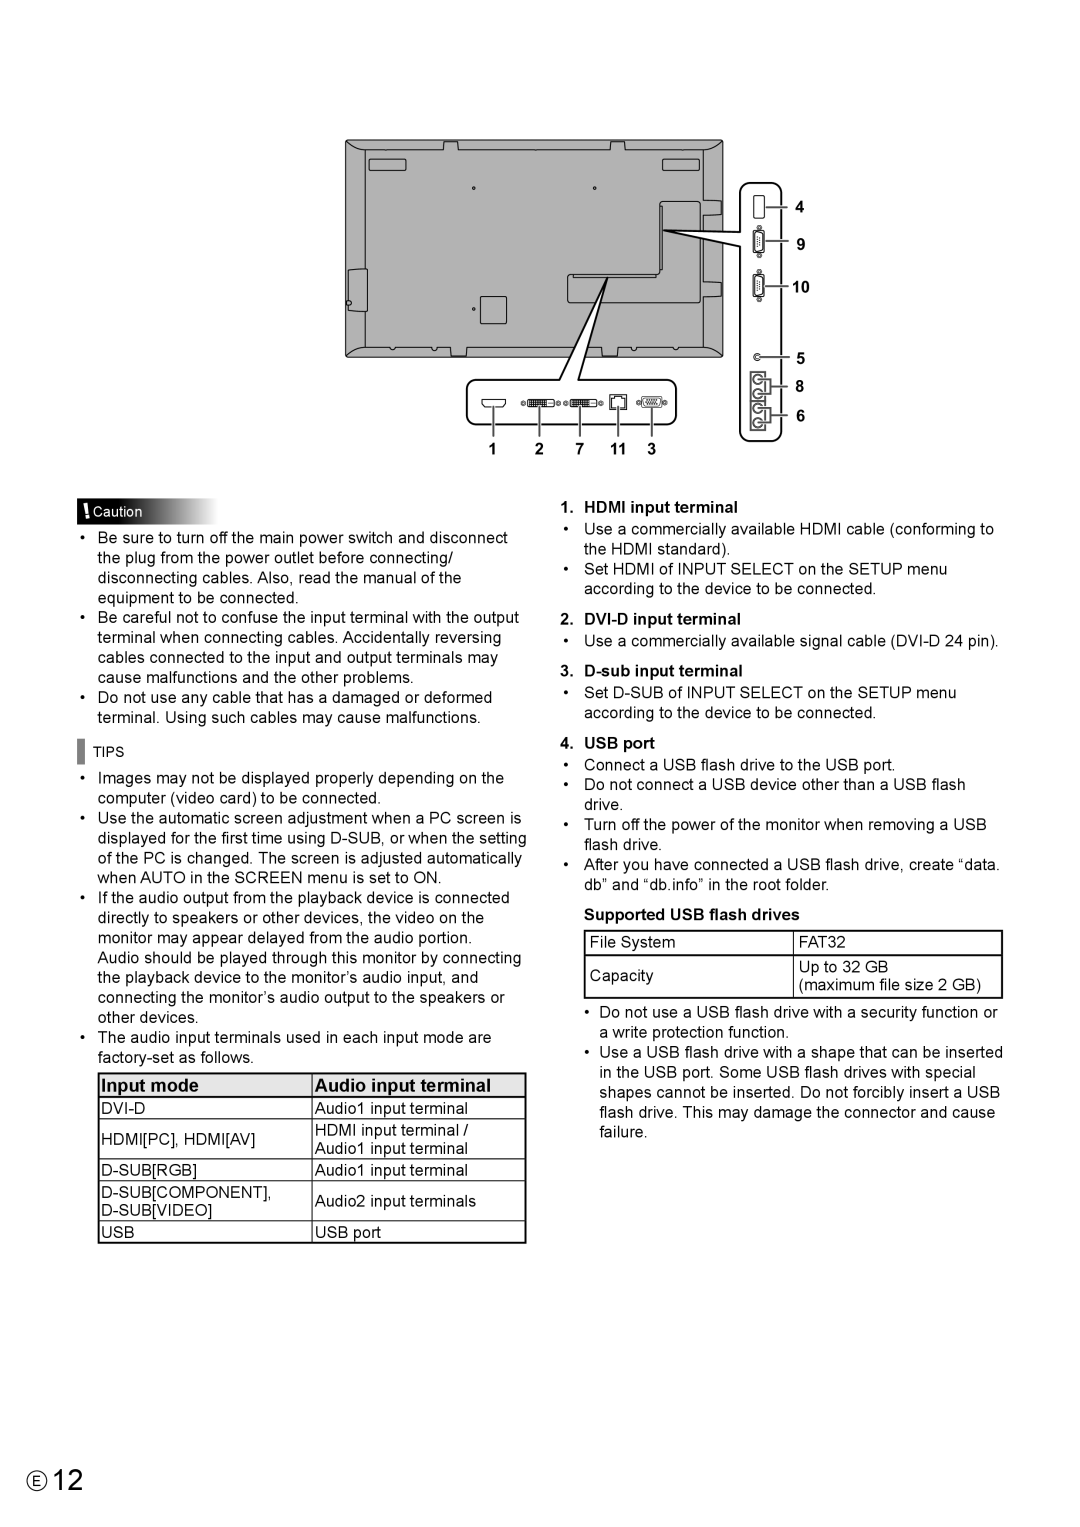
Connectivity is another major highlight of the Sharp PN-Y series. Each model comes equipped with multiple input options, including HDMI, DisplayPort, and USB, making it easy to connect to a variety of devices such as computers, media players, and streaming devices. This flexibility enables seamless content sharing in collaborative environments.

For added functionality, the displays also support touchscreen capabilities (available on certain models), allowing for interactive presentations and engaging user experiences. This feature is especially beneficial in educational settings, where students can actively participate in learning.

Furthermore, the PN-Y series incorporates built-in speakers, providing clear audio output without the need for external audio systems, which simplifies setup and enhances the overall experience.

In summary, the Sharp PN-Y475, PN-Y555, and PN-Y425 are designed to deliver outstanding performance and versatility for professional environments. With their high-quality visuals, extensive connectivity options, and user-friendly features, they stand out as valuable tools for effective communication and collaboration. Whether for corporate presentations or educational purposes, these displays are equipped to enhance engagement and improve the flow of information in any setting.