MOUNTING PRECAUTIONS
•This product is for use indoors.
•A mounting bracket compliant with VESA specifications is required.
•Since the monitor is heavy, consult your dealer before installing, removing or moving the monitor.
•Mounting the monitor on the wall requires special expertise and the work must be performed by an authorized SHARP dealer. You should never attempt to perform any of this work yourself. Our company will bear no responsibility
for accidents or injuries caused by improper mounting or mishandling.
•Use the monitor with the surface perpendicular to a level surface. If necessary, the monitor may be tilted up to 20 degrees upward or downward.
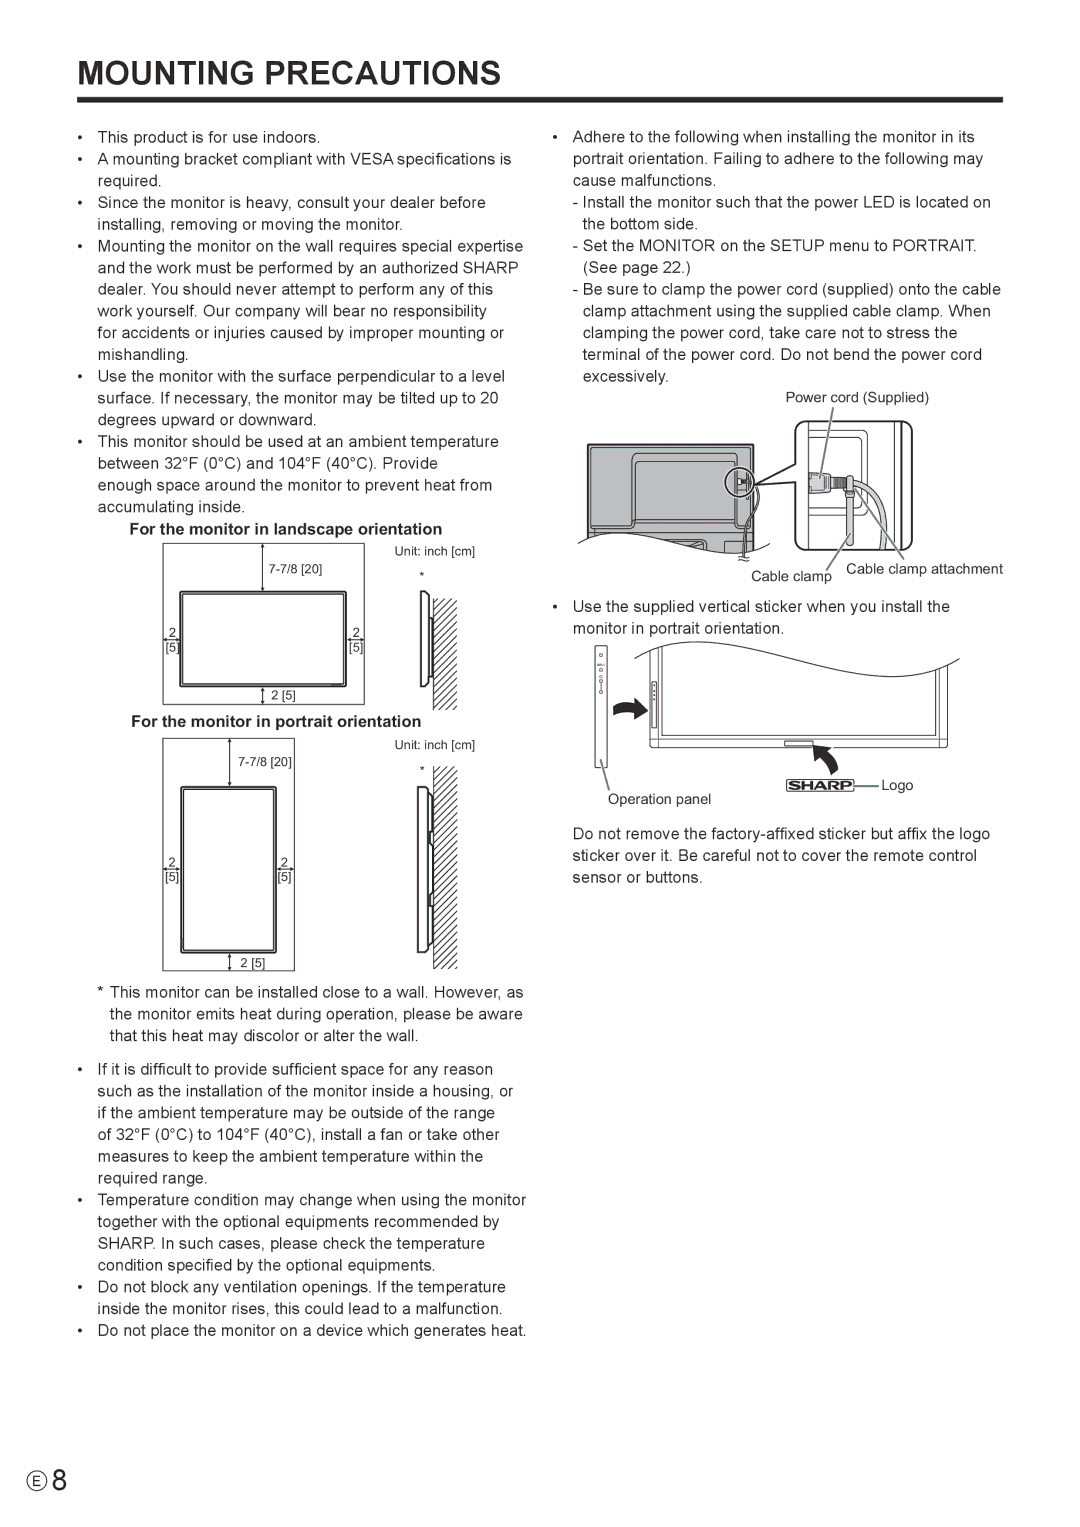
•This monitor should be used at an ambient temperature between 32°F (0°C) and 104°F (40°C). Provide enough space around the monitor to prevent heat from accumulating inside.
For the monitor in landscape orientation
•Adhere to the following when installing the monitor in its portrait orientation. Failing to adhere to the following may cause malfunctions.
-Install the monitor such that the power LED is located on the bottom side.
-Set the MONITOR on the SETUP menu to PORTRAIT. (See page 22.)
-Be sure to clamp the power cord (supplied) onto the cable clamp attachment using the supplied cable clamp. When clamping the power cord, take care not to stress the terminal of the power cord. Do not bend the power cord excessively.
Power cord (Supplied)
| |
2 | 2 |
[5] | [5] |
| 2 [5] |
Unit: inch [cm]
*
Cable clamp Cable clamp attachment
•Use the supplied vertical sticker when you install the monitor in portrait orientation.
For the monitor in portrait orientation
Unit: inch [cm]
*
Operation panel
![]()
![]()
![]()
![]() Logo
Logo
2 | 2 |
[5] | [5] |
| 2 [5] |
Do not remove the
*This monitor can be installed close to a wall. However, as the monitor emits heat during operation, please be aware that this heat may discolor or alter the wall.
•If it is difficult to provide sufficient space for any reason such as the installation of the monitor inside a housing, or if the ambient temperature may be outside of the range of 32°F (0°C) to 104°F (40°C), install a fan or take other measures to keep the ambient temperature within the required range.
•Temperature condition may change when using the monitor together with the optional equipments recommended by
SHARP. In such cases, please check the temperature condition specified by the optional equipments.
•Do not block any ventilation openings. If the temperature inside the monitor rises, this could lead to a malfunction.
•Do not place the monitor on a device which generates heat.
E8
