Part Names and Functions (Continued)
Inserting the Batteries
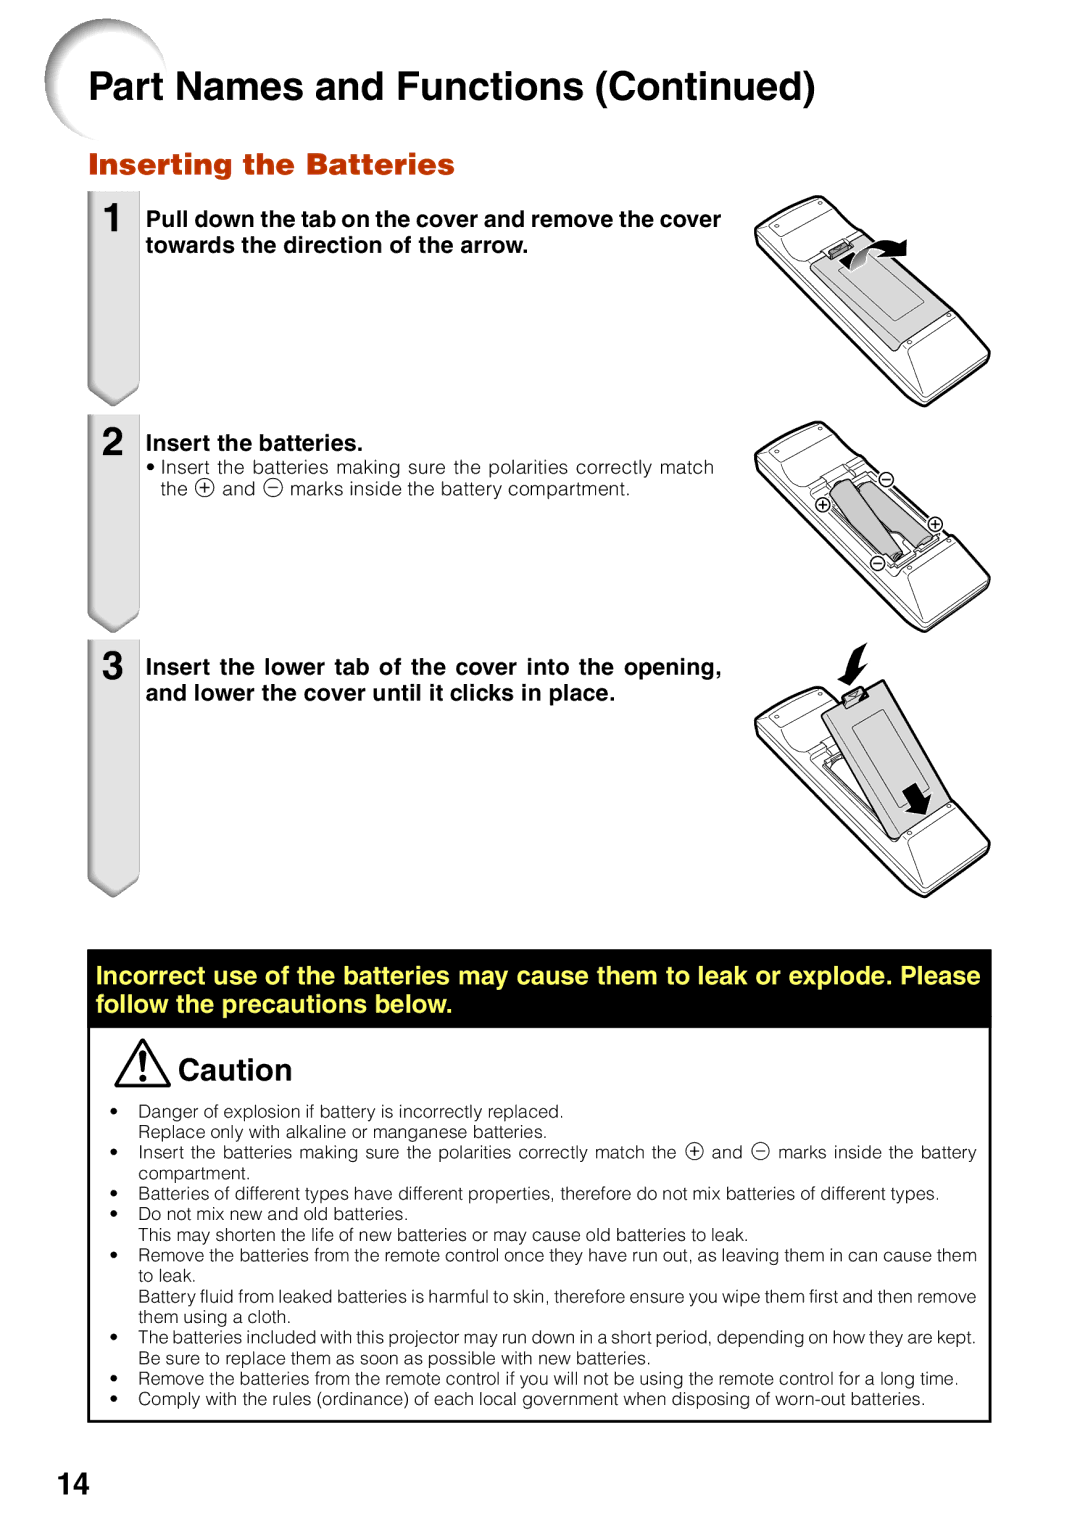
1 Pull down the tab on the cover and remove the cover towards the direction of the arrow.
2 Insert the batteries.
• Insert the batteries making sure the polarities correctly match the m and n marks inside the battery compartment.
3 Insert the lower tab of the cover into the opening, and lower the cover until it clicks in place.
Incorrect use of the batteries may cause them to leak or explode. Please follow the precautions below.
![]() Caution
Caution
•Danger of explosion if battery is incorrectly replaced. Replace only with alkaline or manganese batteries.
•Insert the batteries making sure the polarities correctly match the m and n marks inside the battery compartment.
•Batteries of different types have different properties, therefore do not mix batteries of different types.
•Do not mix new and old batteries.
This may shorten the life of new batteries or may cause old batteries to leak.
•Remove the batteries from the remote control once they have run out, as leaving them in can cause them to leak.
Battery fluid from leaked batteries is harmful to skin, therefore ensure you wipe them first and then remove them using a cloth.
•The batteries included with this projector may run down in a short period, depending on how they are kept. Be sure to replace them as soon as possible with new batteries.
•Remove the batteries from the remote control if you will not be using the remote control for a long time.
•Comply with the rules (ordinance) of each local government when disposing of
14