Removing and Installing the Lamp Unit
![]() Warning!
Warning!
•The lamp unit becomes very hot while the pro- jector is operating. Do not remove the lamp unit from the projector right after use. The lamp and parts around the lamp will be very hot and may cause burns or injury.
Optional | Lamp unit |
accessory |
 Info
Info
•Make sure that you remove the lamp unit by the handle. Do not touch the glass surface of the lamp unit or the inside of the projector.
•To avoid injury to yourself and damage to the lamp, be sure to carefully follow the steps below.
•Do not loosen other screws except for the lamp unit cover and lamp unit.
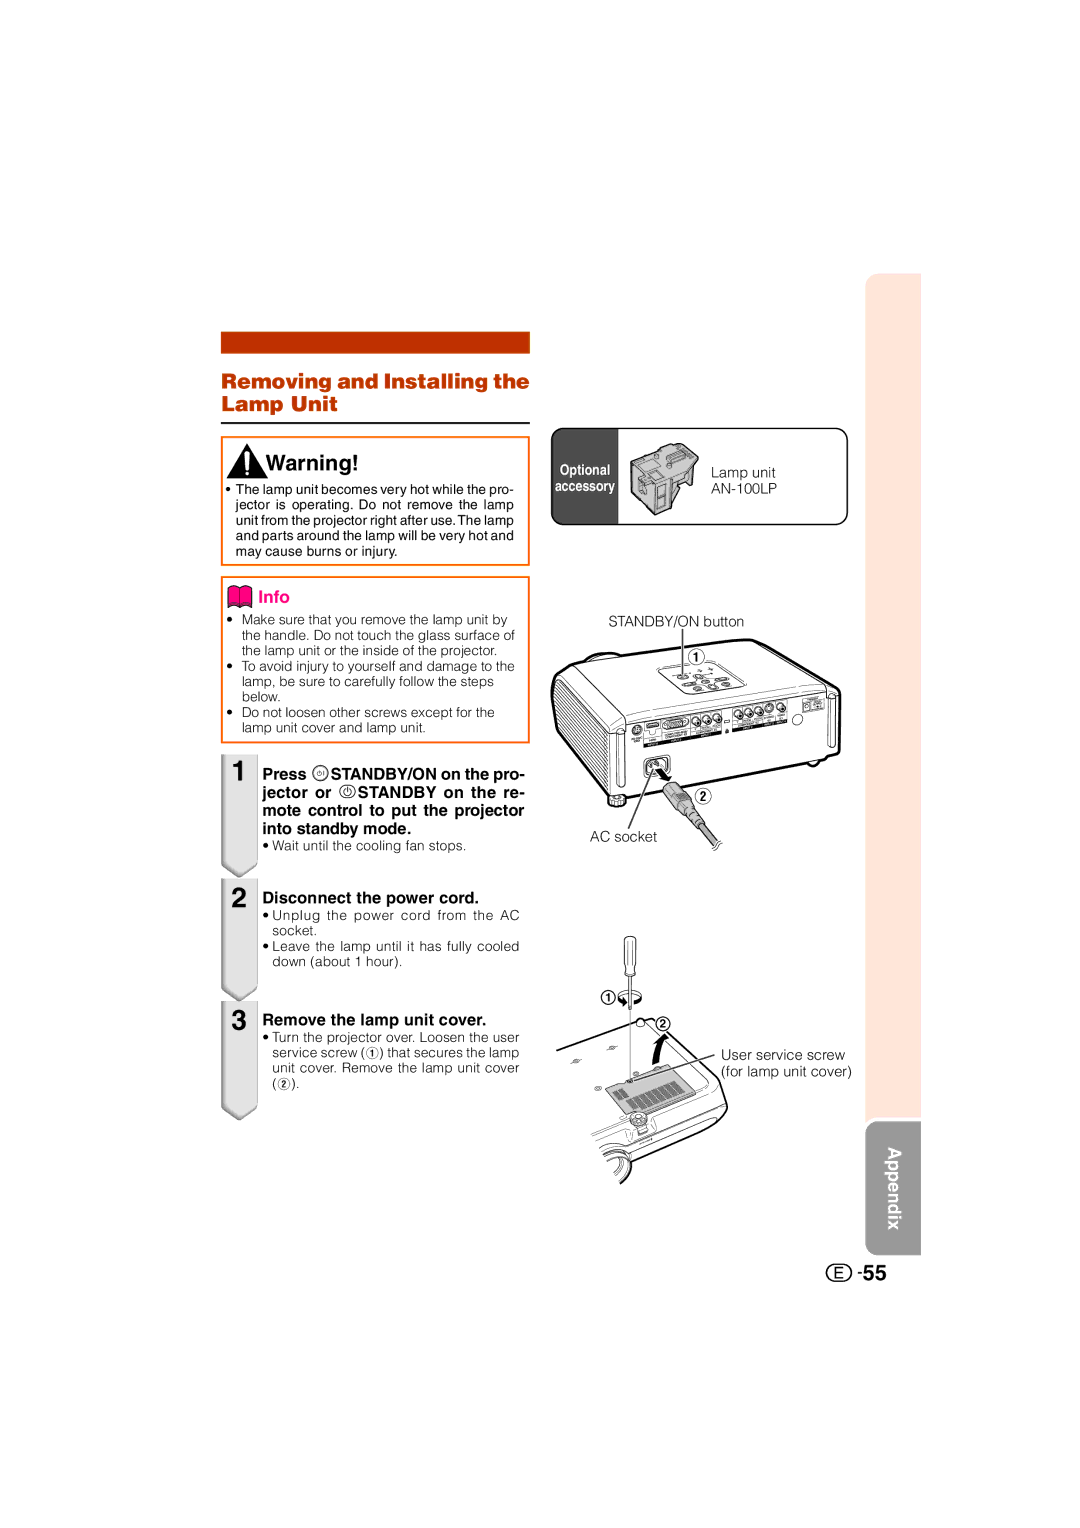
1Press SSTANDBY/ON on the pro- jector or aSTANDBY on the re- mote control to put the projector into standby mode.
•Wait until the cooling fan stops.
2Disconnect the power cord.
•Unplug the power cord from the AC socket.
•Leave the lamp until it has fully cooled down (about 1 hour).
3Remove the lamp unit cover.
•Turn the projector over. Loosen the user service screw (1) that secures the lamp unit cover. Remove the lamp unit cover (2).
STANDBY/ON button
AC socket
1
2
User service screw (for lamp unit cover)
Appendix
![]()
![]() 55
55