Saw Chain
1. 2.3. 4.
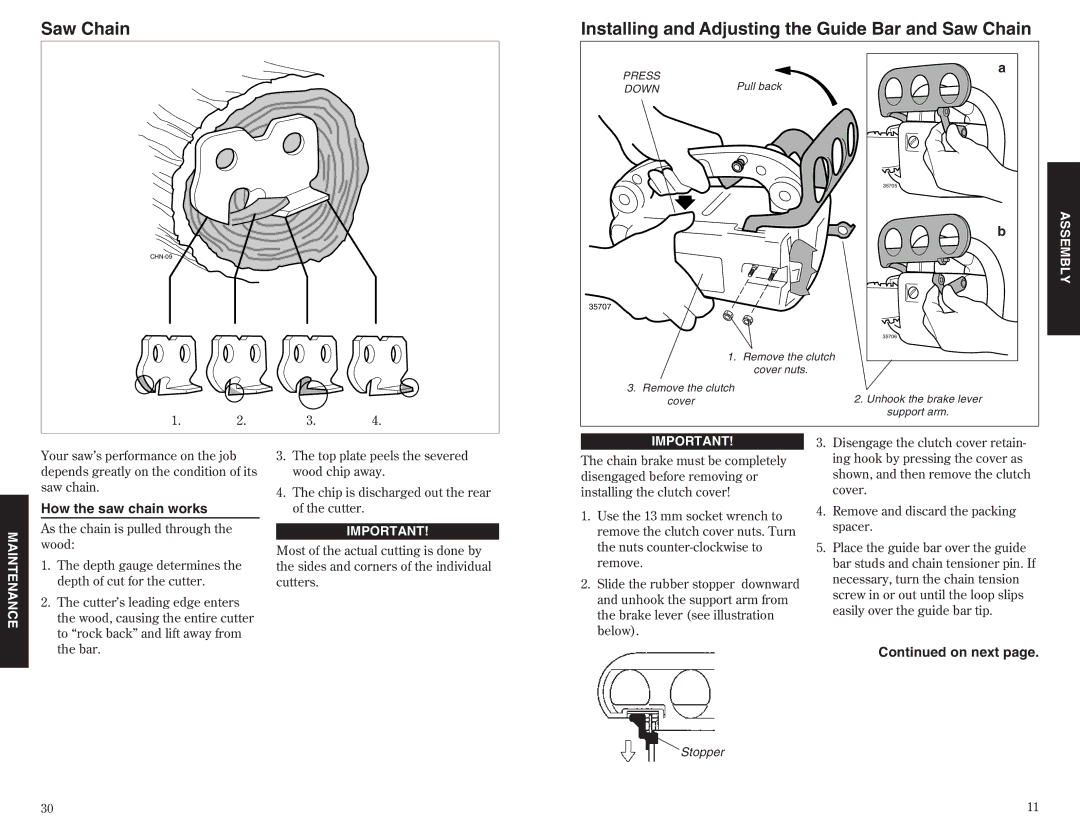
Installing and Adjusting the Guide Bar and Saw Chain
PRESS | a | ||
Pull back | |||
DOWN | |||
|
| 35705 | |
|
| b | |
35707 |
|
| |
|
| 35706 | |
| 1. | Remove the clutch | |
|
| cover nuts. | |
3. | Remove the clutch | 2. Unhook the brake lever | |
| cover | ||
|
| support arm. | |
ASSEMBLY
IMPORTANT!
3. Disengage the clutch cover retain- |
MAINTENANCE
Your sawÕs performance on the job depends greatly on the condition of its saw chain.
How the saw chain works
As the chain is pulled through the wood:
1. | The depth gauge determines the |
| depth of cut for the cutter. |
2. | The cutterÕs leading edge enters |
| the wood, causing the entire cutter |
| to Òrock backÓ and lift away from |
3.The top plate peels the severed wood chip away.
4.The chip is discharged out the rear of the cutter.
IMPORTANT!
Most of the actual cutting is done by the sides and corners of the individual cutters.
The chain brake must be completely disengaged before removing or installing the clutch cover!
1.Use the 13 mm socket wrench to remove the clutch cover nuts. Turn the nuts
2.Slide the rubber stopper downward and unhook the support arm from the brake lever (see illustration below).
ing hook by pressing the cover as |
shown, and then remove the clutch |
cover. |
4. Remove and discard the packing |
spacer. |
5. Place the guide bar over the guide |
bar studs and chain tensioner pin. If |
necessary, turn the chain tension |
screw in or out until the loop slips |
easily over the guide bar tip. |
the bar. |
Continued on next page.
Stopper
30 | 11 |