D ![]()
![]() D
D
A4”
C
B
A
B ![]() C
C
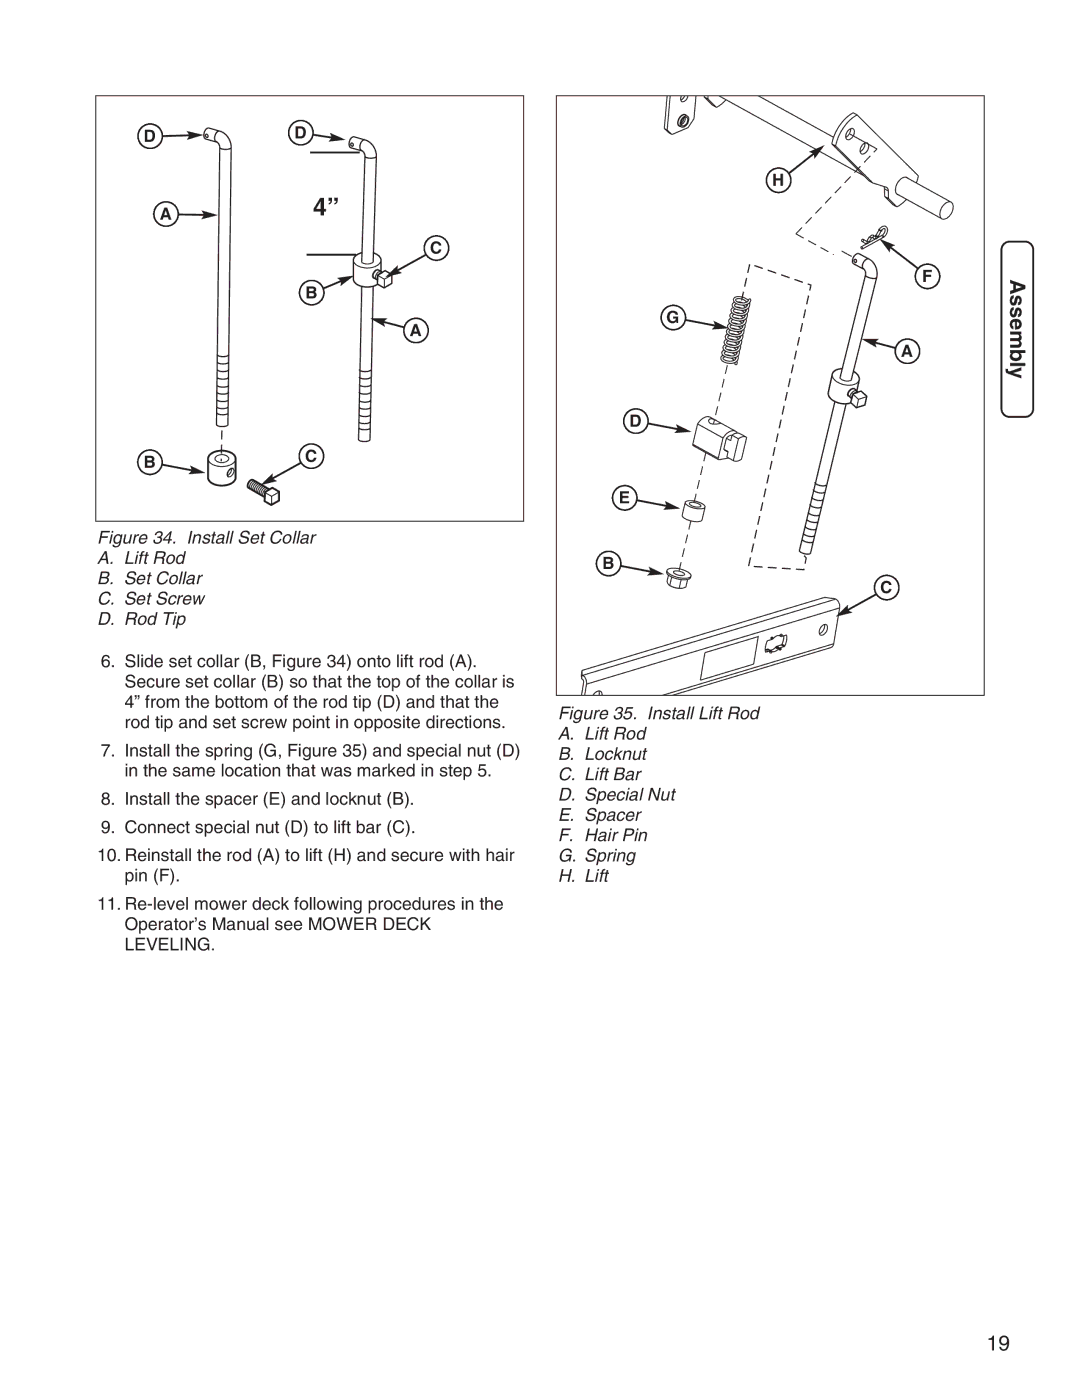
Figure 34. Install Set Collar
A.Lift Rod
B.Set Collar
C.Set Screw
D.Rod Tip
6.Slide set collar (B, Figure 34) onto lift rod (A). Secure set collar (B) so that the top of the collar is 4” from the bottom of the rod tip (D) and that the rod tip and set screw point in opposite directions.
7.Install the spring (G, Figure 35) and special nut (D) in the same location that was marked in step 5.
8.Install the spacer (E) and locknut (B).
9.Connect special nut (D) to lift bar (C).
10.Reinstall the rod (A) to lift (H) and secure with hair pin (F).
11.
| H |
|
|
|
| F | Assembly |
G |
|
| |
| A |
| |
|
|
| |
D |
|
|
|
E |
|
|
|
B |
|
|
|
| C |
|
|
Figure 35. Install Lift Rod
A.Lift Rod
B.Locknut
C.Lift Bar
D.Special Nut
E.Spacer
F.Hair Pin
G.Spring
H.Lift
19
