| B | D | C |
|
|
| |
| A |
|
|
|
|
| D |
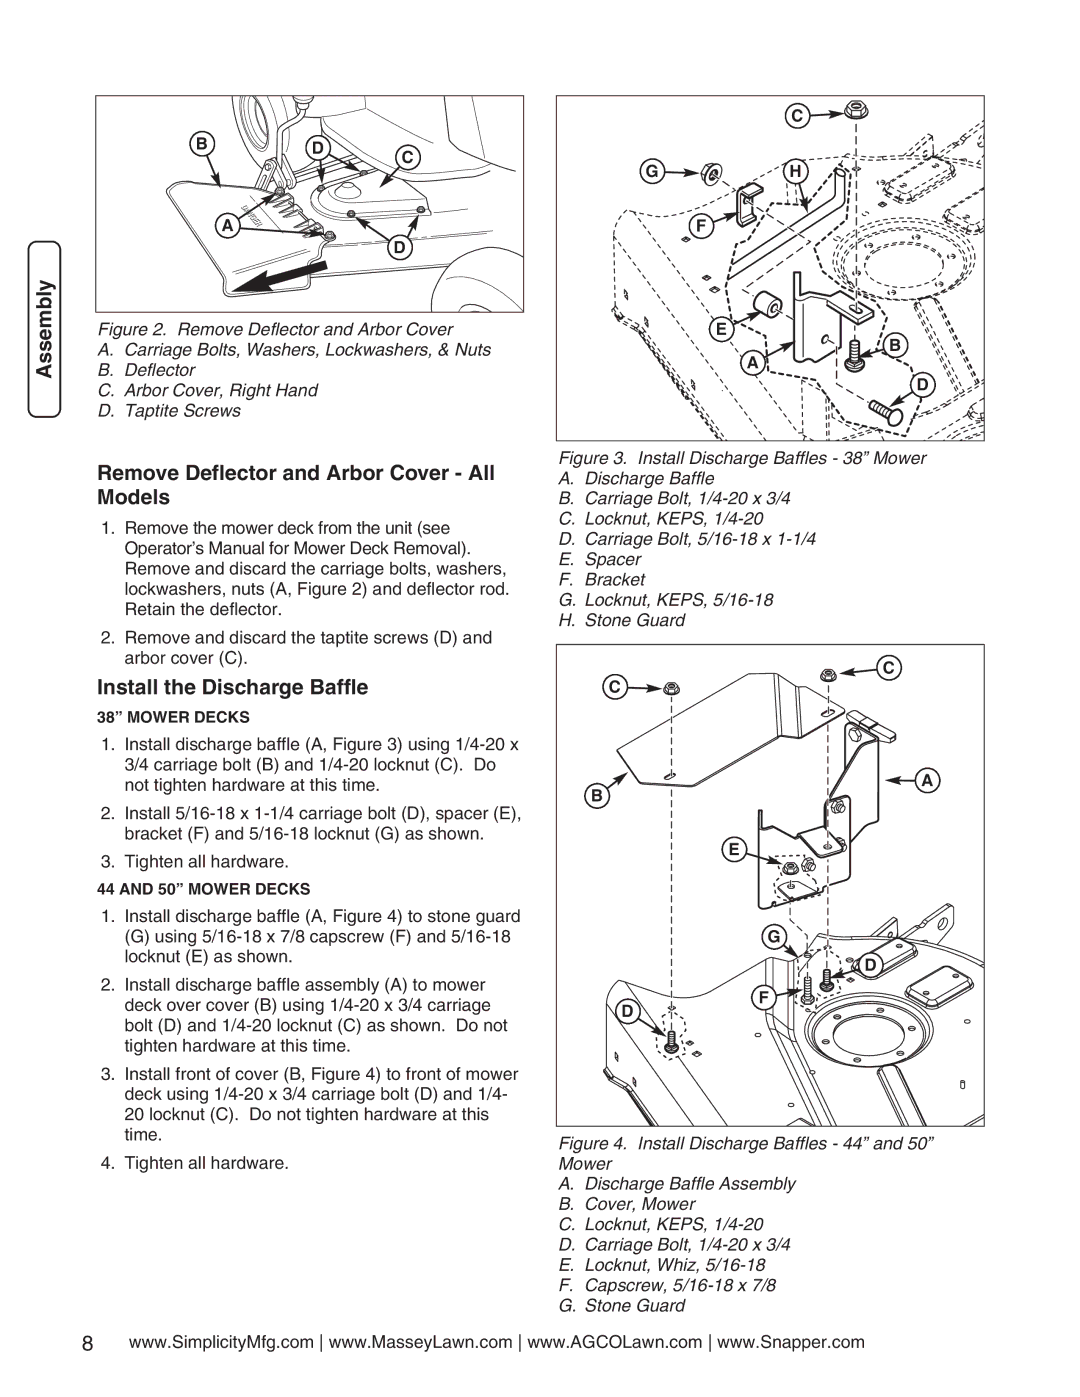
Assembly | Figure 2. Remove Deflector and Arbor Cover | ||
A. Carriage Bolts, Washers, Lockwashers, & Nuts | |||
B. Deflector |
|
| |
| C. Arbor Cover, Right Hand |
| |
| D. Taptite Screws |
|
|
Remove Deflector and Arbor Cover - All Models
1.Remove the mower deck from the unit (see Operator’s Manual for Mower Deck Removal). Remove and discard the carriage bolts, washers, lockwashers, nuts (A, Figure 2) and deflector rod. Retain the deflector.
2.Remove and discard the taptite screws (D) and arbor cover (C).
Install the Discharge Baffle
38” MOWER DECKS
1.Install discharge baffle (A, Figure 3) using
2.Install
3.Tighten all hardware.
44 AND 50” MOWER DECKS
1.Install discharge baffle (A, Figure 4) to stone guard
(G) using
2.Install discharge baffle assembly (A) to mower deck over cover (B) using
3.Install front of cover (B, Figure 4) to front of mower deck using
4.Tighten all hardware.
| C |
G | H |
| F |
| E |
| B |
| A |
| D |
Figure 3. Install Discharge Baffles - 38” Mower
A.Discharge Baffle
B.Carriage Bolt, 1/4-20 x 3/4
C.Locknut, KEPS, 1/4-20
D.Carriage Bolt, 5/16-18 x 1-1/4
E.Spacer
F.Bracket
G.Locknut, KEPS, 5/16-18
H.Stone Guard
C |
C |
A |
B |
E |
G |
D |
F |
D |
Figure 4. Install Discharge Baffles - 44” and 50” Mower
A.Discharge Baffle Assembly
B.Cover, Mower
C.Locknut, KEPS, 1/4-20
D.Carriage Bolt, 1/4-20 x 3/4
E.Locknut, Whiz, 5/16-18
F.Capscrew, 5/16-18 x 7/8
G.Stone Guard
8www.SimplicityMfg.com www.MasseyLawn.com www.AGCOLawn.com www.Snapper.com