Plumbing and Setting the Water Level
NOTE: Use a copper tubing only to plumb this humidifier.
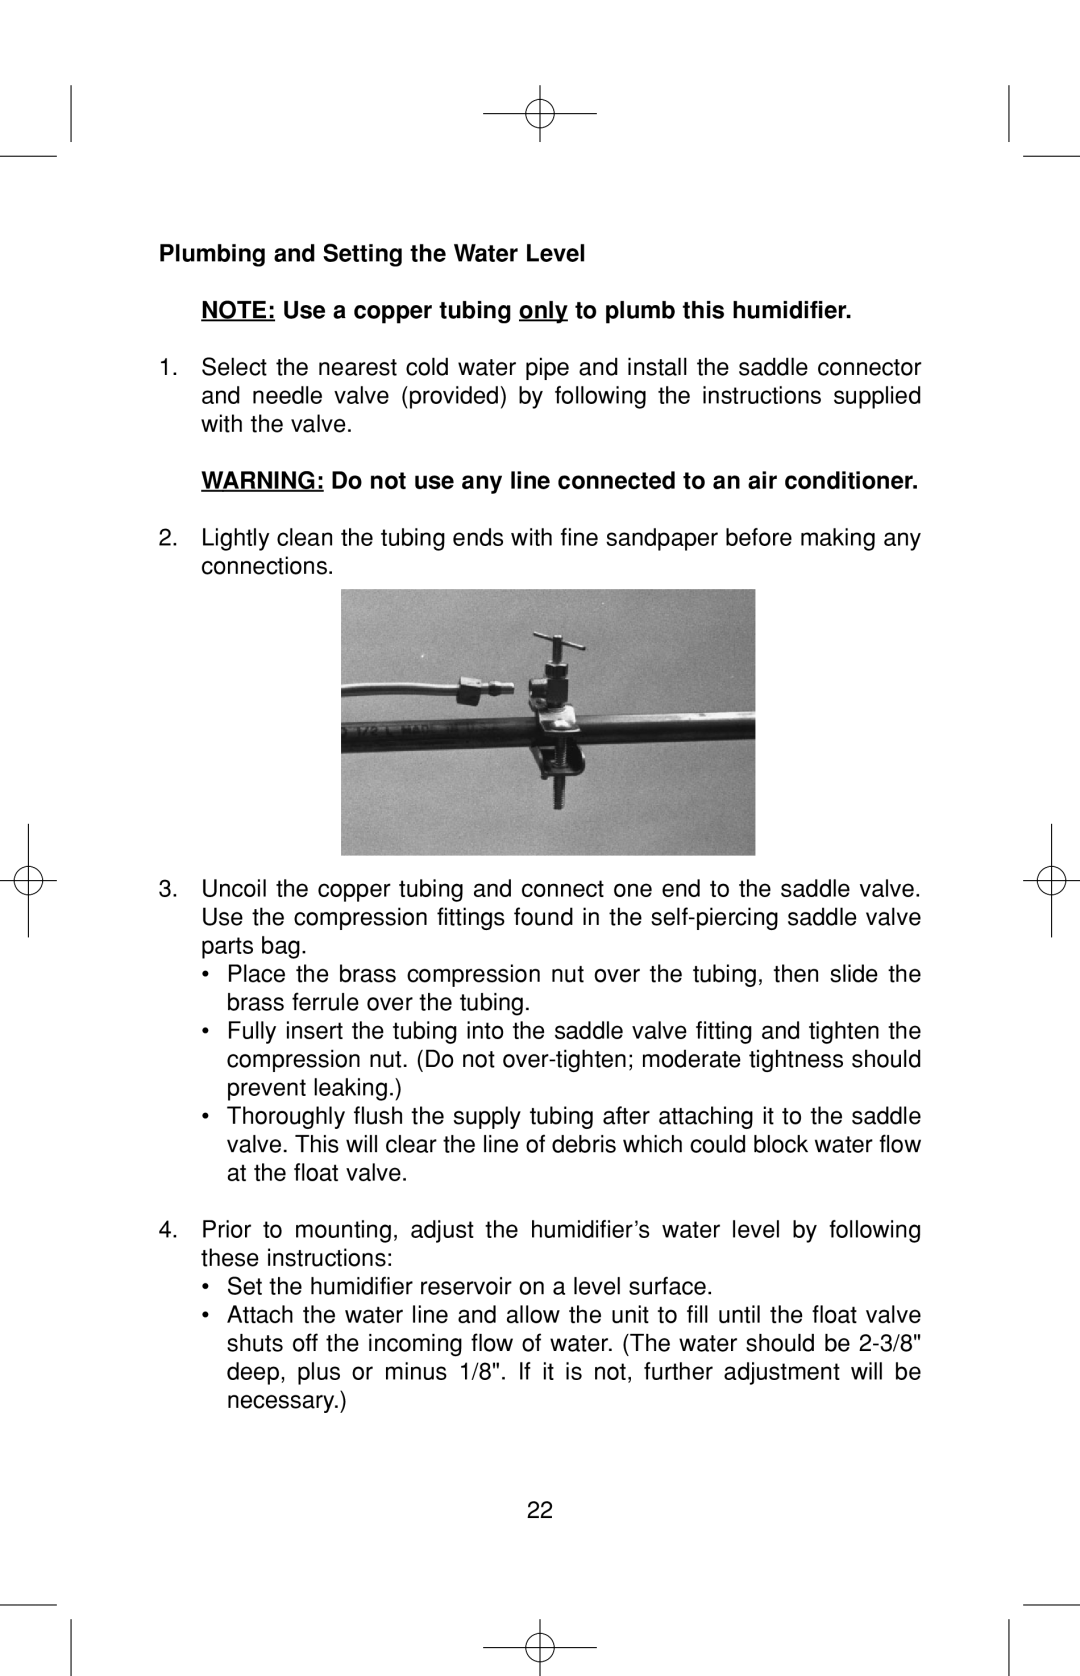
1.Select the nearest cold water pipe and install the saddle connector and needle valve (provided) by following the instructions supplied with the valve.
WARNING: Do not use any line connected to an air conditioner.
2.Lightly clean the tubing ends with fine sandpaper before making any connections.
3.Uncoil the copper tubing and connect one end to the saddle valve. Use the compression fittings found in the
•Place the brass compression nut over the tubing, then slide the brass ferrule over the tubing.
•Fully insert the tubing into the saddle valve fitting and tighten the compression nut. (Do not
•Thoroughly flush the supply tubing after attaching it to the saddle valve. This will clear the line of debris which could block water flow at the float valve.
4.Prior to mounting, adjust the humidifier’s water level by following these instructions:
•Set the humidifier reservoir on a level surface.
•Attach the water line and allow the unit to fill until the float valve shuts off the incoming flow of water. (The water should be
22