Snapper 2400 Series manual Mower Adjustments, Side-To-Side Leveling

Models: 2400 Series

1 40
Download 40 pages 32.18 Kb
Page 29
Image 29

MOWER ADJUSTMENTS

If the cut is uneven, the mower may need leveling. Unequal or improper tire pressure may also cause an uneven cut. Make sure tire pressure is correct as speci- fied in Checking Tire Pressure. To achieve proper mower levelling, perform Side-To-Side Leveling, Front-To-Back Leveling and Transport Height Adjustment procedures, in order, as follows.

Adjustments

WARNING

Before checking mower, shut off PTO and engine. Allow all moving parts to stop. Remove ignition key, then disconnect the spark plug wire and fasten it away from the spark plug.

Side-To-Side Leveling

1.With the mower installed, place the rider on a smooth, level surface such as a concrete floor. Turn the front wheels straight forward.

2.Check for bent blades and replace if necessary.

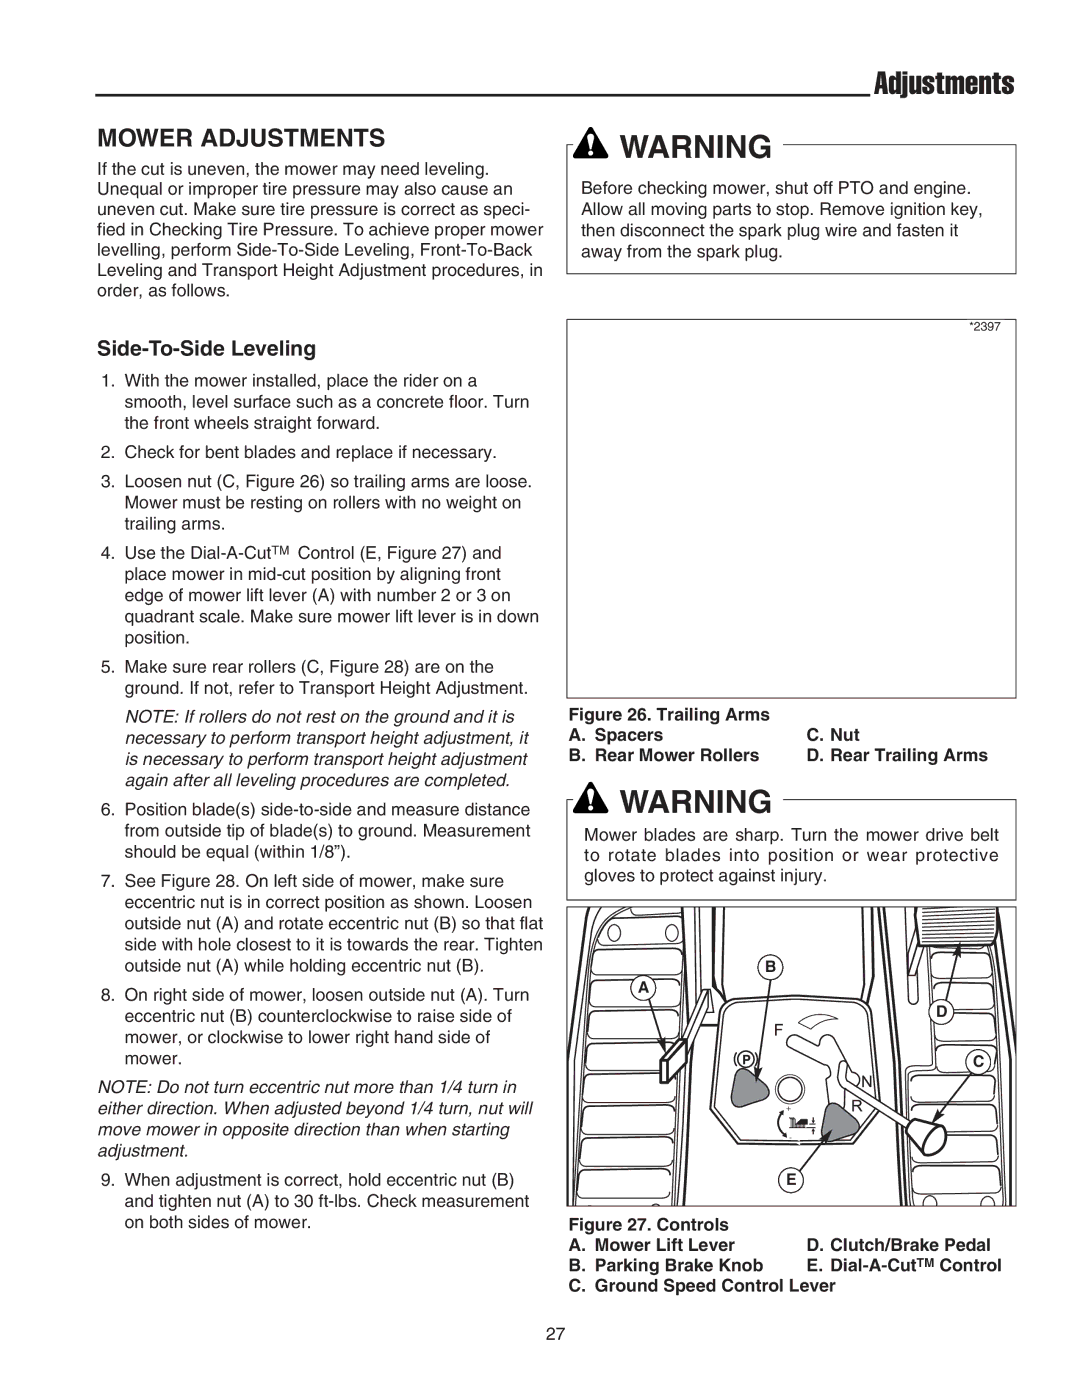
3.Loosen nut (C, Figure 26) so trailing arms are loose. Mower must be resting on rollers with no weight on trailing arms.

4.Use the Dial-A-CutTMControl (E, Figure 27) and place mower in mid-cut position by aligning front edge of mower lift lever (A) with number 2 or 3 on quadrant scale. Make sure mower lift lever is in down position.

5.Make sure rear rollers (C, Figure 28) are on the ground. If not, refer to Transport Height Adjustment.

NOTE: If rollers do not rest on the ground and it is necessary to perform transport height adjustment, it is necessary to perform transport height adjustment again after all leveling procedures are completed.

6.Position blade(s) side-to-side and measure distance from outside tip of blade(s) to ground. Measurement should be equal (within 1/8”).

7.See Figure 28. On left side of mower, make sure eccentric nut is in correct position as shown. Loosen outside nut (A) and rotate eccentric nut (B) so that flat side with hole closest to it is towards the rear. Tighten outside nut (A) while holding eccentric nut (B).

8.On right side of mower, loosen outside nut (A). Turn eccentric nut (B) counterclockwise to raise side of mower, or clockwise to lower right hand side of mower.

NOTE: Do not turn eccentric nut more than 1/4 turn in either direction. When adjusted beyond 1/4 turn, nut will move mower in opposite direction than when starting adjustment.

9.When adjustment is correct, hold eccentric nut (B) and tighten nut (A) to 30 ft-lbs. Check measurement on both sides of mower.

*2397

Figure 26. Trailing Arms


A. Spacers

C. Nut

B. Rear Mower Rollers

D. Rear Trailing Arms

WARNING

Mower blades are sharp. Turn the mower drive belt to rotate blades into position or wear protective gloves to protect against injury.


B

A


D


C


+


-


E

Figure 27. Controls


A. Mower Lift Lever

D. Clutch/Brake Pedal

B. Parking Brake Knob

E. Dial-A-CutTMControl

C. Ground Speed Control Lever

27

Page 29
Image 29
Snapper 2400 Series manual Mower Adjustments, Side-To-Side Leveling

2400 Series specifications

The Snapper 2400 Series is a well-engineered line of outdoor power equipment recognized for its robust performance and user-friendly design. Built to deliver outstanding cutting results, this series is suitable for both residential and commercial users who seek reliability and efficiency in their gardening tools.

One of the key features of the Snapper 2400 Series is its powerful engine. Equipped with a high-performance Briggs & Stratton engine, these mowers can handle tough grass and uneven terrains with ease. The reliable starting system eliminates the frustration typical of other models, ensuring that users can get to work quickly and efficiently.

The cutting deck of the Snapper 2400 Series is another highlight. With its innovative design and durable construction, the cutting deck provides a wide mowing path that allows for faster completion of lawn care tasks. The high-quality steel deck is resistant to wear and tear, and its sleek design ensures optimal air flow for a clean cut, further enhancing the mower's performance.

Maneuverability is another standout feature of the Snapper 2400 Series. With features like zero-turn capabilities, users can navigate around trees, flower beds, and other landscape features effortlessly. The ergonomic controls add to the user-friendly experience, making operation smoother and more enjoyable, even for those who may be new to lawn maintenance.

The Snapper 2400 Series is also known for its versatility. Many models within the series offer multiple cutting height adjustments, allowing users to adapt the mower's performance to different grass types and conditions. Furthermore, optional attachments such as mulching kits and baggers provide extra functionality, enabling users to customize their mowing experience.

In terms of durability, the Snapper 2400 Series is built with heavy-duty components that stand up to rigorous use. This quality construction ensures that the products not only perform well but also last longer, offering great value for the investment.

In conclusion, the Snapper 2400 Series combines powerful engines, efficient cutting systems, versatile features, and durable construction, making it a reliable choice for anyone looking for high-quality lawn care equipment. With its emphasis on user experience and performance, the Snapper 2400 Series stands out in its category, appealing to homeowners and professionals alike.