Initial Setup & Assembly
7.Lift the hitch (B) and from the left side of the tractor, slide hitch latch pin (A) through the mounting hole in hitch frame, along the tractor frame support fingers
(C) and through the final mounting hole in hitch frame. Secure hitch latch pin (A) with the quick clip (D).
NOTE: Keep the handle portion of the hitch latch pin towards the front of the tractor.
8. Hitch installation is now complete.
ATTACHING BLOWER TO TRACTOR
1.Position snow thrower assembly in front of tractor.
2.Remove both quick clips (E, Figure 14) and mounting pins (D) from the snow thrower.
3.Align the hitch mounting arms (B) with the snow thrower mounting tabs (C) and slide the snow thrower into position.
4.Align mounting holes on snow thrower frame with the mounting holes in the hitch.
5.Insert mounting pins (D) and secure with quick clips
(E).
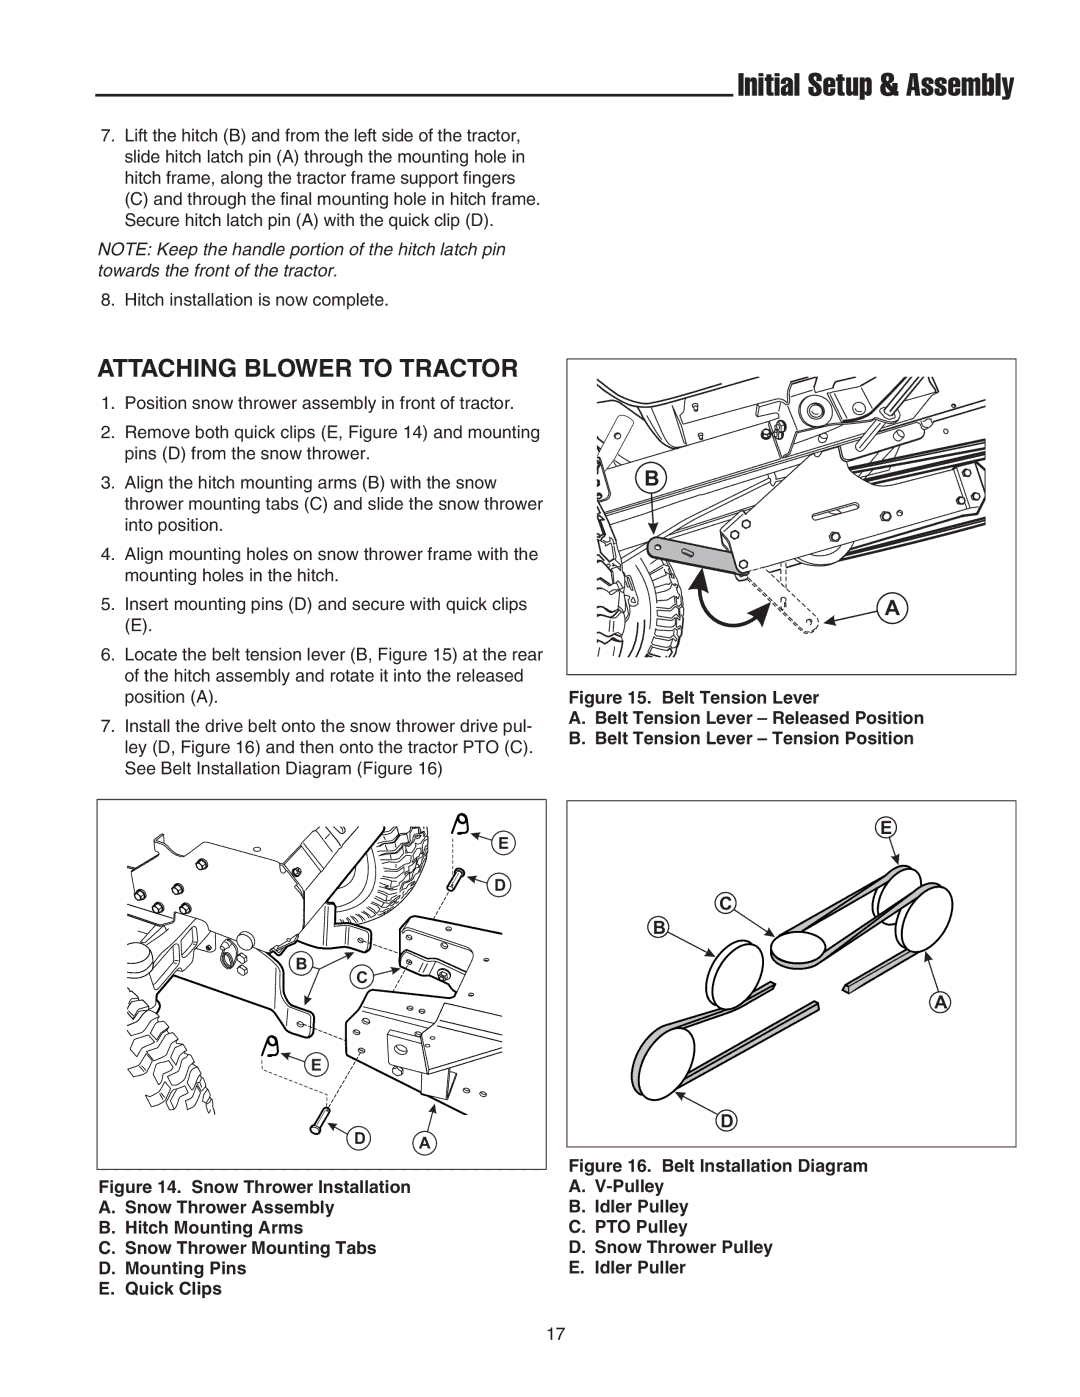
6.Locate the belt tension lever (B, Figure 15) at the rear of the hitch assembly and rotate it into the released position (A).
7.Install the drive belt onto the snow thrower drive pul- ley (D, Figure 16) and then onto the tractor PTO (C). See Belt Installation Diagram (Figure 16)
B |
A |
Figure 15. Belt Tension Lever
A.Belt Tension Lever – Released Position
B.Belt Tension Lever – Tension Position
| E |
| D |
B |
|
C |
|
E |
|
D | A |
|
Figure 14. Snow Thrower Installation
A.Snow Thrower Assembly
B.Hitch Mounting Arms
C.Snow Thrower Mounting Tabs
D.Mounting Pins
E.Quick Clips
E
C
B
A
D
Figure 16. Belt Installation Diagram
A.V-Pulley
B.Idler Pulley
C.PTO Pulley
D.Snow Thrower Pulley
E.Idler Puller
17