Removal
Snow Thrower Removal
![]() CAUTION
CAUTION
Make sure to shut off the engine and locking the tractor brakes or block the rear wheels before beginning the snow thrower removal process.
1.Fully raise and support the snow thrower with wooden blocks.
2.Loosen the turn buckle (C, Figure 21) and then remove the lift assist spring, turn buckle and axle clamp.
3.Lower the snow thrower to the ground.
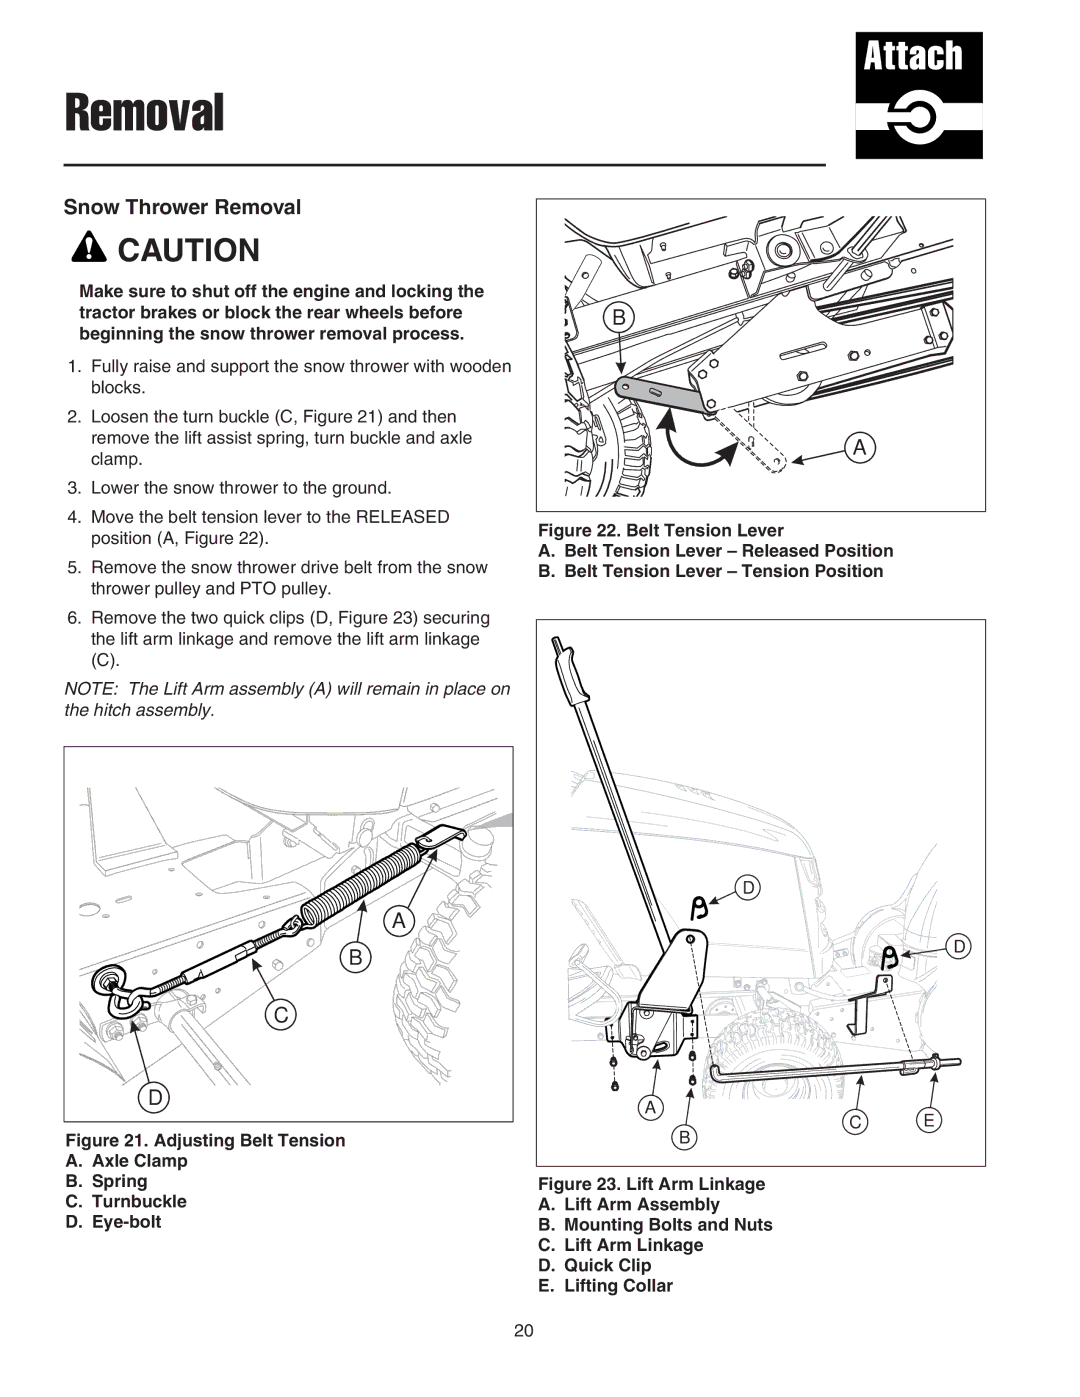
4.Move the belt tension lever to the RELEASED position (A, Figure 22).
5.Remove the snow thrower drive belt from the snow thrower pulley and PTO pulley.
6.Remove the two quick clips (D, Figure 23) securing the lift arm linkage and remove the lift arm linkage
(C).
NOTE: The Lift Arm assembly (A) will remain in place on the hitch assembly.
A |
B |
C |
D |
Figure 21. Adjusting Belt Tension
A.Axle Clamp
B.Spring
C.Turnbuckle
D.Eye-bolt
B |
A |
Figure 22. Belt Tension Lever
A.Belt Tension Lever – Released Position
B.Belt Tension Lever – Tension Position
D |
|
| D |
A | E |
C | |
B |
|
Figure 23. Lift Arm Linkage
A.Lift Arm Assembly
B.Mounting Bolts and Nuts
C.Lift Arm Linkage
D.Quick Clip
E.Lifting Collar
20