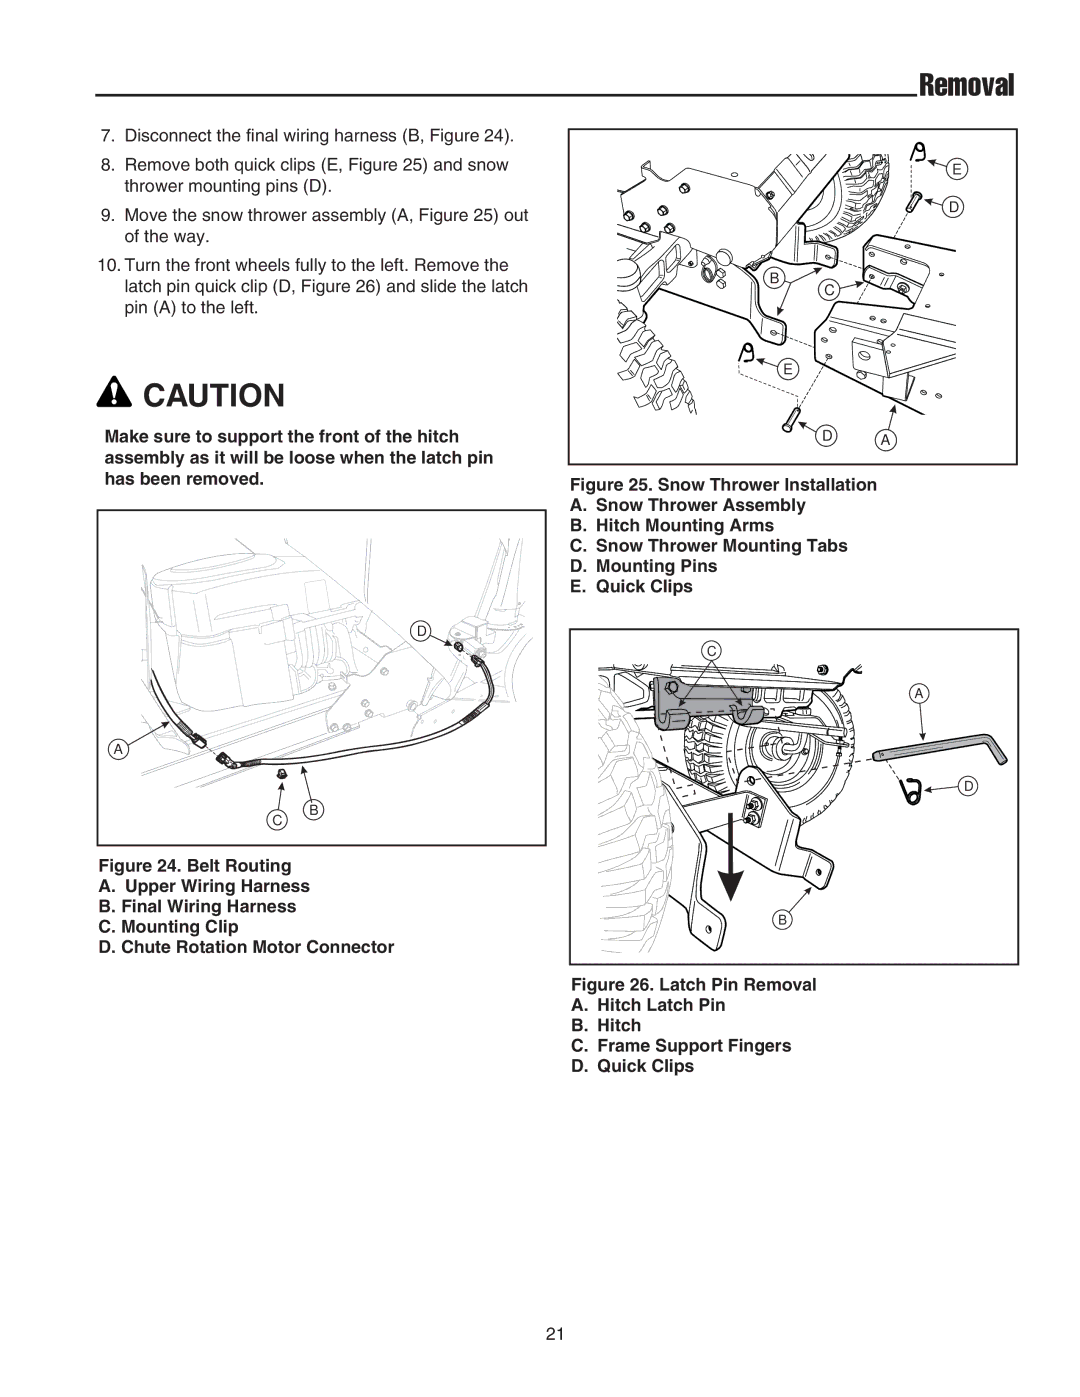
7.Disconnect the final wiring harness (B, Figure 24).
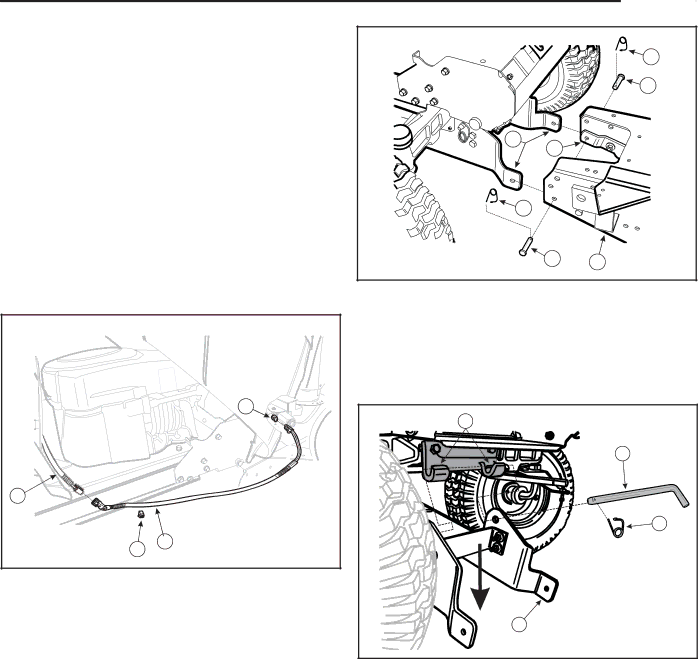
8.Remove both quick clips (E, Figure 25) and snow thrower mounting pins (D).
9.Move the snow thrower assembly (A, Figure 25) out of the way.
10.Turn the front wheels fully to the left. Remove the latch pin quick clip (D, Figure 26) and slide the latch pin (A) to the left.
![]() CAUTION
CAUTION
Make sure to support the front of the hitch assembly as it will be loose when the latch pin has been removed.
D |
A |
B |
C |
Figure 24. Belt Routing
A.Upper Wiring Harness
B.Final Wiring Harness
C.Mounting Clip
D.Chute Rotation Motor Connector
| Removal |
| E |
| D |
B |
|
C |
|
E |
|
D | A |
|
Figure 25. Snow Thrower Installation
A.Snow Thrower Assembly
B.Hitch Mounting Arms
C.Snow Thrower Mounting Tabs
D.Mounting Pins
E.Quick Clips
C |
A |
D |
B |
Figure 26. Latch Pin Removal
A.Hitch Latch Pin
B.Hitch
C.Frame Support Fingers
D.Quick Clips
21