Section 4 - ADJUSTMENT & REPAIR
Traction drive belt removal (Continued from previous page)
2.Slide belt guide assembly to the rear and remove.
3.Disconnect traction belt idler pulley spring from tractor frame. See Figure 4.27.
RIGHT REAR
TRACTOR
FRAME
DISCONNECT
SPRING FROM
FRAME
FIGURE 4.27
WARNING
DO NOT attempt any adjustments, maintenance or service with the engine or blade running. STOP blade. STOP engine. Set brake. Remove key. Remove spark plug wire from spark plug and secure wire away from spark plug. Engine and components can be extremely hot. Avoid burns by allowing engine and components sufficient time to cool.
4.4.6TRACTION DRIVE BELT REPLACEMENT
Mower Deck Removal
4.Remove mounting nuts that secure the traction drive belt idler tension pulley and stationary idler pulleys. See Figure 4.28.
STATIONARY
IDLER
PULLEYSTRANSMISSION
PULLEY
| REMOVE | TENSION | |
ENGINE | IDLER | ||
ALL | |||
PULLEY | PULLEY | ||
PULLEYS | |||
|
|
VIEW FROM UNDERNEATH TRACTOR
FIGURE 4.28
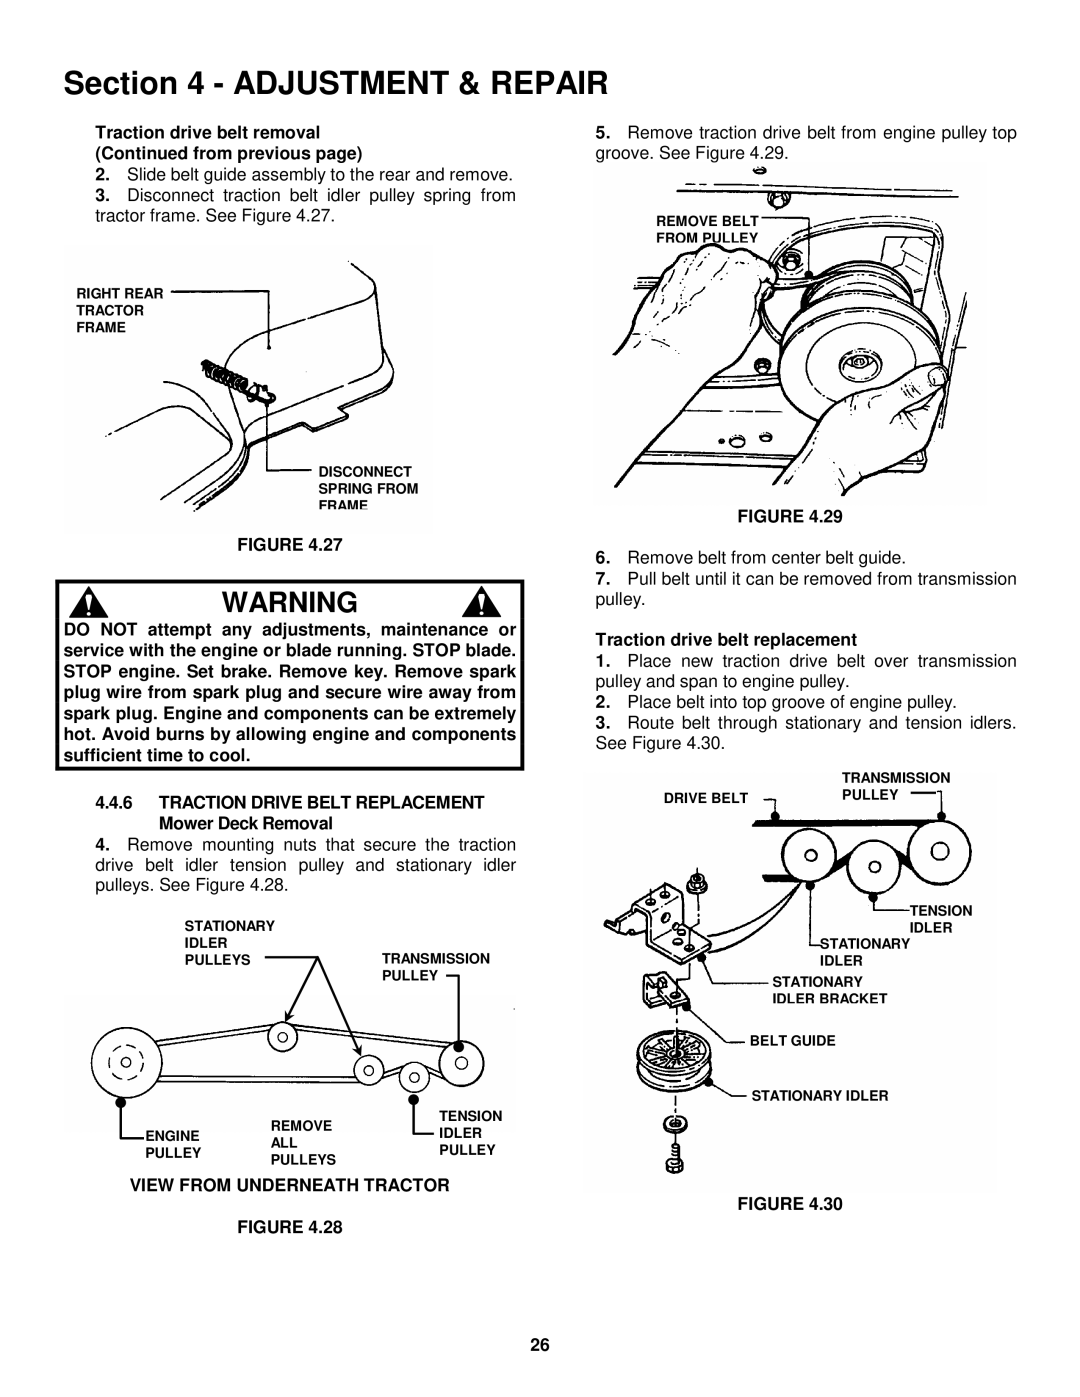
5.Remove traction drive belt from engine pulley top groove. See Figure 4.29.
REMOVE BELT
FROM PULLEY
FIGURE 4.29
6.Remove belt from center belt guide.
7.Pull belt until it can be removed from transmission pulley.
Traction drive belt replacement
1.Place new traction drive belt over transmission pulley and span to engine pulley.
2.Place belt into top groove of engine pulley.
3.Route belt through stationary and tension idlers. See Figure 4.30.
| TRANSMISSION | ||
DRIVE BELT | PULLEY |
|
|
| |||
TENSION
IDLER
STATIONARY
IDLER
STATIONARY
IDLER BRACKET
BELT GUIDE
STATIONARY IDLER
FIGURE 4.30
26