
LT23460AWS specifications
The Snapper LT23460AWS is a versatile riding lawn mower designed for homeowners seeking efficiency, comfort, and ease of use in maintaining their lawns. This model comes equipped with several innovative features and technologies that enhance its performance and user experience.One of the standout characteristics of the LT23460AWS is its powerful 23 horsepower Briggs & Stratton engine. This engine provides ample power to tackle various terrains, ensuring a smooth and efficient mowing experience. The mower operates on a hydrostatic transmission system, allowing users to easily adjust the speed and direction without the need for manual shifting, making it ideal for navigating around obstacles with ease.
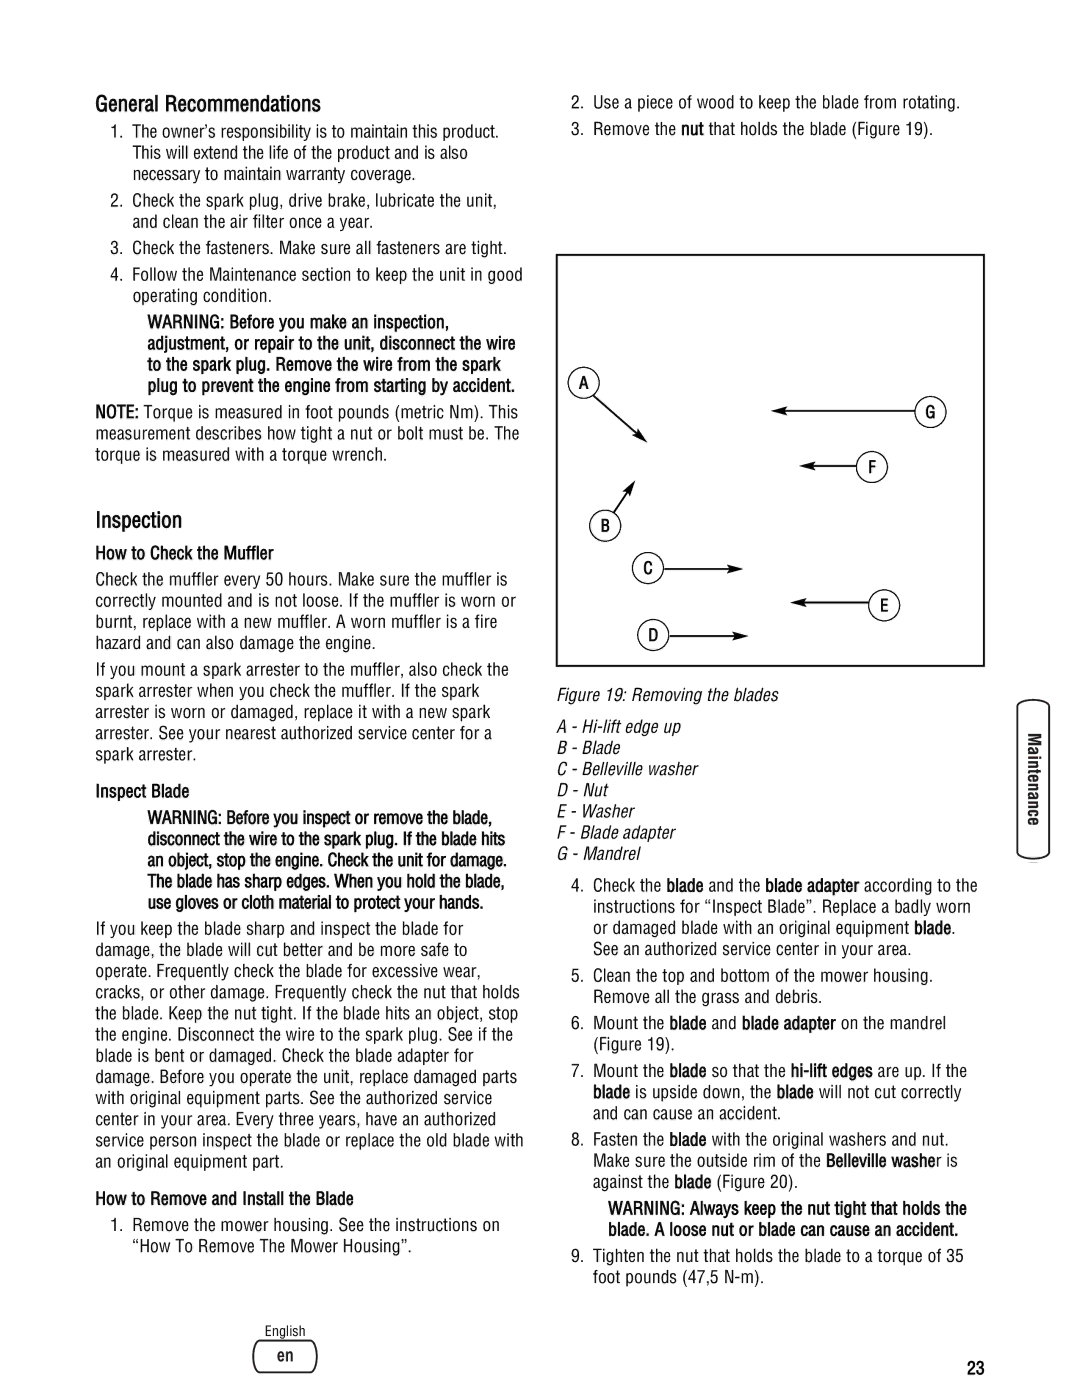
The Snapper LT23460AWS features a 60-inch cutting deck, which allows for wide coverage in fewer passes, reducing the time spent mowing. This cutting deck is equipped with a robust cutting system, designed to deliver a clean, precise cut, whether tackling tall grass or maintaining a manicured lawn. Additionally, the deck height can be easily adjusted to suit different grass lengths, providing flexibility in lawn care.
Comfort is a key aspect of the LT23460AWS. The mower is designed with a spacious, ergonomic seat that provides ample cushioning, allowing for hours of comfortable mowing. Its easy-to-reach controls are strategically placed, enhancing user convenience and minimizing fatigue. The steering wheel is designed for optimal maneuverability, making it easier to navigate tight corners and complex landscaping.
Another notable technology in the Snapper LT23460AWS is the Advanced Air Management System. This technology optimizes airflow within the cutting deck, ensuring even grass distribution and improving overall cut quality. Moreover, the mower includes a mulching capability, allowing homeowners to cut grass into fine pieces that can enrich the lawn when returned to the soil.
The LT23460AWS is also designed with durability in mind. Its robust construction features high-quality materials that can withstand the rigors of regular mowing. This commitment to durability ensures that the Snapper LT23460AWS will provide reliable performance season after season.
In summary, the Snapper LT23460AWS is a powerful and efficient riding mower that combines advanced technology with user-friendly design. With its powerful engine, hydrostatic transmission, and comfortable seating, this mower is poised to meet the diverse needs of homeowners while delivering high-quality lawn care results.