Section 5 - ADJUSTMENTS & REPAIR
WARNING
DO NOT attempt any maintenance, adjustments or service with engine running. STOP engine. STOP blades. Set brake. Remove key. Remove spark plug wires and secure away from spark plugs. Engine and components are HOT. Avoid serious burns, allow sufficient time for all parts to cool.
5.2.1.MOWER DECK ADJUSTMENT (LEVELNESS) SIDE to SIDE and FRONT to REAR
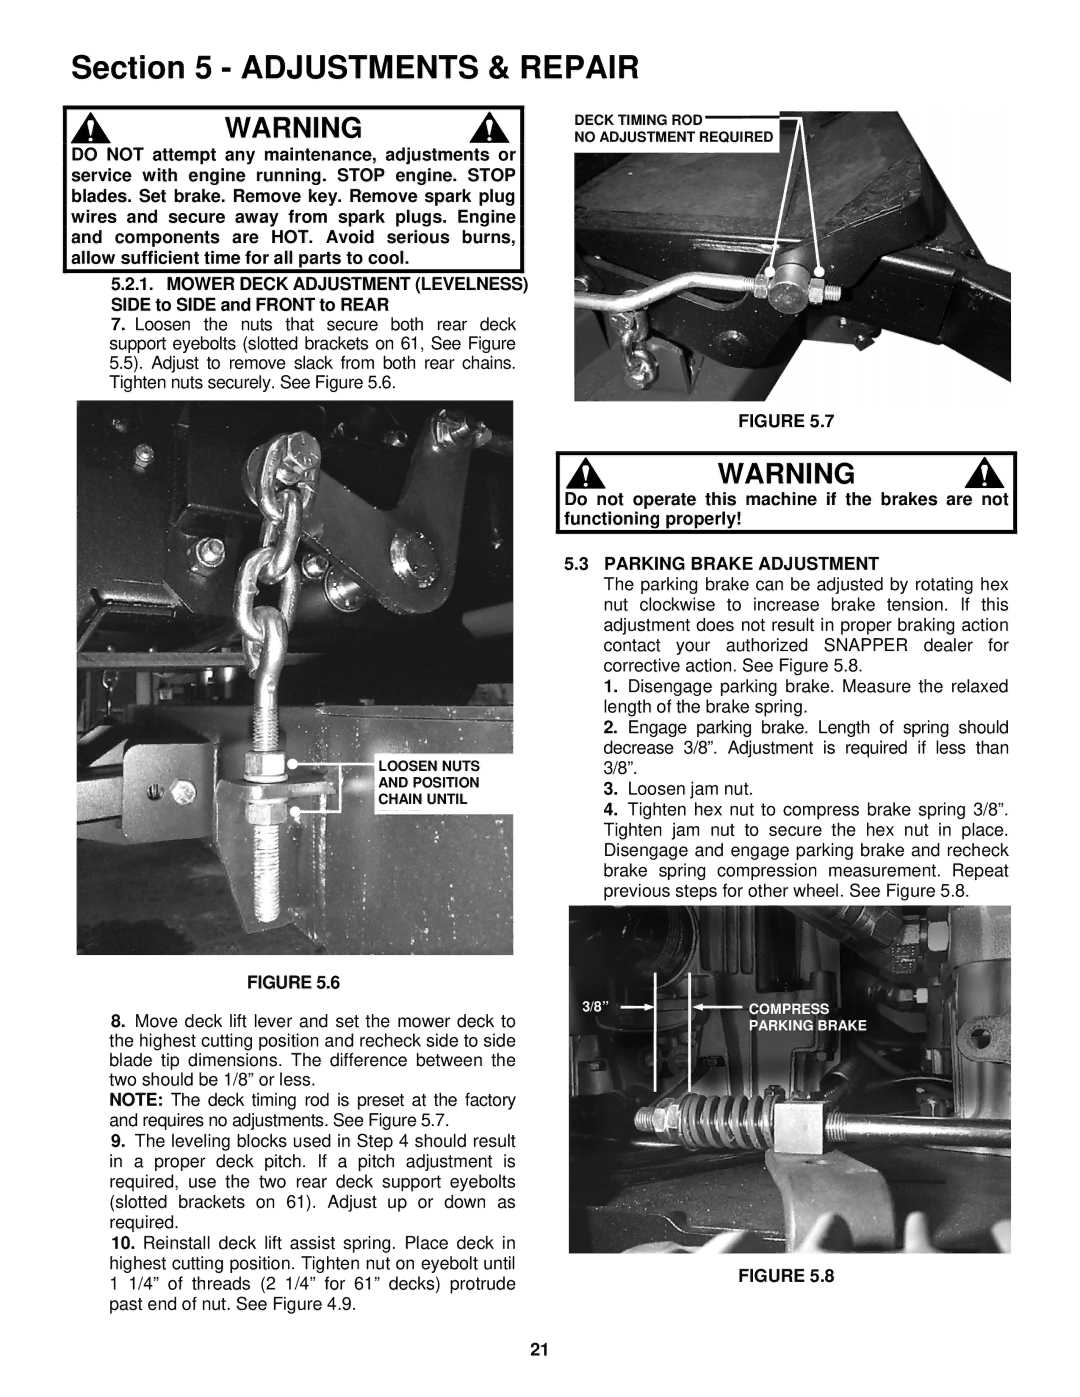
7. Loosen the nuts that secure both rear deck support eyebolts (slotted brackets on 61, See Figure 5.5). Adjust to remove slack from both rear chains. Tighten nuts securely. See Figure 5.6.
![]() LOOSEN NUTS
LOOSEN NUTS
AND POSITION
CHAIN UNTIL
TIGHT
FIGURE 5.6
8.Move deck lift lever and set the mower deck to the highest cutting position and recheck side to side blade tip dimensions. The difference between the two should be 1/8” or less.
NOTE: The deck timing rod is preset at the factory and requires no adjustments. See Figure 5.7.
9.The leveling blocks used in Step 4 should result in a proper deck pitch. If a pitch adjustment is required, use the two rear deck support eyebolts (slotted brackets on 61). Adjust up or down as required.
10.Reinstall deck lift assist spring. Place deck in highest cutting position. Tighten nut on eyebolt until 1 1/4” of threads (2 1/4” for 61” decks) protrude past end of nut. See Figure 4.9.
DECK TIMING ROD
NO ADJUSTMENT REQUIRED
FIGURE 5.7
WARNING
Do not operate this machine if the brakes are not functioning properly!
5.3PARKING BRAKE ADJUSTMENT
The parking brake can be adjusted by rotating hex nut clockwise to increase brake tension. If this adjustment does not result in proper braking action contact your authorized SNAPPER dealer for corrective action. See Figure 5.8.
1.Disengage parking brake. Measure the relaxed length of the brake spring.
2.Engage parking brake. Length of spring should decrease 3/8”. Adjustment is required if less than 3/8”.
3.Loosen jam nut.
4.Tighten hex nut to compress brake spring 3/8”. Tighten jam nut to secure the hex nut in place. Disengage and engage parking brake and recheck brake spring compression measurement. Repeat previous steps for other wheel. See Figure 5.8.
3/8” ![]()
![]() COMPRESS PARKING BRAKE
COMPRESS PARKING BRAKE
FIGURE 5.8
21