Section 53 - ADJUSTMENTSOPERAINGINSTRUCTIONS& REPAIR
! | WARNING | ! |
Shield the positive terminal with terminal cover locat- ed on battery harness. This prevents metal from touching the positive terminal, which could cause sparks. Cables must be connected to battery terminals in the proper position. RED (Positive) cable must go to the ( + ) terminal. BLACK (Negative) cable must go to the ( - ) terminal. If battery is removed, DO NOT oper- ate engine without insulating Positive + battery cable terminal with electrical tape, or sparking from the bat- tery cables can result.
5.10BATTERY
NOTE: In order to raise operator set to access battery compartment, seat must be in rearmost position.
5.10.1. BATTERY REMOVAL
1.Slide terminal cover away from positive terminal.
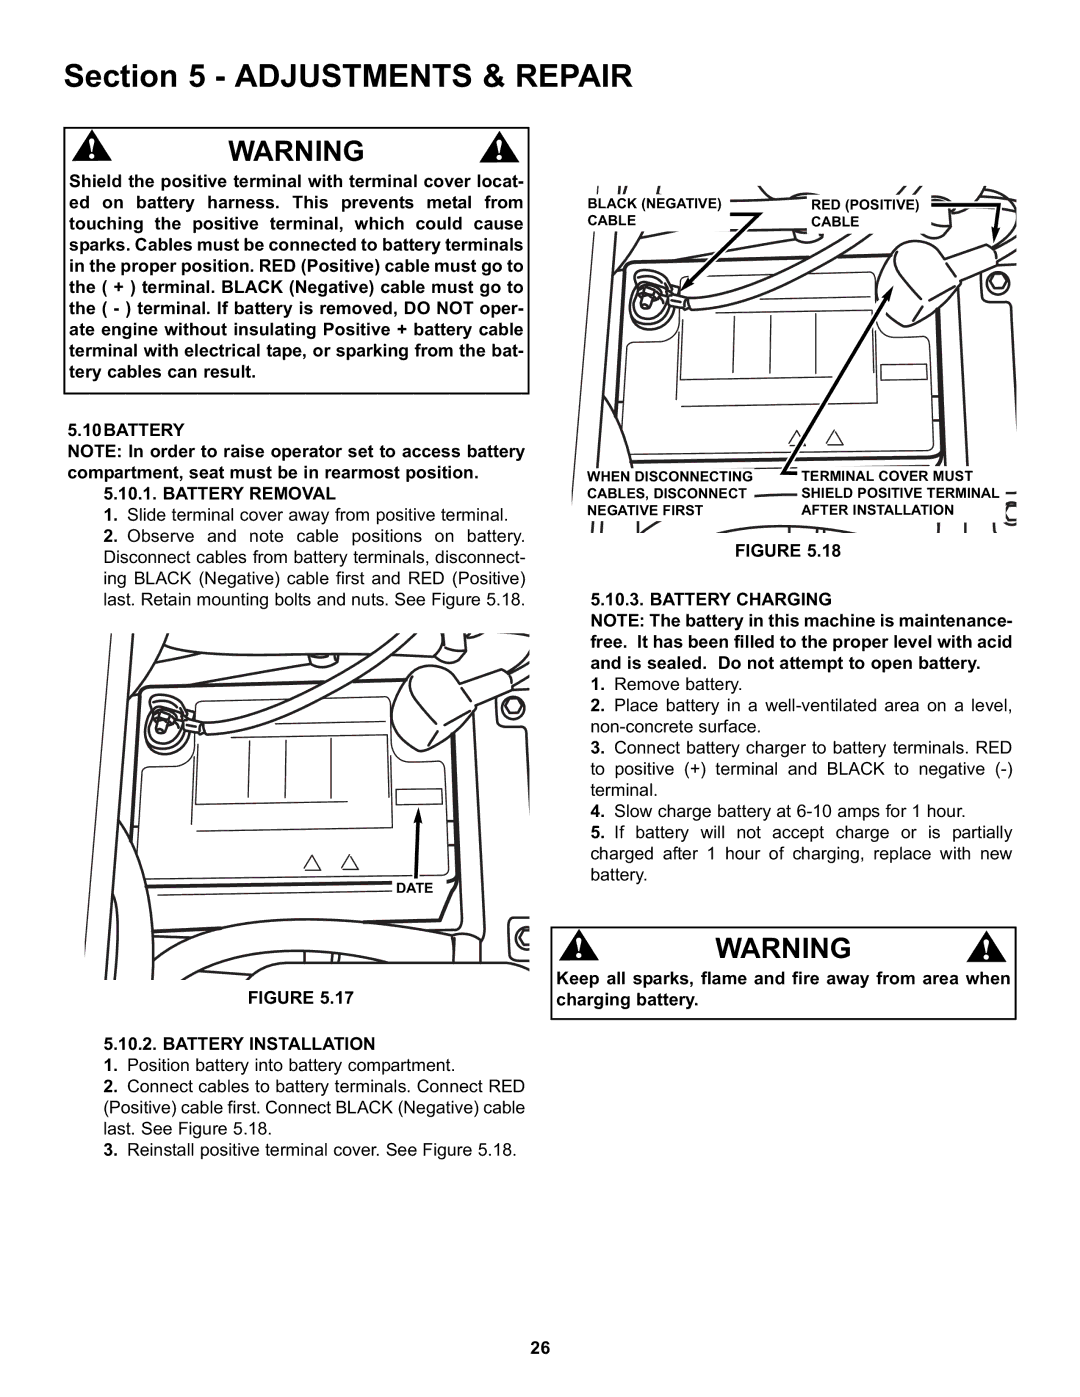
2.Observe and note cable positions on battery. Disconnect cables from battery terminals, disconnect- ing BLACK (Negative) cable first and RED (Positive) last. Retain mounting bolts and nuts. See Figure 5.18.
DATE
FIGURE 5.17
5.10.2. BATTERY INSTALLATION
1.Position battery into battery compartment.
2.Connect cables to battery terminals. Connect RED (Positive) cable first. Connect BLACK (Negative) cable last. See Figure 5.18.
3.Reinstall positive terminal cover. See Figure 5.18.
BLACK (NEGATIVE) | RED (POSITIVE) |
CABLE | CABLE |
WHEN DISCONNECTING | TERMINAL COVER MUST |
CABLES, DISCONNECT | SHIELD POSITIVE TERMINAL |
NEGATIVE FIRST | AFTER INSTALLATION |
FIGURE 5.18
5.10.3. BATTERY CHARGING
NOTE: The battery in this machine is maintenance- free. It has been filled to the proper level with acid and is sealed. Do not attempt to open battery.
1.Remove battery.
2.Place battery in a
3.Connect battery charger to battery terminals. RED to positive (+) terminal and BLACK to negative
4.Slow charge battery at
5.If battery will not accept charge or is partially charged after 1 hour of charging, replace with new battery.
! | WARNING | ! |
Keep all sparks, flame and fire away from area when charging battery.
26
