
KC-30H / KC-35H specifications
The Soleus Air KC-30H and KC-35H are sophisticated portable air conditioners designed to provide innovative cooling solutions for both residential and commercial spaces. These units are particularly known for their sleek design, user-friendly interface, and energy-efficient technologies, making them a popular choice for consumers seeking comfort without energy waste.One of the main features of the KC-30H and KC-35H is their impressive cooling capability. The KC-30H can cool up to 300 square feet, while the KC-35H is suitable for areas up to 350 square feet, making them ideal for bedrooms, living rooms, and small offices. Both models utilize a powerful compressor and a high-efficiency cooling system that quickly lowers the temperature in any given space.
Another standout characteristic is their dual-hose design, which enhances cooling efficiency by drawing in more air from outside and exhausting hot air more effectively. This feature not only improves cooling performance but also helps reduce humidity levels, ensuring a more comfortable indoor environment.
The Soleus Air units are equipped with multiple fan speeds and cooling modes, allowing users to customize their cooling experience according to their preferences. The dehumidification mode is particularly beneficial in humid climates, as it effectively removes excess moisture from the air, promoting both comfort and air quality.
Technologically, these models are fitted with a digital display and remote control, enabling users to adjust settings from a distance easily. The programmable timer feature allows for scheduled operation, helping to minimize energy consumption. This is especially useful for those who want to come home to a pre-cooled space without running the unit throughout the day.
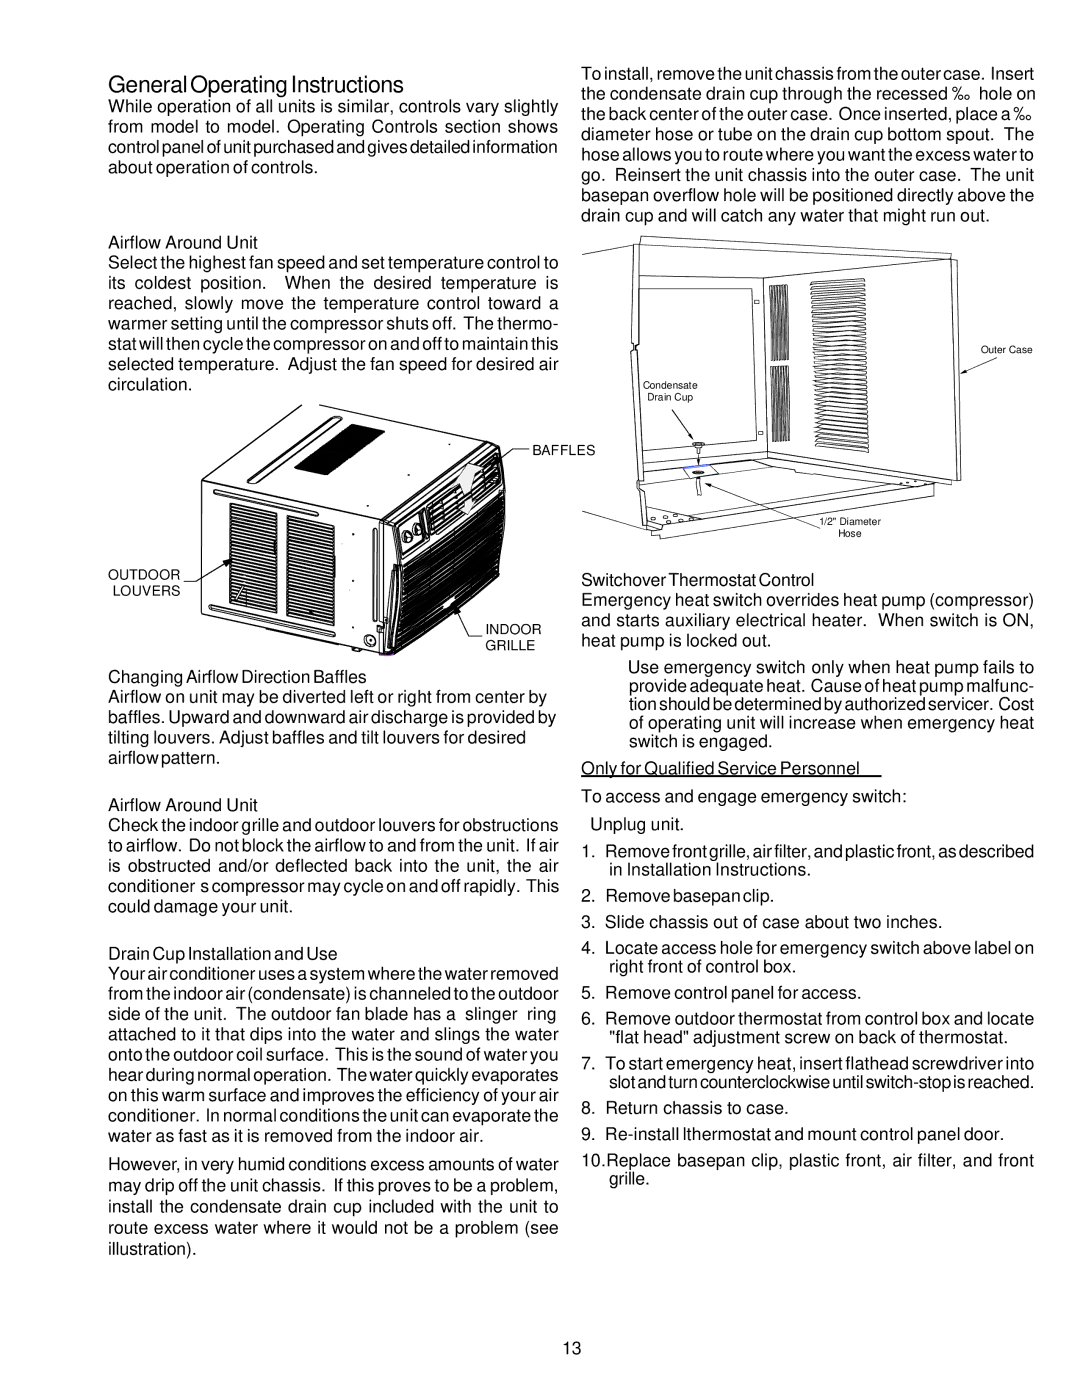
The KC-30H and KC-35H also feature a self-evaporative system that eliminates the need for manual water drainage. This technology collects and reuses condensate to aid in the cooling process, further enhancing energy efficiency.
Additionally, the portable design, complete with rolling casters, makes these air conditioners easy to move from room to room, providing flexible cooling wherever it's needed. Their compact footprint means they can fit snugly in tight spaces without compromising on performance.
In summary, the Soleus Air KC-30H and KC-35H stand out for their effective cooling capabilities, energy-efficient technologies, user-friendly features, and portability. Ideal for individuals looking to beat the heat, these air conditioners deliver comfort and convenience in equal measure.