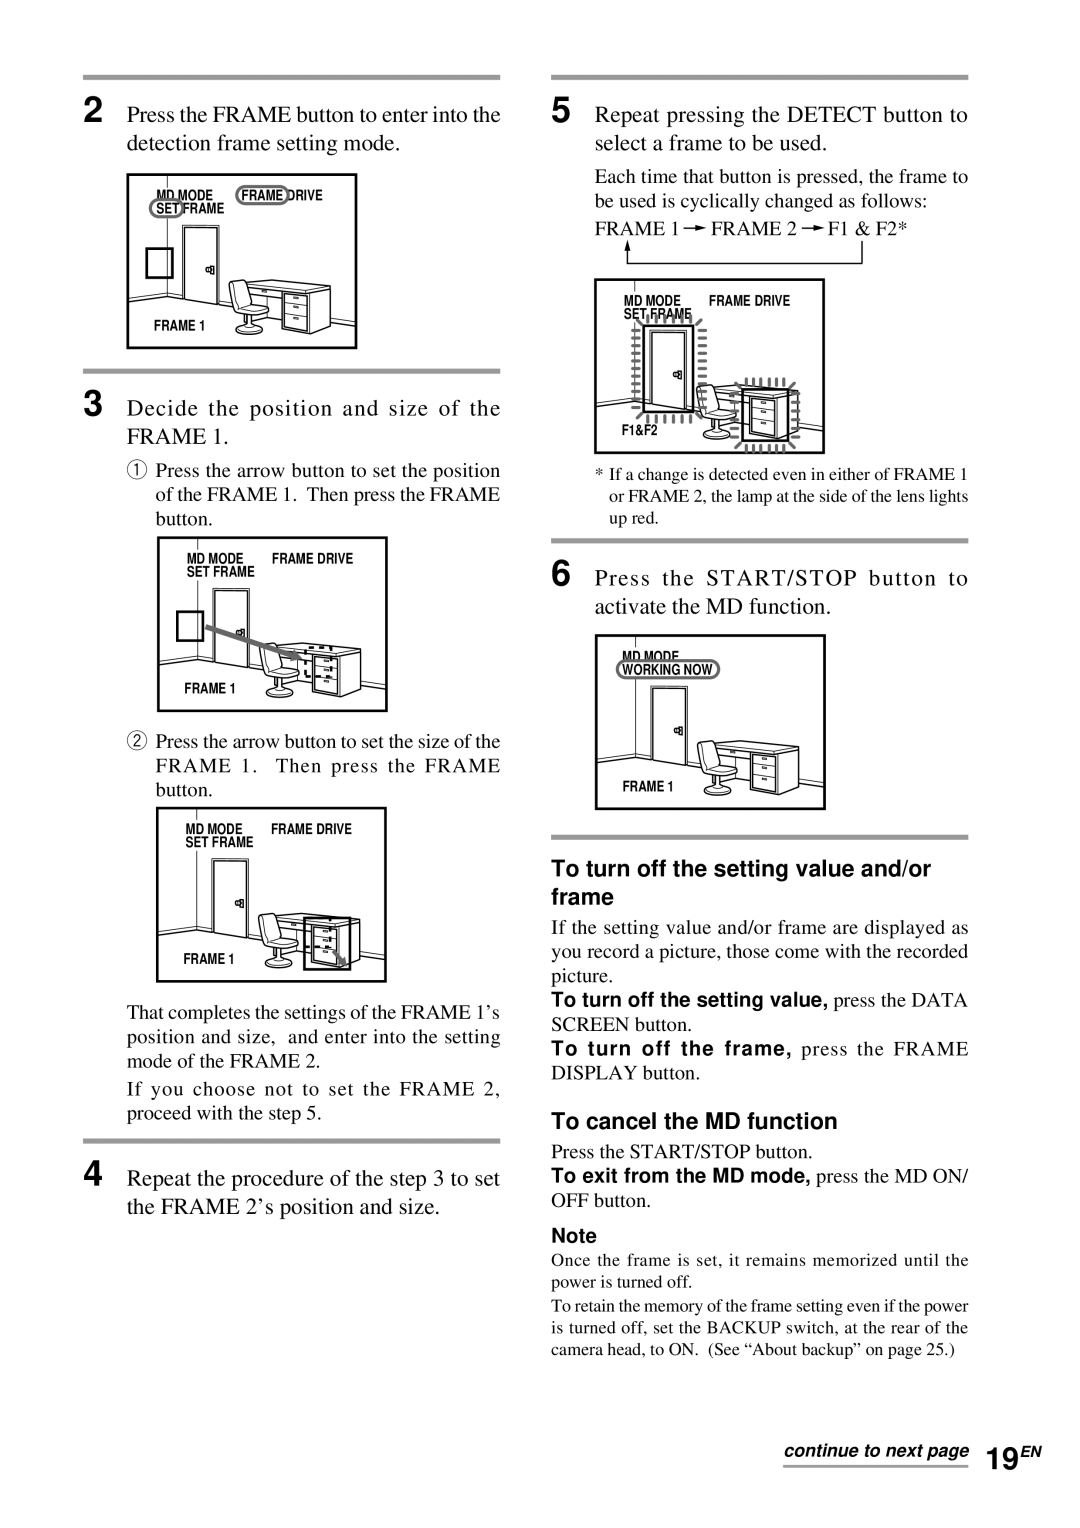
2 Press the FRAME button to enter into the detection frame setting mode.
MD MODE | FRAME DRIVE |
SET FRAME |
|
FRAME 1 |
|
3 Decide the position and size of the FRAME 1.
qPress the arrow button to set the position of the FRAME 1. Then press the FRAME button.
MD MODE | FRAME DRIVE |
SET FRAME |
|
FRAME 1 |
|
wPress the arrow button to set the size of the FRAME 1. Then press the FRAME button.
MD MODE | FRAME DRIVE |
SET FRAME |
|
FRAME 1 |
|
That completes the settings of the FRAME 1’s position and size, and enter into the setting mode of the FRAME 2.
If you choose not to set the FRAME 2, proceed with the step 5.
4 Repeat the procedure of the step 3 to set the FRAME 2’s position and size.
5 Repeat pressing the DETECT button to select a frame to be used.
Each time that button is pressed, the frame to be used is cyclically changed as follows:
FRAME 1 | FRAME 2 | F1 & F2* |
MD MODE | FRAME DRIVE |
|
SET FRAME |
|
|
F1&F2 |
|
|
*If a change is detected even in either of FRAME 1 or FRAME 2, the lamp at the side of the lens lights up red.
6 Press the START/STOP button to activate the MD function.
MD MODE |
WORKING NOW |
FRAME 1 |
To turn off the setting value and/or frame
If the setting value and/or frame are displayed as you record a picture, those come with the recorded picture.
To turn off the setting value, press the DATA
SCREEN button.
To turn off the frame, press the FRAME DISPLAY button.
To cancel the MD function
Press the START/STOP button.
To exit from the MD mode, press the MD ON/
OFF button.
Note
Once the frame is set, it remains memorized until the power is turned off.
To retain the memory of the frame setting even if the power is turned off, set the BACKUP switch, at the rear of the camera head, to ON. (See “About backup” on page 25.)
continue to next page 19EN
