Recording from the radio (continued)
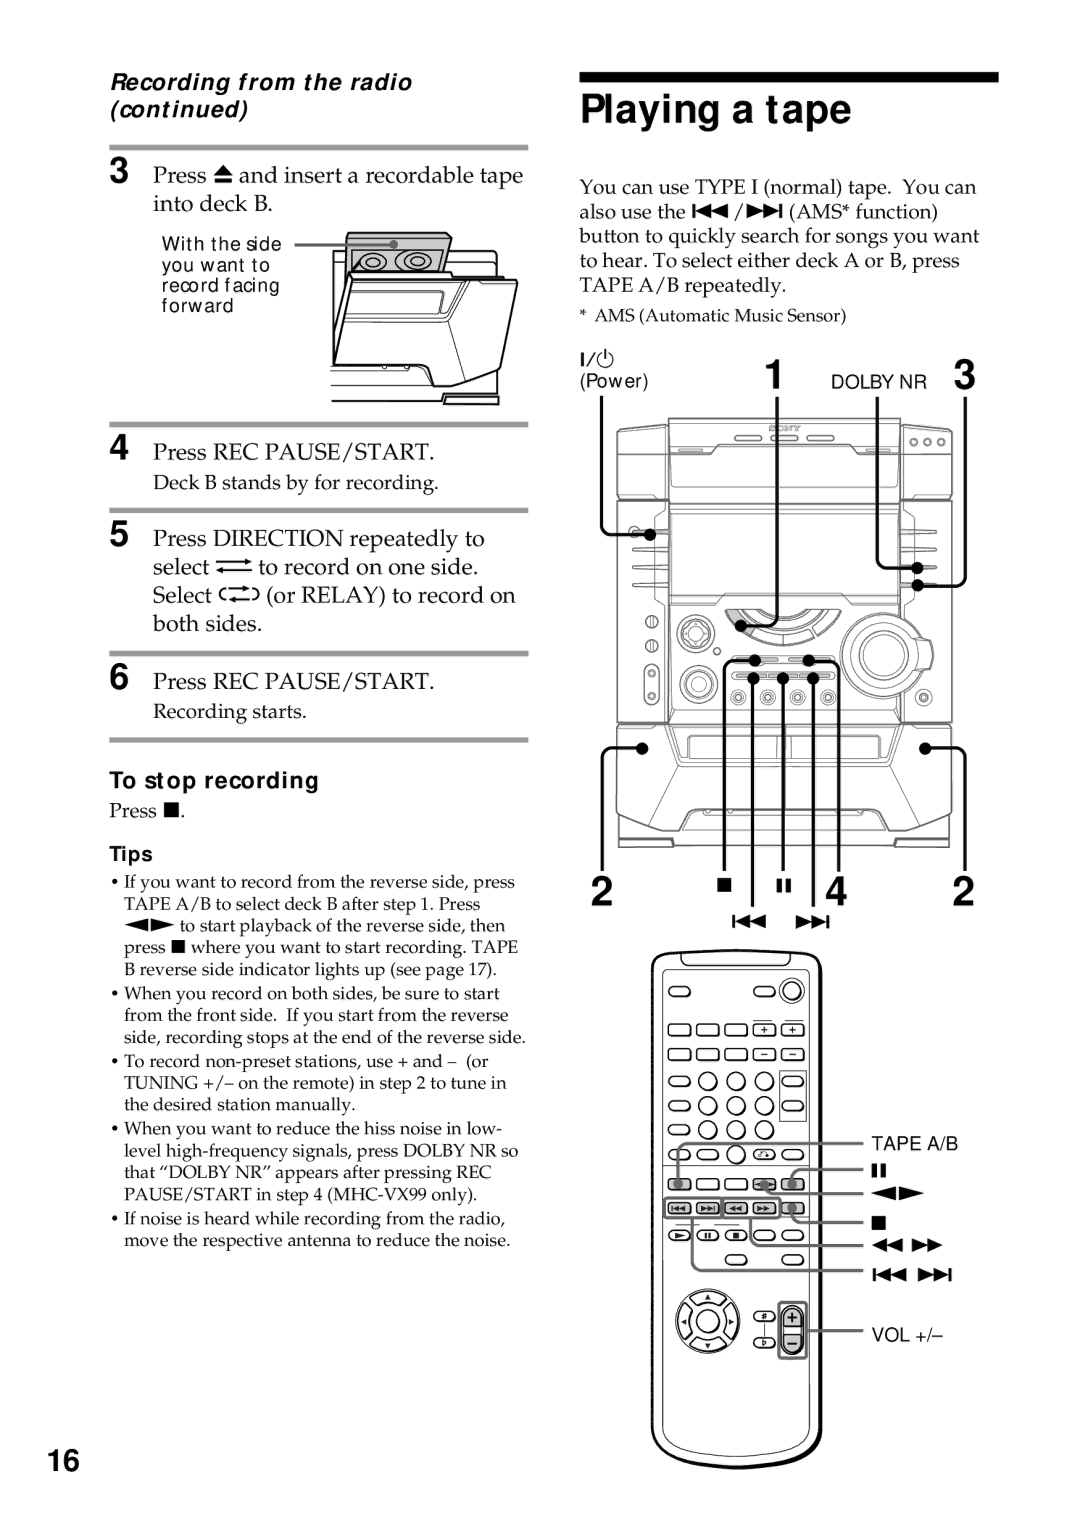
3 Press Z and insert a recordable tape into deck B.
With the side you want to record facing forward
4 Press REC PAUSE/START.
Deck B stands by for recording.
5 Press DIRECTION repeatedly to select g to record on one side. Select j (or RELAY) to record on both sides.
6 Press REC PAUSE/START.
Recording starts.
To stop recording
Press x.
Tips
• If you want to record from the reverse side, press |
TAPE A/B to select deck B after step 1. Press |
nN to start playback of the reverse side, then |
press x where you want to start recording. TAPE |
B reverse side indicator lights up (see page 17). |
• When you record on both sides, be sure to start |
from the front side. If you start from the reverse |
side, recording stops at the end of the reverse side. |
• To record |
TUNING +/– on the remote) in step 2 to tune in |
the desired station manually. |
• When you want to reduce the hiss noise in low- |
Playing a tape
You can use TYPE I (normal) tape. You can also use the ./> (AMS* function) button to quickly search for songs you want to hear. To select either deck A or B, press TAPE A/B repeatedly.
* AMS (Automatic Music Sensor)
?/1 | 1 DOLBY NR 3 |
(Power) |
2 x X 4 2 |
. > |
level |
that “DOLBY NR” appears after pressing REC |
PAUSE/START in step 4 |
• If noise is heard while recording from the radio, |
O
nN X
. > m M s
TAPE A/B
X nN
x
move the respective antenna to reduce the noise. |
N X x
v
b B
m M
. >
![]()
![]() VOL +/–
VOL +/–
V
16