4-226-942-11
Mini Hi-Fi Component System
MHC-VX99 MHC-VX77 MHC-VX55
Operating Instructions
VIDEO CDs
About this manual
This system can play the following discs
Note on VIDEO CDs
Getting Started
Table of Contents
Sound Adjustment
Other Features
2Connect the surround speaker MHC-VX77only
Step 1 Hooking up the system
Getting Started
1Connect the speakers
Jack type A
6Connect the power cord to a wall outlet
When using a TV
3Connect the FM/AM antennas
To attach the front speaker pads
Step 1 Hooking up the system continued
To connect optional components
To deactivate the demonstration
1 Press CLOCK/TIMER SET
Step 2 Setting the time
Using the remote
When carrying this system
4 Press . or repeatedly to set the minute
Step 3 Presetting radio stations
Step 2 Setting the time continued
3 Press ENTER
3 Press TUNER MEMORY
To tune in a station with a weak signal
To erase the preset station
To change the AM tuning interval
3 Press one of the DISC 1~3 buttons
Playing a VIDEO CD
Basic Operations
1 Turn on your TV and select the video input
Basic Operations
Tips
Do this
Playing a CD
Normal play
2 Press one of the DISC 1~3 buttons
Basic Operations
Recording a CD/VIDEO CD
CD Synchro Recording
2 Press CD
3 Press Z OPEN/CLOSE and place a CD
Preset Tuning
Listening to the radio
Recording a CD/VIDEO CD continued
1 Press TUNER/BAND repeatedly to select FM or AM
To listen to non-presetradio stations
Recording from the radio
x 4,6
Power
Playing a tape
Recording from the radio continued
4 Press REC PAUSE/START
Searching for the beginning of a track AMS
1 Press TAPE A/B repeatedly to select deck A or B
jto play both sides
4 Press nN
To stop dubbing
Recording from a tape
High-speedDubbing
5 Press REC PAUSE/START
Singing along Karaoke
4 Start playing the music and adjust the volume
When you use VIDEO CDs
When you are done
To cancel the echoing
Adjusting the microphone echo
Adjusting the key
Turn ECHO LEVEL to adjust the echo effect
Playing a VIDEO CD with PBC functions Ver
The VIDEO CD/CD Player
PBC Play
To select a menu number using the remote
Checking the remaining time
Tips
During normal playback
Using the on-screendisplay
When playback is stopped
Press DISPLAY
During playback of an audio CD
Using the on-screendisplay continued
ON SCREEN 2 display
During playback of a VIDEO CD
Locating a specific part of a disc
ON SCREEN OFF
Special Menu
Time Search
Locating by elapsed time
Locating the track you want
Locating a specific part of a disc continued
2 Press 3 to select “3 TRACK DIGEST.”
Locating a section within a track
To display the next 9 tracks
––Track Digest
Locating a specific part of a disc continued
Resume Play
2 Press nN
Adjusting the picture
2 Press b or B repeatedly to adjust the hue
3 Press v or V repeatedly to adjust the sharpness
1 Press CD, then place a CD
To cancel Repeat Play
Playing the CD tracks repeatedly
Repeat Play
3 Press nN
To cancel Shuffle Play
Playing the CD tracks in random order
Shuffle Play
Program Play
Programming the CD tracks
To cancel Program Play
Tips
Press
1 Insert a recordable tape into deck B
Recording on a tape manually
x 3,5
The Tape Deck
x 5
Recording a CD by specifying track order
Program Edit
12 Press REC PAUSE/START
To cancel Program Edit
Selecting tape length automatically
10 Press CD SYNC HI-DUB
Flashing part of a CD
To adjust the loop length
To adjust the flash length
Looping part of a CD
For a powerful sound GROOVE
Adjusting the sound
Sound Adjustment
To listen through the headphones
To select USER FILE
To cancel the effect
Selecting the audio emphasis
Selecting the effect from music menu
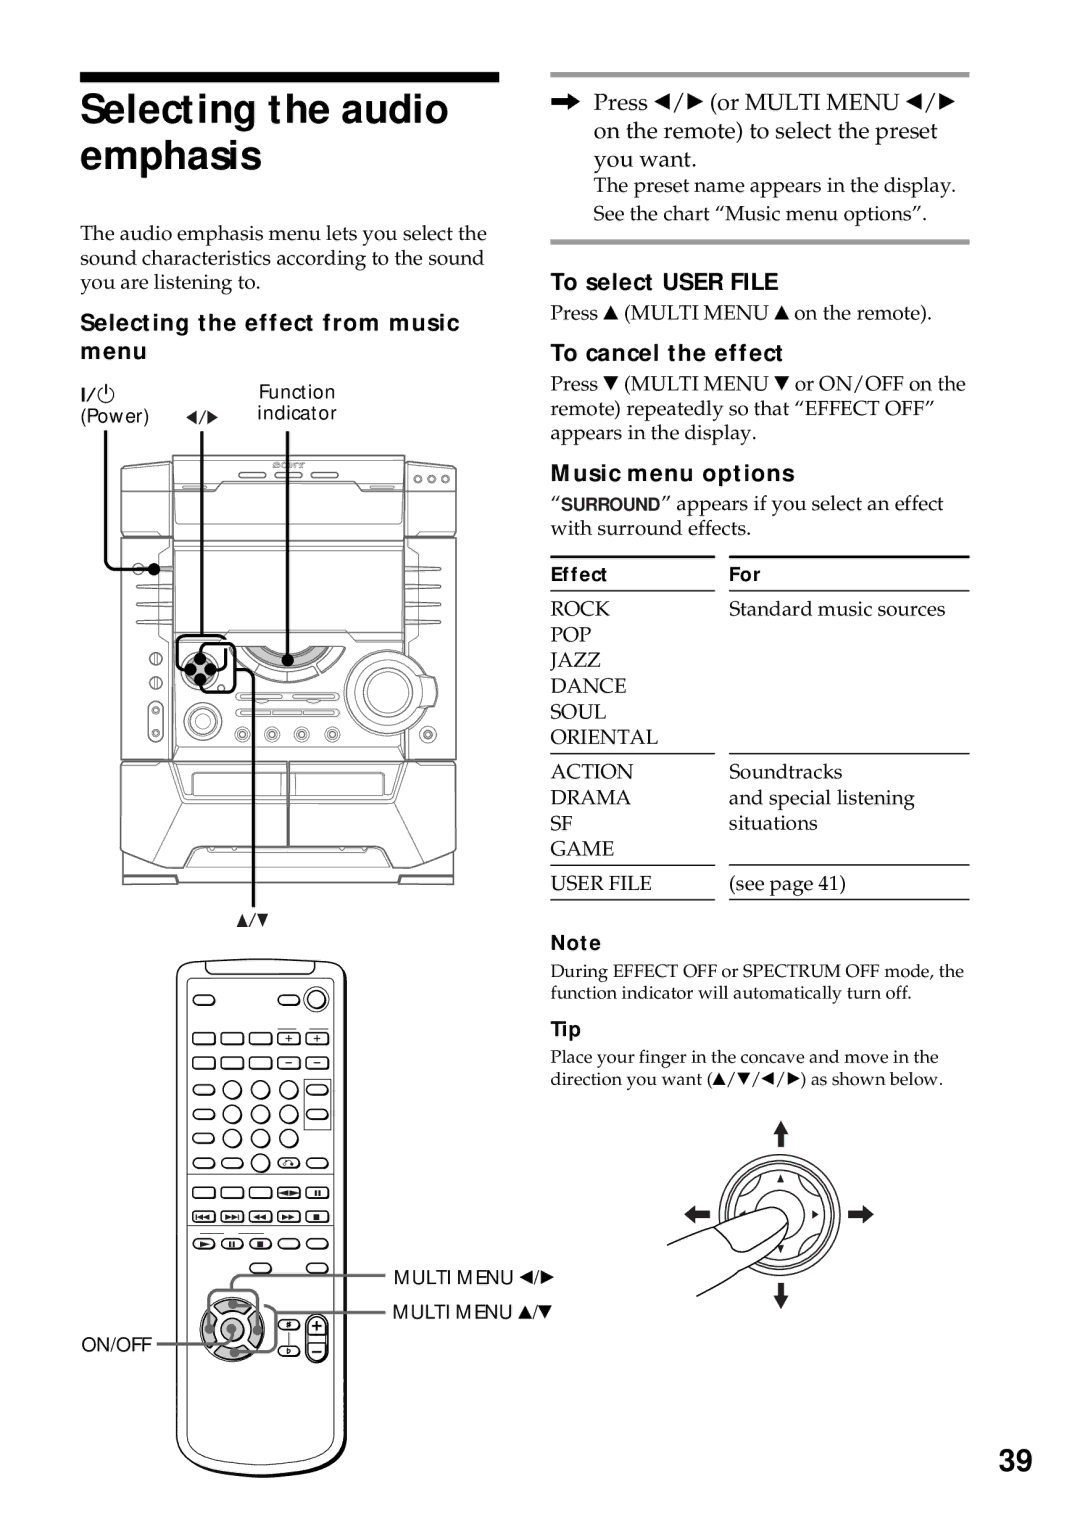
t CINEMA SPACE*
Changing the spectrum analyzer display
Selecting the surround effect
Press SPECTRUM
Adjusting the graphic equalizer
1 Press EQ EDIT
3 Press ENTER
Other Features
Mixing and recording sounds
To stop recording
Daily Timer
Sleep Timer
When you choose “SLEEP AUTO”
To cancel the Sleep Timer function
Waking up to music continued
9 Turn off the power
To check the setting
To cancel the timer operation
4 Set the time to start recording
Timer-recordingradio programs
7 Turn off the power
2 Press CLOCK/TIMER SET
Optional components
Connecting audio components
Connecting an MD deck for digital recording
Connecting an MD deck for listening to music
To the audio output of the VCR
Connecting a VCR
Jack type A
Connecting external antennas
FM antenna
AM antenna
Cleaning the cabinet
Precautions
On safety
On placement
Cleaning the tape heads
Troubleshooting
Precautions continued
When using a tape longer than 90 minutes
VIDEO CD/CD Player
The timer does not function
“PROTECT”and “PUSH POWER” appear alternately
Speakers
The tape does not record
Troubleshooting continued
Tape Deck
Tuner
Tape player section
Specifications
Amplifier section
VIDEO CD/CD player section
Front speaker SS-VX99for MHC-VX99
Specifications continued
Speaker
General
Playback Control PBC
Glossary
Auto Pause
Menu Playback
T, U, V, W, X, Y, Z
Index
H, I, J
P, Q