Recording from a tape
— High-speed Dubbing
4 Press DIRECTION repeatedly to select g to record on one side. Select j (or RELAY) to record on both sides.
You can use TYPE I (normal) tape. |
| 5 Press REC PAUSE/START. | ||
| Dubbing starts. | |||
|
|
|
| |
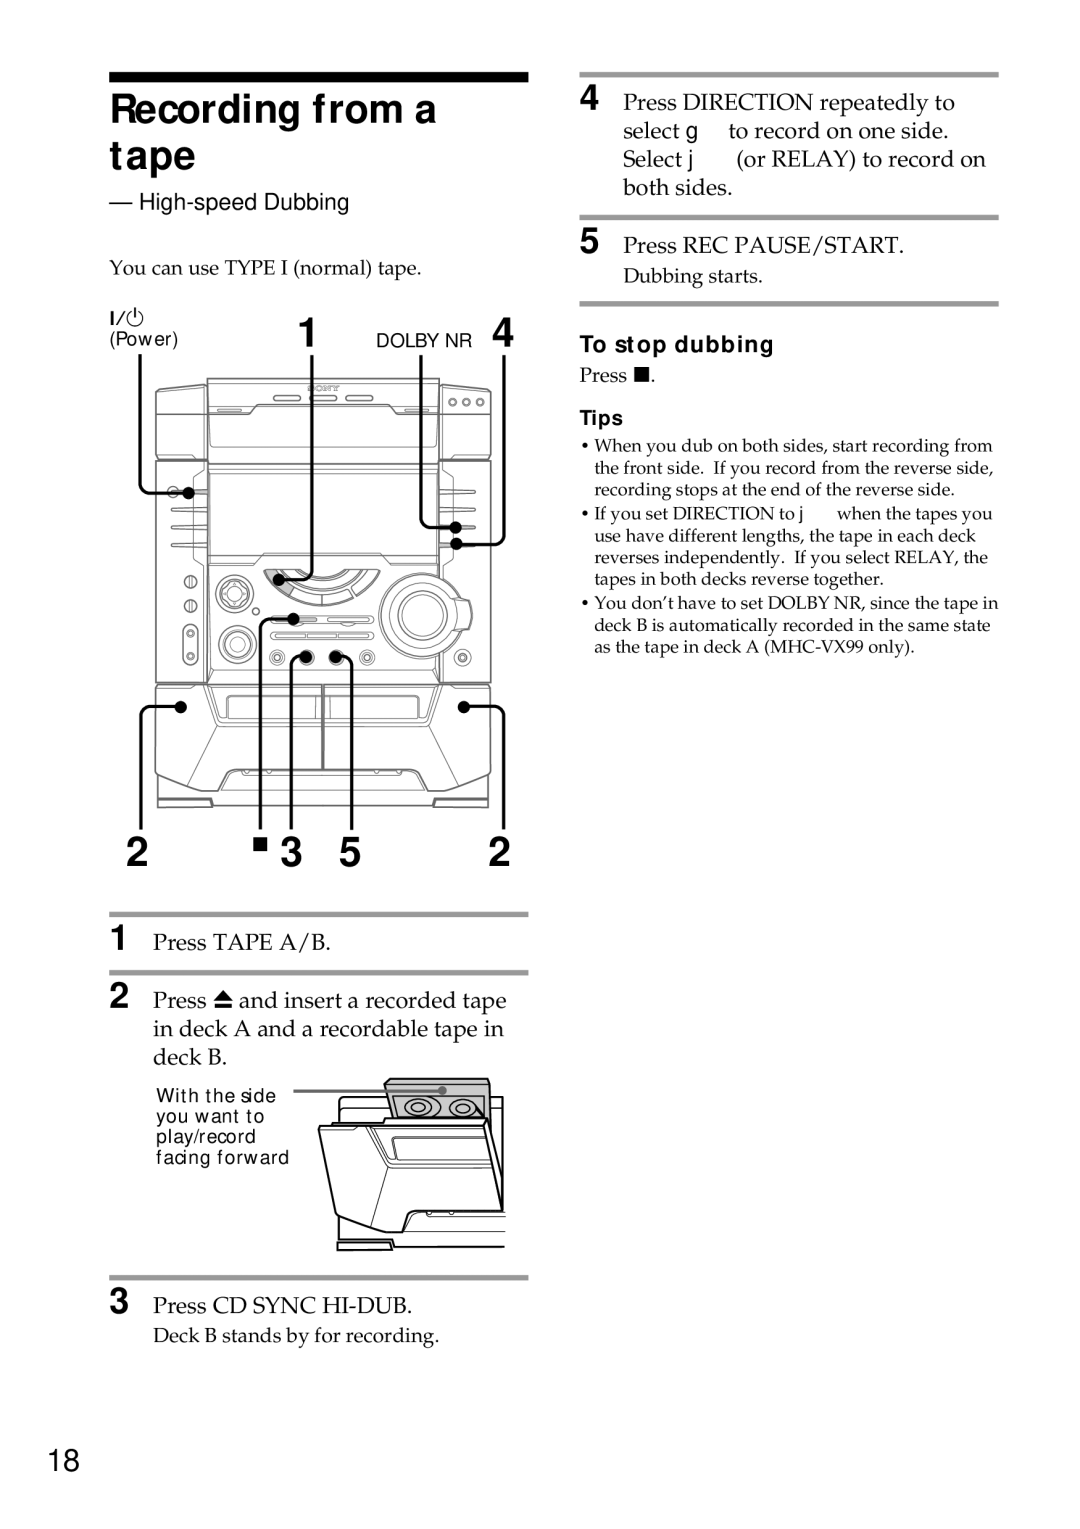
?/1 | 1 |
| 4 |
|
|
| |||
(Power) | DOLBY NR | To stop dubbing | ||
Press x.
Tips
• When you dub on both sides, start recording from the front side. If you record from the reverse side, recording stops at the end of the reverse side.
• If you set DIRECTION to j when the tapes you use have different lengths, the tape in each deck reverses independently. If you select RELAY, the tapes in both decks reverse together.
• You don’t have to set DOLBY NR, since the tape in deck B is automatically recorded in the same state as the tape in deck A
2 | x 3 5 | 2 |
1 Press TAPE A/B.
2 Press Z and insert a recorded tape in deck A and a recordable tape in deck B.
With the side you want to play/record facing forward
3 Press CD SYNC HI-DUB.
Deck B stands by for recording.
18