C L E A N I N G A N D C A R E
Oven Light
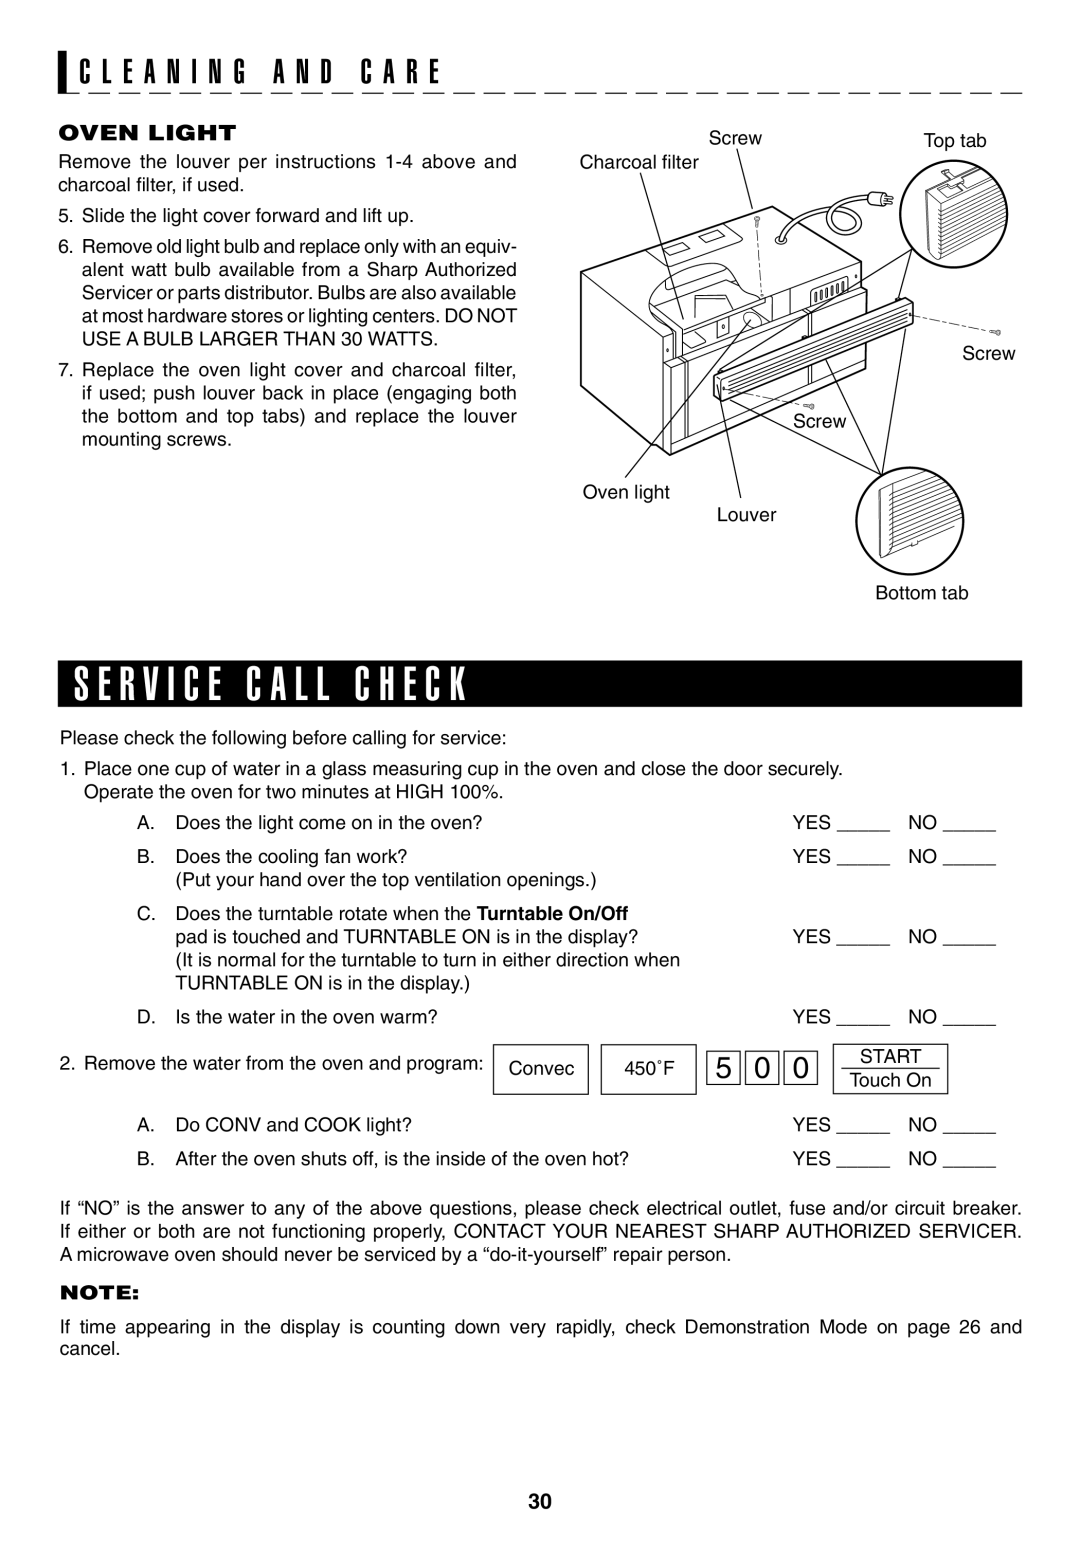
Remove the louver per instructions
5.Slide the light cover forward and lift up.
6.Remove old light bulb and replace only with an equiv- alent watt bulb available from a Sharp Authorized Servicer or parts distributor. Bulbs are also available at most hardware stores or lighting centers. DO NOT USE A BULB LARGER THAN 30 WATTS.
7.Replace the oven light cover and charcoal filter, if used; push louver back in place (engaging both the bottom and top tabs) and replace the louver mounting screws.
Screw | Top tab |
Charcoal filter
Screw
Screw
Oven light
Louver
Bottom tab
S E R V I C E C A L L C H E C K
Please check the following before calling for service:
1.Place one cup of water in a glass measuring cup in the oven and close the door securely. Operate the oven for two minutes at HIGH 100%.
A. Does the light come on in the oven? | YES _____ | NO _____ |
B. Does the cooling fan work? | YES _____ | NO _____ |
(Put your hand over the top ventilation openings.) |
|
|
C. Does the turntable rotate when the Turntable On/Off |
|
|
pad is touched and TURNTABLE ON is in the display? | YES _____ | NO _____ |
(It is normal for the turntable to turn in either direction when |
|
|
TURNTABLE ON is in the display.) |
|
|
D.Is the water in the oven warm?
2.Remove the water from the oven and program:
Convec
|
|
| YES _____ NO _____ | ||||
|
|
|
|
|
|
|
|
450˚F | 5 | 0 | 0 |
| START |
|
|
| Touch On |
| |||||
|
|
|
|
|
| ||
|
|
|
|
|
|
|
|
A. | Do CONV and COOK light? | YES _____ | NO _____ |
B. | After the oven shuts off, is the inside of the oven hot? | YES _____ | NO _____ |
If “NO” is the answer to any of the above questions, please check electrical outlet, fuse and/or circuit breaker. If either or both are not functioning properly, CONTACT YOUR NEAREST SHARP AUTHORIZED SERVICER. A microwave oven should never be serviced by a
NOTE:
If time appearing in the display is counting down very rapidly, check Demonstration Mode on page 26 and cancel.
30
