3-4. Removing and Installing the Grille
Basically, these models can be installed and wired with- out removing the grille. If access to any internal part is needed, follow the steps as given below.
How to remove the grille
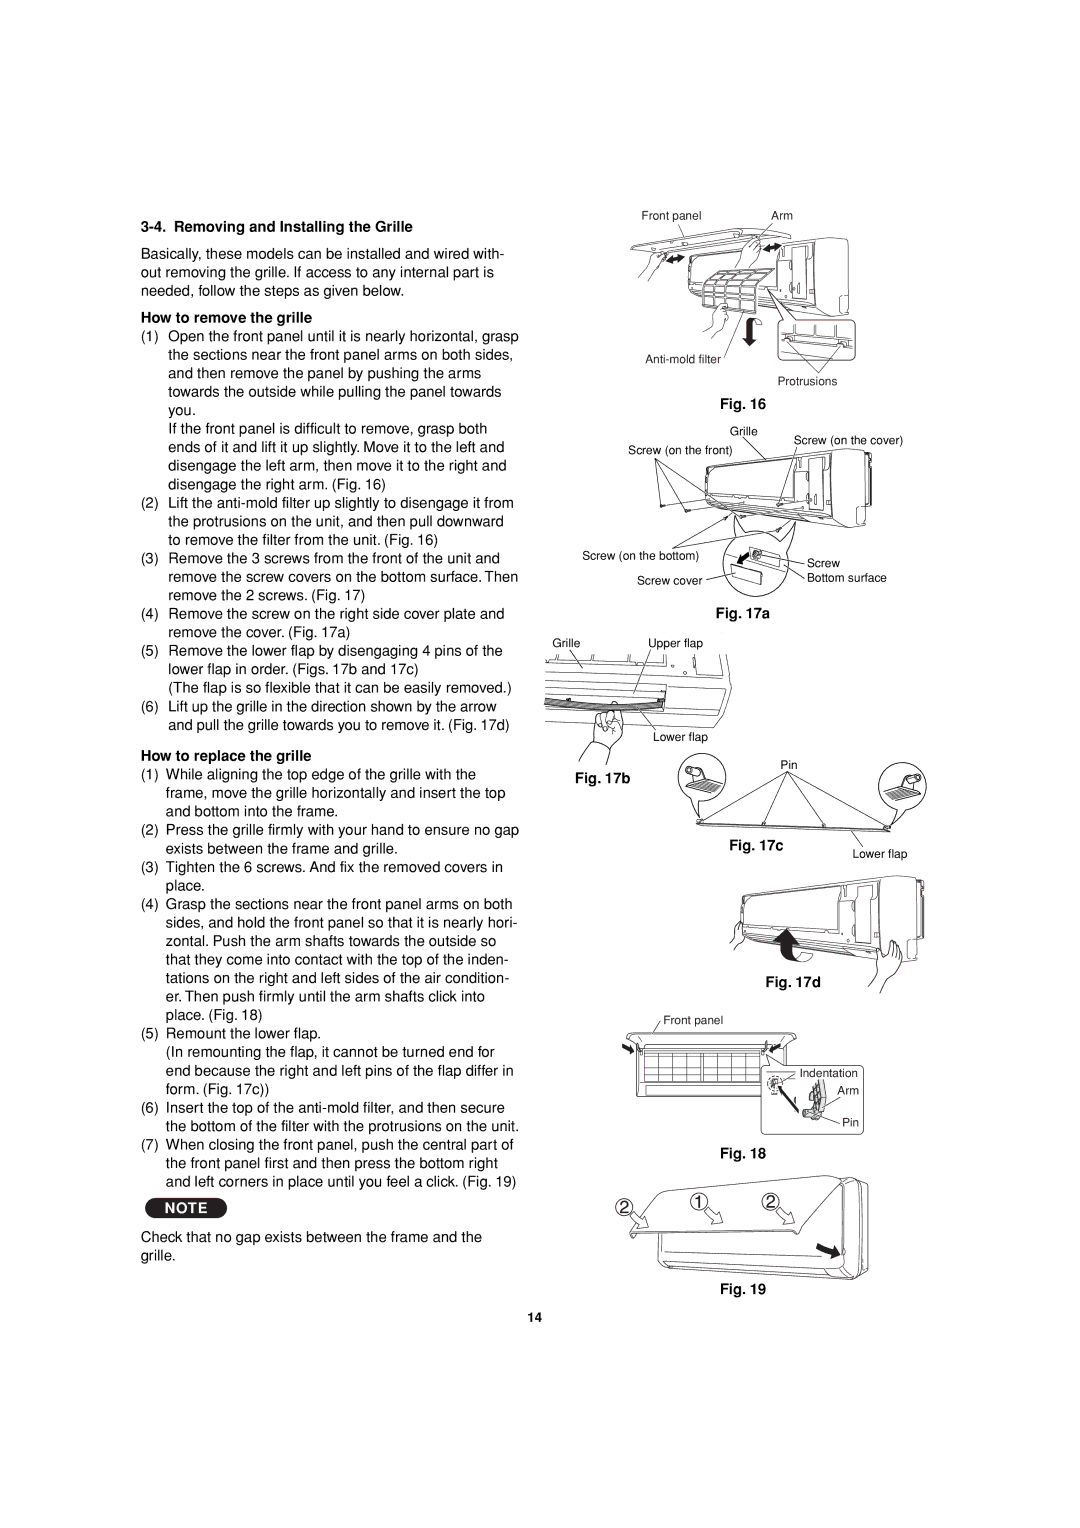
(1)Open the front panel until it is nearly horizontal, grasp the sections near the front panel arms on both sides, and then remove the panel by pushing the arms towards the outside while pulling the panel towards you.
If the front panel is difficult to remove, grasp both ends of it and lift it up slightly. Move it to the left and disengage the left arm, then move it to the right and disengage the right arm. (Fig. 16)
(2)Lift the
(3)Remove the 3 screws from the front of the unit and remove the screw covers on the bottom surface. Then remove the 2 screws. (Fig. 17)
(4)Remove the screw on the right side cover plate and remove the cover. (Fig. 17a)
(5)Remove the lower flap by disengaging 4 pins of the lower flap in order. (Figs. 17b and 17c)
(The flap is so flexible that it can be easily removed.)
(6)Lift up the grille in the direction shown by the arrow and pull the grille towards you to remove it. (Fig. 17d)
How to replace the grille
(1)While aligning the top edge of the grille with the frame, move the grille horizontally and insert the top and bottom into the frame.
(2)Press the grille firmly with your hand to ensure no gap exists between the frame and grille.
(3)Tighten the 6 screws. And fix the removed covers in place.
(4)Grasp the sections near the front panel arms on both sides, and hold the front panel so that it is nearly hori- zontal. Push the arm shafts towards the outside so that they come into contact with the top of the inden- tations on the right and left sides of the air condition- er. Then push firmly until the arm shafts click into place. (Fig. 18)
(5)Remount the lower flap.
(In remounting the flap, it cannot be turned end for end because the right and left pins of the flap differ in form. (Fig. 17c))
(6)Insert the top of the
(7)When closing the front panel, push the central part of the front panel first and then press the bottom right and left corners in place until you feel a click. (Fig. 19)
NOTE
Check that no gap exists between the frame and the grille.
Front panel | Arm |
Protrusions
Fig. 16
Grille
Screw (on the cover)
Screw (on the front)
Screw (on the bottom) | Screw |
| |
Screw cover | Bottom surface |
Fig. 17a
Grille | Upper flap |
Lower flap
Pin
Fig. 17b
Fig. 17c
Lower flap
Fig. 17d
Front panel
![]() Indentation
Indentation
Arm
![]() Pin
Pin
Fig. 18
Fig. 19
14