Precautions
∙Before operating the unit for the first time or after replacing the car battery, press the reset button with a
Pressing the reset button will erase the memorized programme and clear the memory of the CD programme memory function.
Reset button
∙If your car was parked in direct sunlight resulting in a considerable rise in temperature inside the car, allow the unit to cool off before operating it.
∙If no power is being supplied to the unit, check the connections first. If everything is in order, check the fuse.
∙If no sound comes from the speakers of a
If you have any questions or problems concerning your unit that are not covered in this manual, please consult your nearest dealer.
Notes on Cassettes
Cassette care
∙Do not touch the tape surface of a cassette, as any dirt or dust will contaminate the heads.
∙Keep cassettes away from equipment with
∙Do not expose cassettes to direct sunlight, extremely cold temperatures or moisture.
∙When the tape is played back for a long period, the cassette shell may become warm because of the
Cassettes longer than 90 minutes
The use of cassettes longer than 90 minutes is not recommended except for long continuous play. The tapes used for these cassettes are very thin and tend to be stretched easily. Frequent playing and stopping of these tapes may cause them to be pulled into the cassette deck mechanism.
Detaching and Attaching the Front Panel
The front panel of this unit can be detached in order to prevent the unit from being stolen.
Detaching the Front Panel
Before detaching the front panel, be sure to press the OFF button first. Then press the RELEASE button to open up the front panel, and detach the panel by pulling it towards you as illustrated.
RELEASE button
Be sure not to drop the panel when detaching it from the unit.
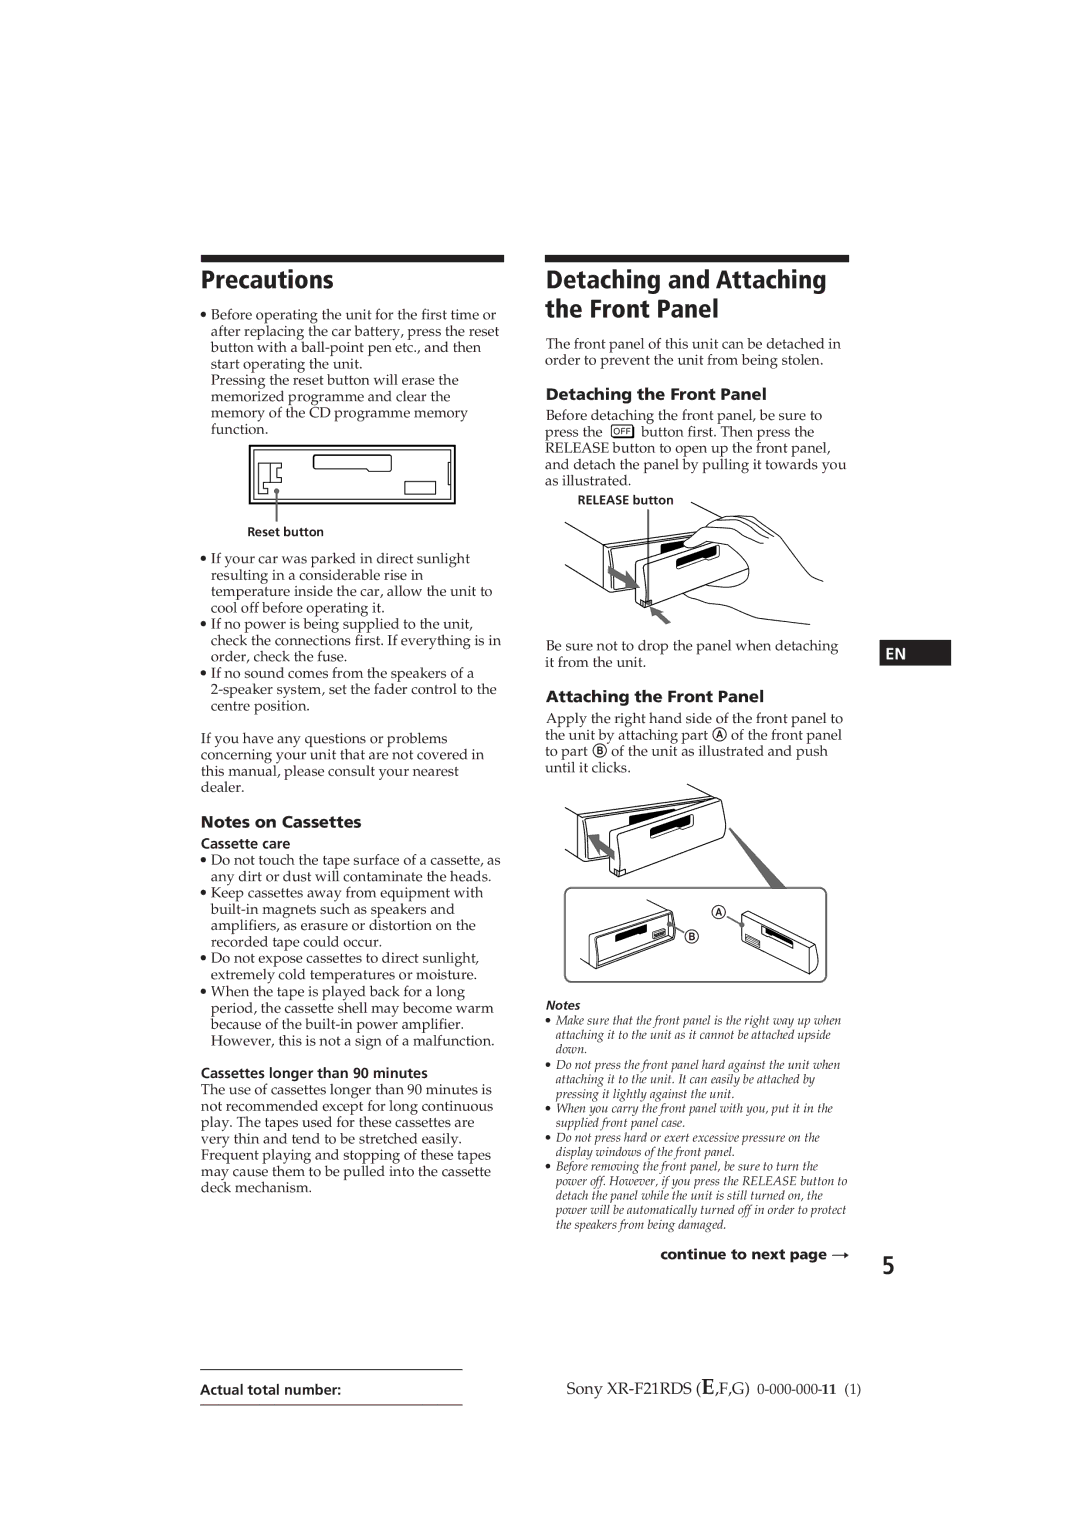
Attaching the Front Panel
Apply the right hand side of the front panel to the unit by attaching part A of the front panel to part B of the unit as illustrated and push until it clicks.
A
![]()
![]()
![]() B
B
Notes
∙Make sure that the front panel is the right way up when attaching it to the unit as it cannot be attached upside down.
∙Do not press the front panel hard against the unit when attaching it to the unit. It can easily be attached by pressing it lightly against the unit.
∙When you carry the front panel with you, put it in the supplied front panel case.
∙Do not press hard or exert excessive pressure on the display windows of the front panel.
∙Before removing the front panel, be sure to turn the power off. However, if you press the RELEASE button to detach the panel while the unit is still turned on, the power will be automatically turned off in order to protect the speakers from being damaged.
continue to next page n
EN
5
Actual total number: | Sony |