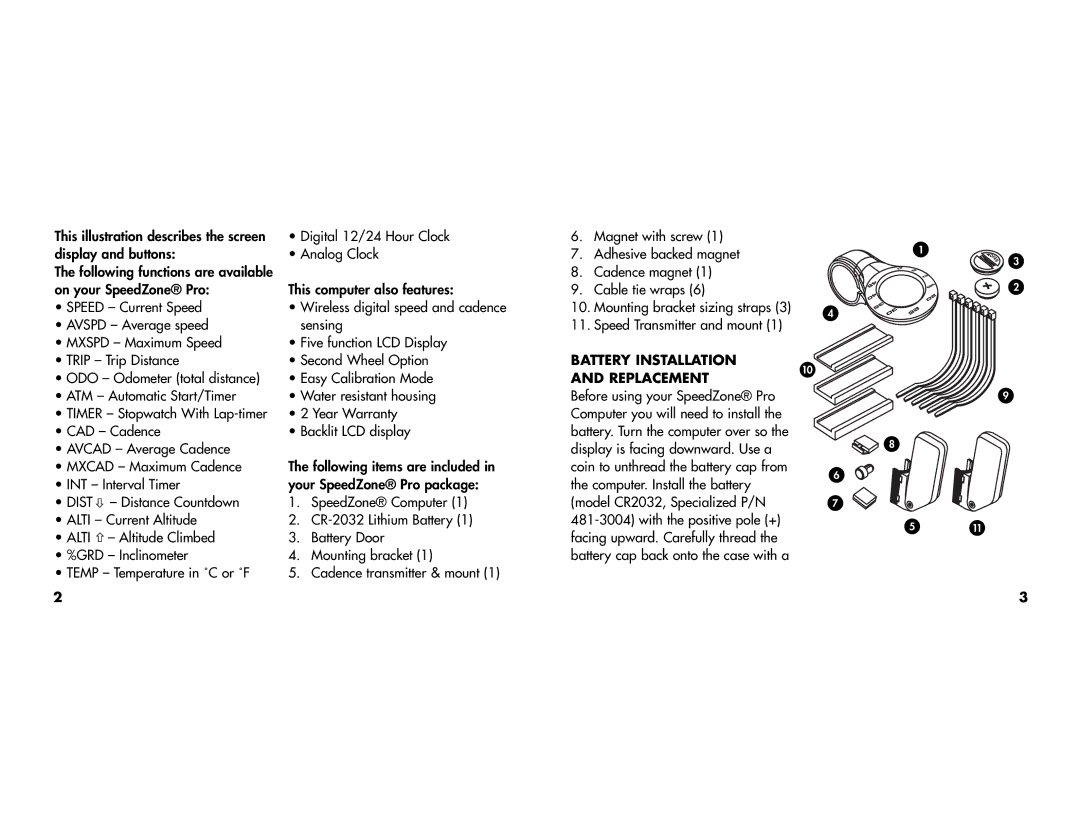
This illustration describes the screen | • Digital 12/24 Hour Clock | 6. | Magnet with screw (1) |
| 1 | |||
display and buttons: | • Analog Clock | 7. | Adhesive backed magnet |
| ||||
|
| |||||||
The following functions are available |
|
| 8. | Cadence magnet (1) |
|
| ||
on your SpeedZone® Pro: | This computer also features: | 9. Cable tie wraps (6) |
|
| ||||
• SPEED – Current Speed | • Wireless digital speed and cadence | 10. Mounting bracket sizing straps (3) | 4 |
| ||||
• AVSPD – Average speed |
| sensing | 11. Speed Transmitter and mount (1) |
| ||||
|
|
| ||||||
• MXSPD – Maximum Speed | • Five function LCD Display |
|
|
|
| |||
• TRIP – Trip Distance | • Second Wheel Option | BATTERY INSTALLATION | 10 |
| ||||
• ODO – Odometer (total distance) | • Easy Calibration Mode | AND REPLACEMENT |
| |||||
|
| |||||||
• ATM – Automatic Start/Timer | • Water resistant housing | Before using your SpeedZone® Pro |
| 9 | ||||
• TIMER – Stopwatch With | • 2 Year Warranty | Computer you will need to install the |
|
| ||||
• CAD – Cadence | • Backlit LCD display | battery. Turn the computer over so the | 8 |
| ||||
• AVCAD – Average Cadence |
|
| display is facing downward. Use a |
| ||||
|
|
|
| |||||
• MXCAD – Maximum Cadence | The following items are included in | coin to unthread the battery cap from | 6 |
| ||||
• INT – Interval Timer | your SpeedZone® Pro package: | the computer. Install the battery |
| |||||
|
| |||||||
• DIST | – Distance Countdown | 1. | SpeedZone® Computer (1) | (model CR2032, Specialized P/N | 7 |
| ||
• ALTI – Current Altitude | 2. | 5 | 11 | |||||
• ALTI | – Altitude Climbed | 3. | Battery Door | facing upward. Carefully thread the | ||||
|
| |||||||
• %GRD – Inclinometer | 4. | Mounting bracket (1) | battery cap back onto the case with a |
|
| |||
• TEMP – Temperature in ˚C or ˚F | 5. | Cadence transmitter & mount (1) |
|
|
|
| ||
3
2
2 | 3 |
