Connecting to Other Devices
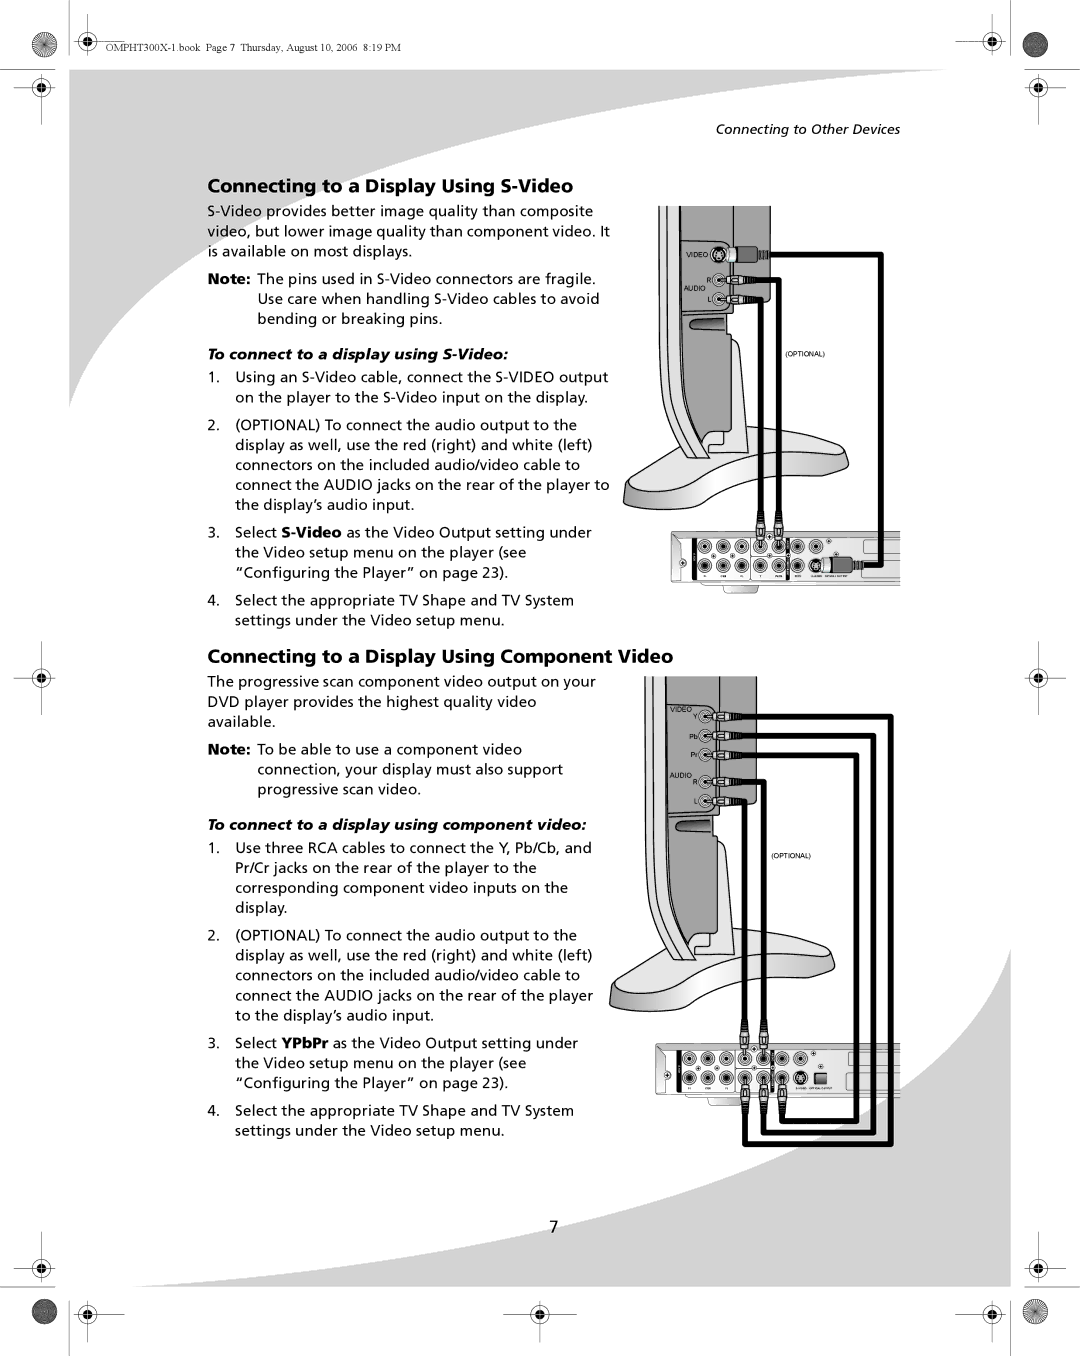
Connecting to a Display Using S-Video
Note: The pins used in
To connect to a display using S-Video:
1.Using an
2.(OPTIONAL) To connect the audio output to the display as well, use the red (right) and white (left) connectors on the included audio/video cable to connect the AUDIO jacks on the rear of the player to the display’s audio input.
3.Select
VIDEO |
|
|
|
|
|
|
|
|
R |
|
|
|
|
|
|
|
|
AUDIO |
|
|
|
|
|
|
|
|
L |
|
|
|
|
|
|
|
|
|
|
|
|
| (OPTIONAL) |
| ||
|
|
|
|
| AUDIO |
|
|
|
5.1CH | CEN | FL | Y | Pb/Cb | COMPONENT | Pr/Cr | OPTICAL OUTPUT | |
SL |
| |||||||
4.Select the appropriate TV Shape and TV System settings under the Video setup menu.
Connecting to a Display Using Component Video
The progressive scan component video output on your DVD player provides the highest quality video available.
Note: To be able to use a component video connection, your display must also support progressive scan video.
To connect to a display using component video:
1.Use three RCA cables to connect the Y, Pb/Cb, and Pr/Cr jacks on the rear of the player to the corresponding component video inputs on the display.
2.(OPTIONAL) To connect the audio output to the display as well, use the red (right) and white (left) connectors on the included audio/video cable to connect the AUDIO jacks on the rear of the player to the display’s audio input.
3.Select YPbPr as the Video Output setting under the Video setup menu on the player (see “Configuring the Player” on page 23).
4.Select the appropriate TV Shape and TV System settings under the Video setup menu.
VIDEO |
|
|
|
|
|
|
|
Y |
|
|
|
|
|
|
|
Pb |
|
|
|
|
|
|
|
Pr |
|
|
|
|
|
|
|
AUDIO |
|
|
|
|
|
|
|
R |
|
|
|
|
|
|
|
L |
|
|
|
|
|
|
|
|
|
|
|
| (OPTIONAL) | ||
|
|
|
|
| AUDIO |
|
|
5.1CH | CEN | FL | Y | Pb/Cb | COMPONENT | Pr/Cr | |
SL |
| ||||||
7
