ASSEMBLY INSTRUCTIONS
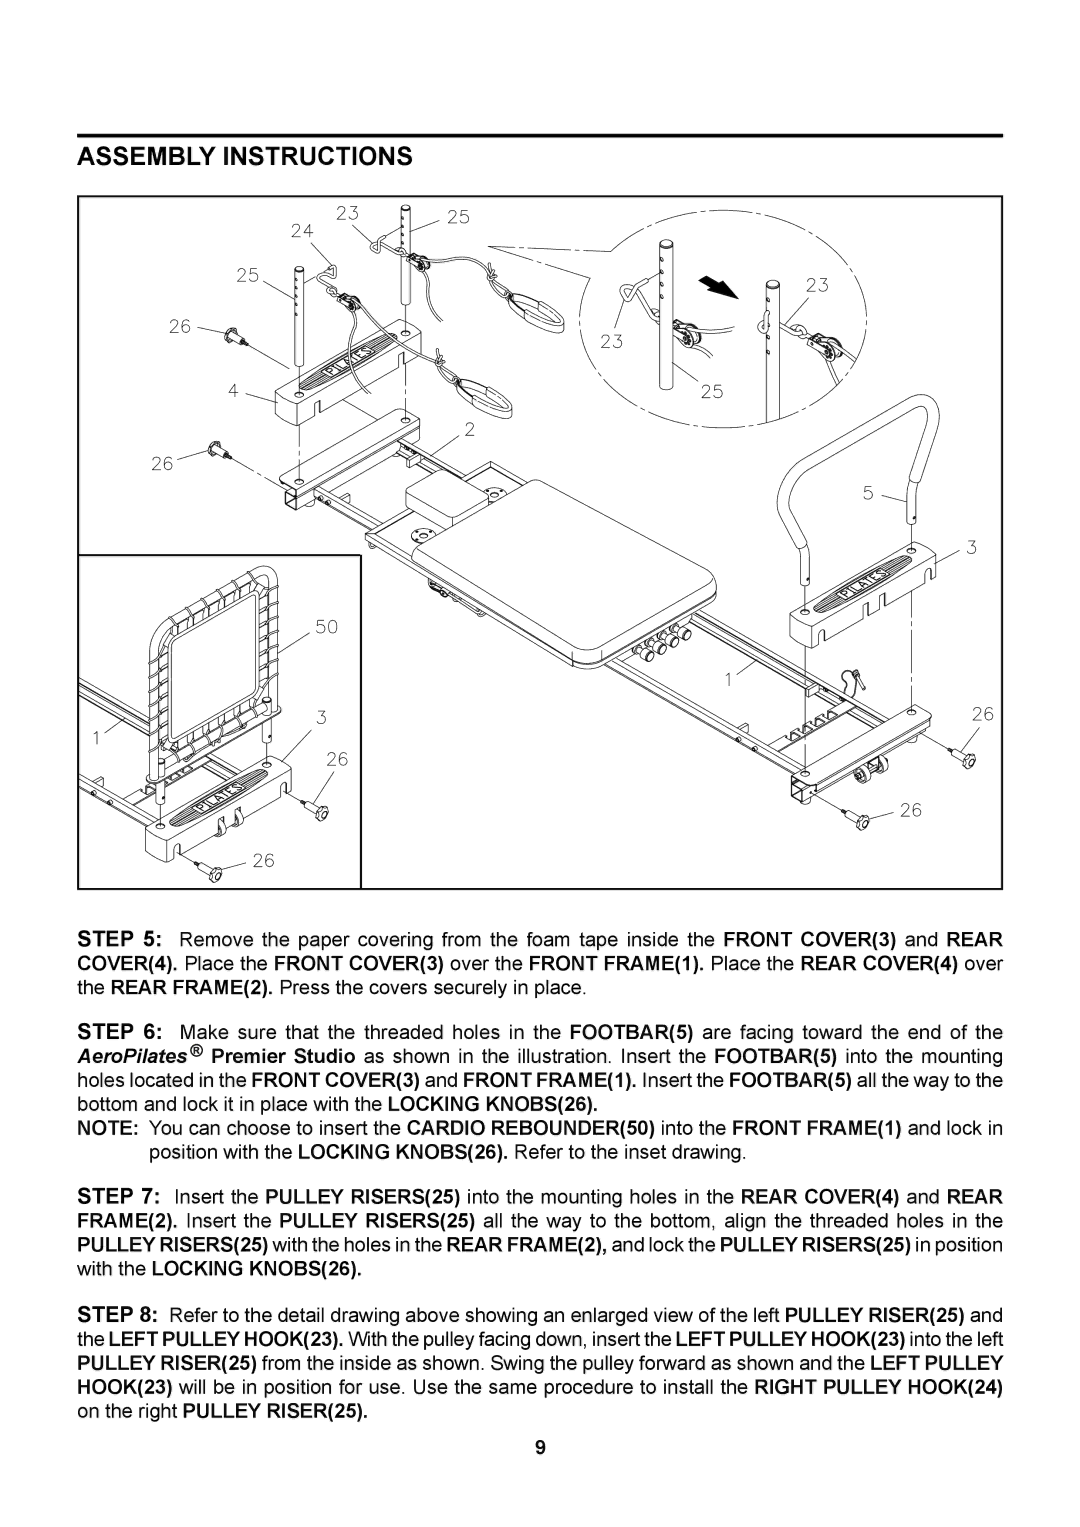
STEP 5: Remove the paper covering from the foam tape inside the FRONT COVER(3) and REAR COVER(4). Place the FRONT COVER(3) over the FRONT FRAME(1). Place the REAR COVER(4) over the REAR FRAME(2). Press the covers securely in place.
STEP 6: Make sure that the threaded holes in the FOOTBAR(5) are facing toward the end of the AeroPilates ![]() Premier Studio as shown in the illustration. Insert the FOOTBAR(5) into the mounting holes located in the FRONT COVER(3) and FRONT FRAME(1). Insert the FOOTBAR(5) all the way to the bottom and lock it in place with the LOCKING KNOBS(26).
Premier Studio as shown in the illustration. Insert the FOOTBAR(5) into the mounting holes located in the FRONT COVER(3) and FRONT FRAME(1). Insert the FOOTBAR(5) all the way to the bottom and lock it in place with the LOCKING KNOBS(26).
NOTE: You can choose to insert the CARDIO REBOUNDER(50) into the FRONT FRAME(1) and lock in position with the LOCKING KNOBS(26). Refer to the inset drawing.
STEP 7: Insert the PULLEY RISERS(25) into the mounting holes in the REAR COVER(4) and REAR FRAME(2). Insert the PULLEY RISERS(25) all the way to the bottom, align the threaded holes in the PULLEY RISERS(25) with the holes in the REAR FRAME(2), and lock the PULLEY RISERS(25) in position with the LOCKING KNOBS(26).
STEP 8: Refer to the detail drawing above showing an enlarged view of the left PULLEY RISER(25) and the LEFT PULLEY HOOK(23). With the pulley facing down, insert the LEFT PULLEY HOOK(23) into the left PULLEY RISER(25) from the inside as shown. Swing the pulley forward as shown and the LEFT PULLEY HOOK(23) will be in position for use. Use the same procedure to install the RIGHT PULLEY HOOK(24) on the right PULLEY RISER(25).
9