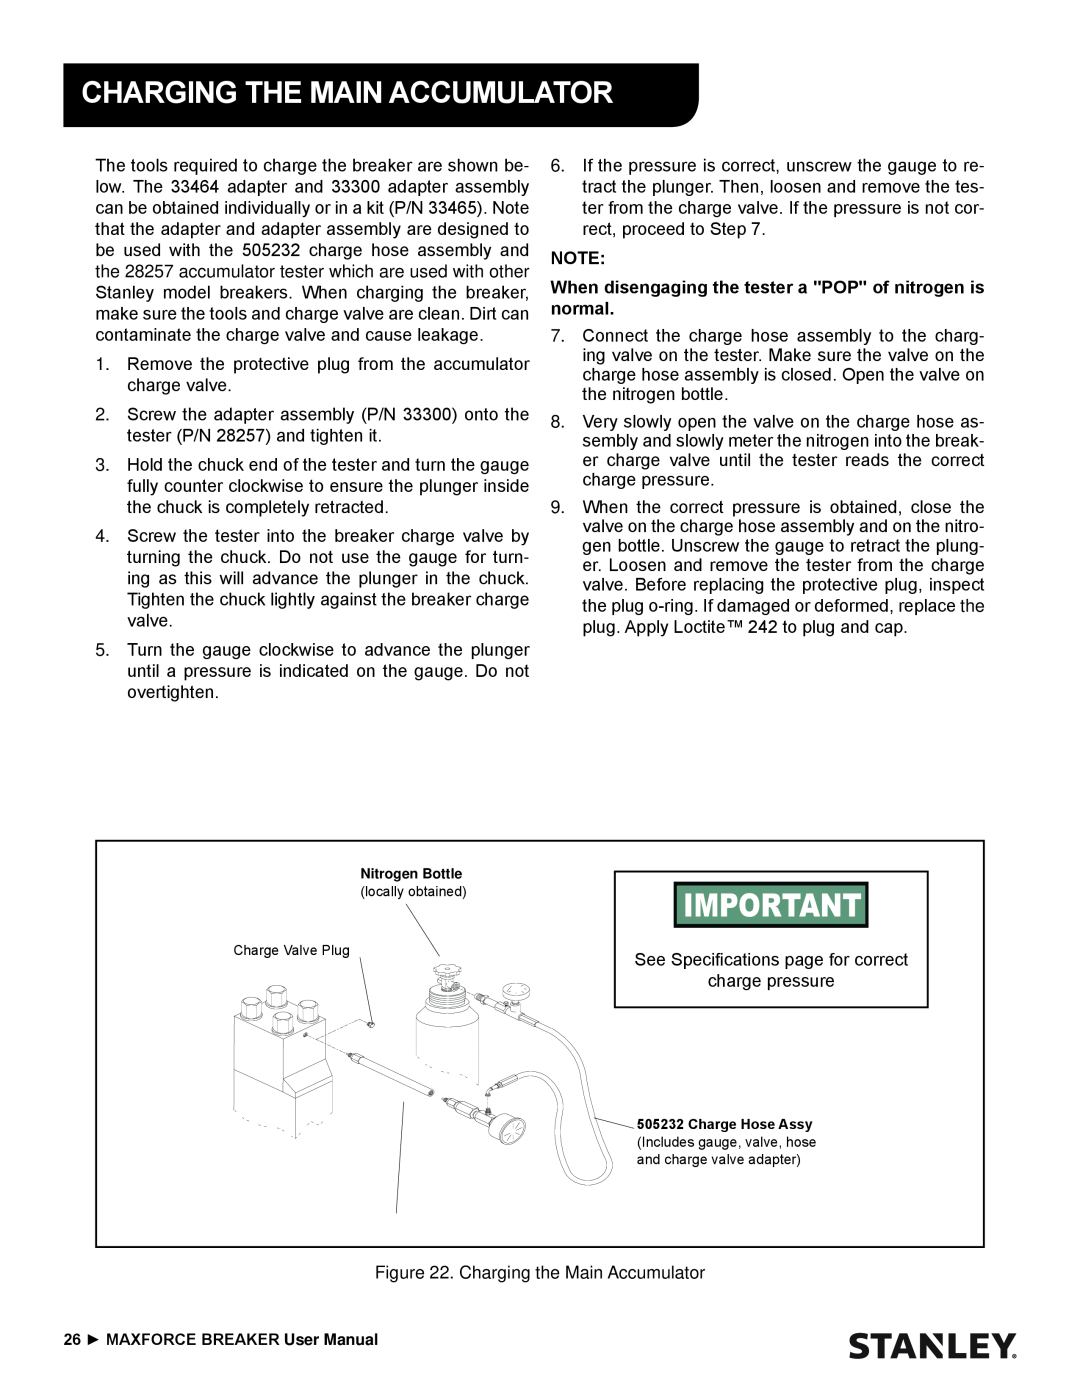
CHARGING THE MAIN ACCUMULATOR
The tools required to charge the breaker are shown be- low. The 33464 adapter and 33300 adapter assembly can be obtained individually or in a kit (P/N 33465). Note that the adapter and adapter assembly are designed to be used with the 505232 charge hose assembly and
the 28257 accumulator tester which are used with other
Stanley model breakers. When charging the breaker, make sure the tools and charge valve are clean. Dirt can contaminate the charge valve and cause leakage.
1.Remove the protective plug from the accumulator charge valve.
2.Screw the adapter assembly (P/N 33300) onto the tester (P/N 28257) and tighten it.
3.Hold the chuck end of the tester and turn the gauge fully counter clockwise to ensure the plunger inside the chuck is completely retracted.
4.Screw the tester into the breaker charge valve by turning the chuck. Do not use the gauge for turn- ing as this will advance the plunger in the chuck. Tighten the chuck lightly against the breaker charge valve.
5.Turn the gauge clockwise to advance the plunger until a pressure is indicated on the gauge. Do not overtighten.
6.If the pressure is correct, unscrew the gauge to re- tract the plunger. Then, loosen and remove the tes- ter from the charge valve. If the pressure is not cor- rect, proceed to Step 7.
NOTE:
When disengaging the tester a "POP" of nitrogen is normal.
7.Connect the charge hose assembly to the charg- ing valve on the tester. Make sure the valve on the charge hose assembly is closed. Open the valve on the nitrogen bottle.
8.Very slowly open the valve on the charge hose as- sembly and slowly meter the nitrogen into the break- er charge valve until the tester reads the correct charge pressure.
9.When the correct pressure is obtained, close the valve on the charge hose assembly and on the nitro- gen bottle. Unscrew the gauge to retract the plung- er. Loosen and remove the tester from the charge valve. Before replacing the protective plug, inspect the plug
Nitrogen Bottle
(locally obtained)
Charge Valve Plug
IMPORTANT
See Specifications page for correct
charge pressure
![]() 505232 Charge Hose Assy (Includes gauge, valve, hose and charge valve adapter)
505232 Charge Hose Assy (Includes gauge, valve, hose and charge valve adapter)
Figure 22. Charging the Main Accumulator
26 ► MAXFORCE BREAKER User Manual