Installing the serial interface unit
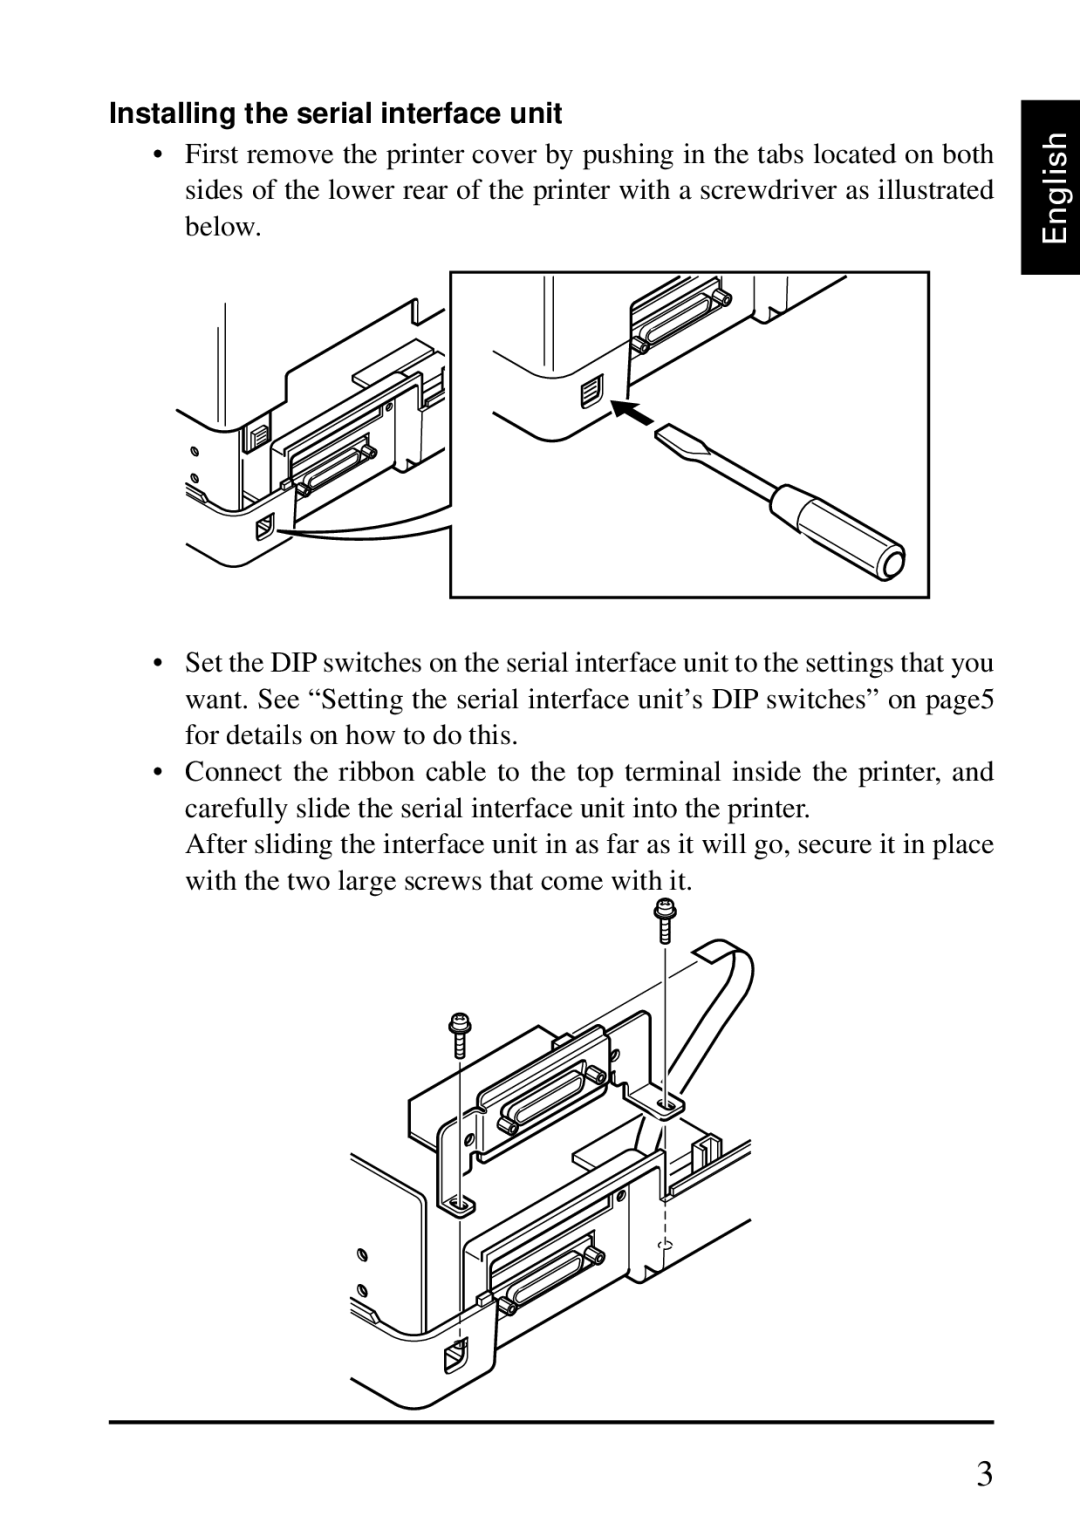
•First remove the printer cover by pushing in the tabs located on both sides of the lower rear of the printer with a screwdriver as illustrated below.
•Set the DIP switches on the serial interface unit to the settings that you want. See “Setting the serial interface unit’s DIP switches” on page5 for details on how to do this.
•Connect the ribbon cable to the top terminal inside the printer, and carefully slide the serial interface unit into the printer.
After sliding the interface unit in as far as it will go, secure it in place with the two large screws that come with it.
English
3