Stewart Filmscreen Corp C Installing the low-voltage 3-button switch option

Models: C

1 20
Download 20 pages 51.56 Kb
Page 13
Image 13

Installing the low-voltage 3-button switch option

The optional Stewart Filmscreen low-voltage control allows the use of low- voltage wire to connect to the supplied 3-position 24V momentary wall switch.

Preparing the connection

Before making the electrical connections, you need:

‹An available 120V AC constant power source

‹A 4-conductor switch hook-up cable (4-conductor bell wire or category 5 cable is typically used for long runs)

Making the connection

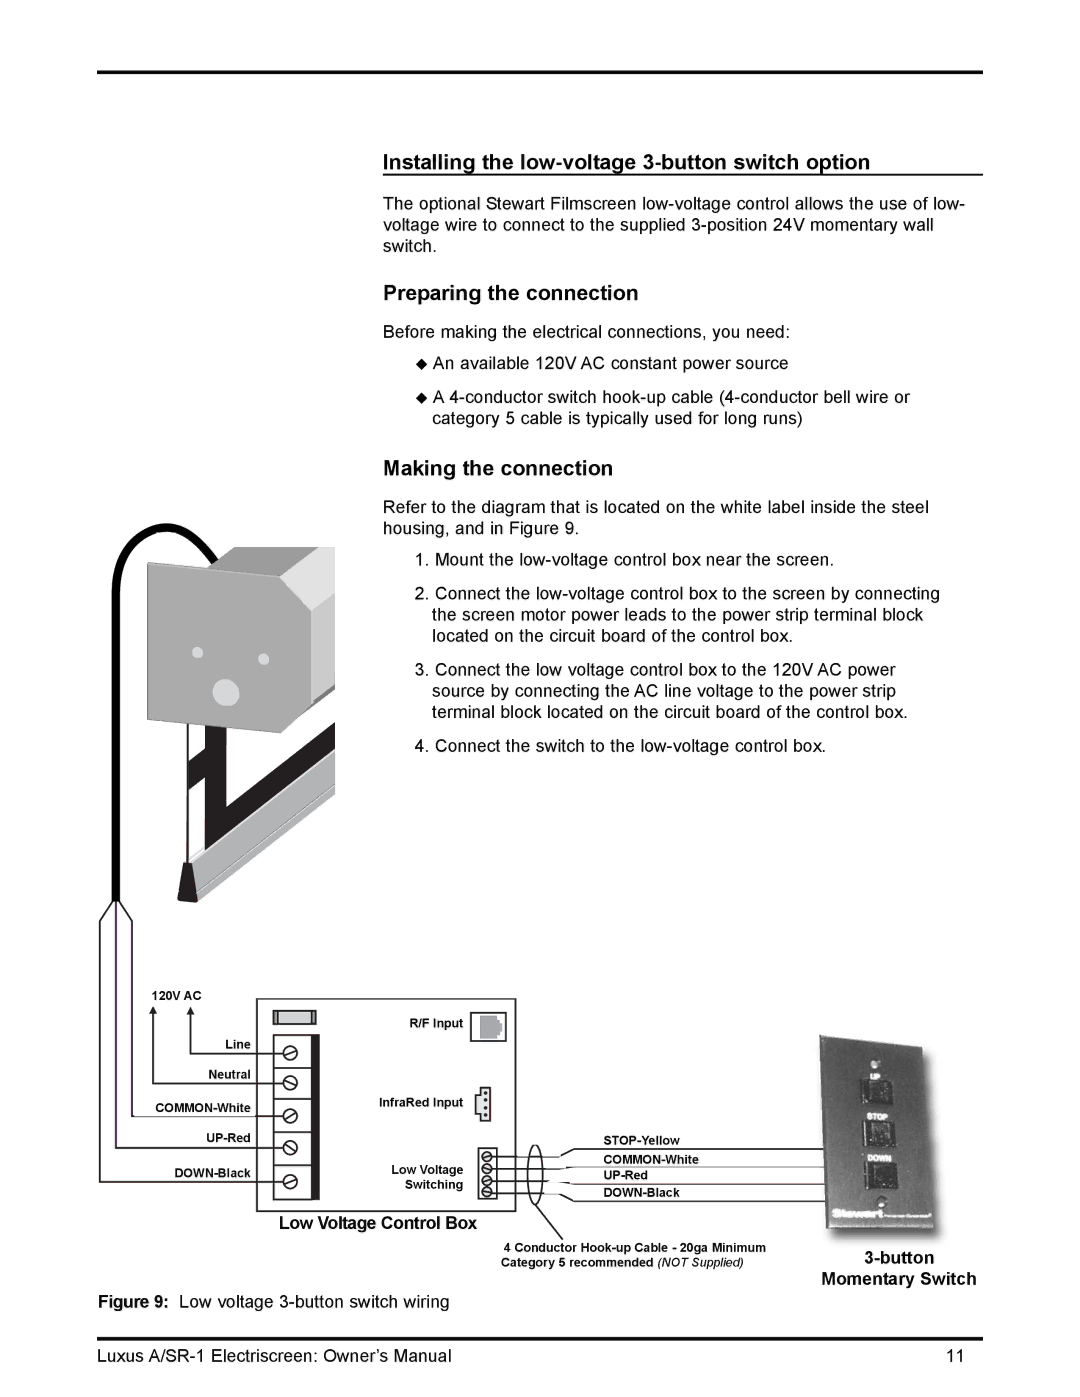
Refer to the diagram that is located on the white label inside the steel housing, and in Figure 9.

1.Mount the low-voltage control box near the screen.

2.Connect the low-voltage control box to the screen by connecting the screen motor power leads to the power strip terminal block located on the circuit board of the control box.

3.Connect the low voltage control box to the 120V AC power source by connecting the AC line voltage to the power strip terminal block located on the circuit board of the control box.

4.Connect the switch to the low-voltage control box.

120V AC

Line

Neutral

COMMON-White

UP-Red

DOWN-Black

R/F Input

InfraRed Input

Low Voltage Switching

STOP-Yellow

COMMON-White

UP-Red

DOWN-Black

Low Voltage Control Box

4 Conductor Hook-up Cable - 20ga Minimum Category 5 recommended (NOT Supplied)

Figure 9: Low voltage 3-button switch wiring

3-button

Momentary Switch

Luxus A/SR-1 Electriscreen: Owner’s Manual

11

Page 13
Image 13
Stewart Filmscreen Corp C Installing the low-voltage 3-button switch option, Low voltage 3-button switch wiring