O V E R L AY
P A N E L S
Refer to the Overlay Panel Specifications on pages
OVERLAY PANEL I N S TA L L AT I O N
OVERLAY P A N E L S
If your customer has chosen an overlay design application, make sure that the panels you are about to install match dimensions listed in the Overlay Panel Specifications on pages
IMPORTANT NOTE: The size of the overlay panel is critical. It must fit over the door frame.
Overlay models are shipped without handle hardware. The cabinet manufacturer or designer will provide handle hardware at the job site to match the overall decorating scheme.
To install overlay panels, first remove the magnet backed trim molding using a piece of tape to pull it away from the frame and expose the screws. The molding will bend at the center so that you can remove it. Remove the frame by removing the four screws. The door channel is now ready to accept the overlay panel assembly.
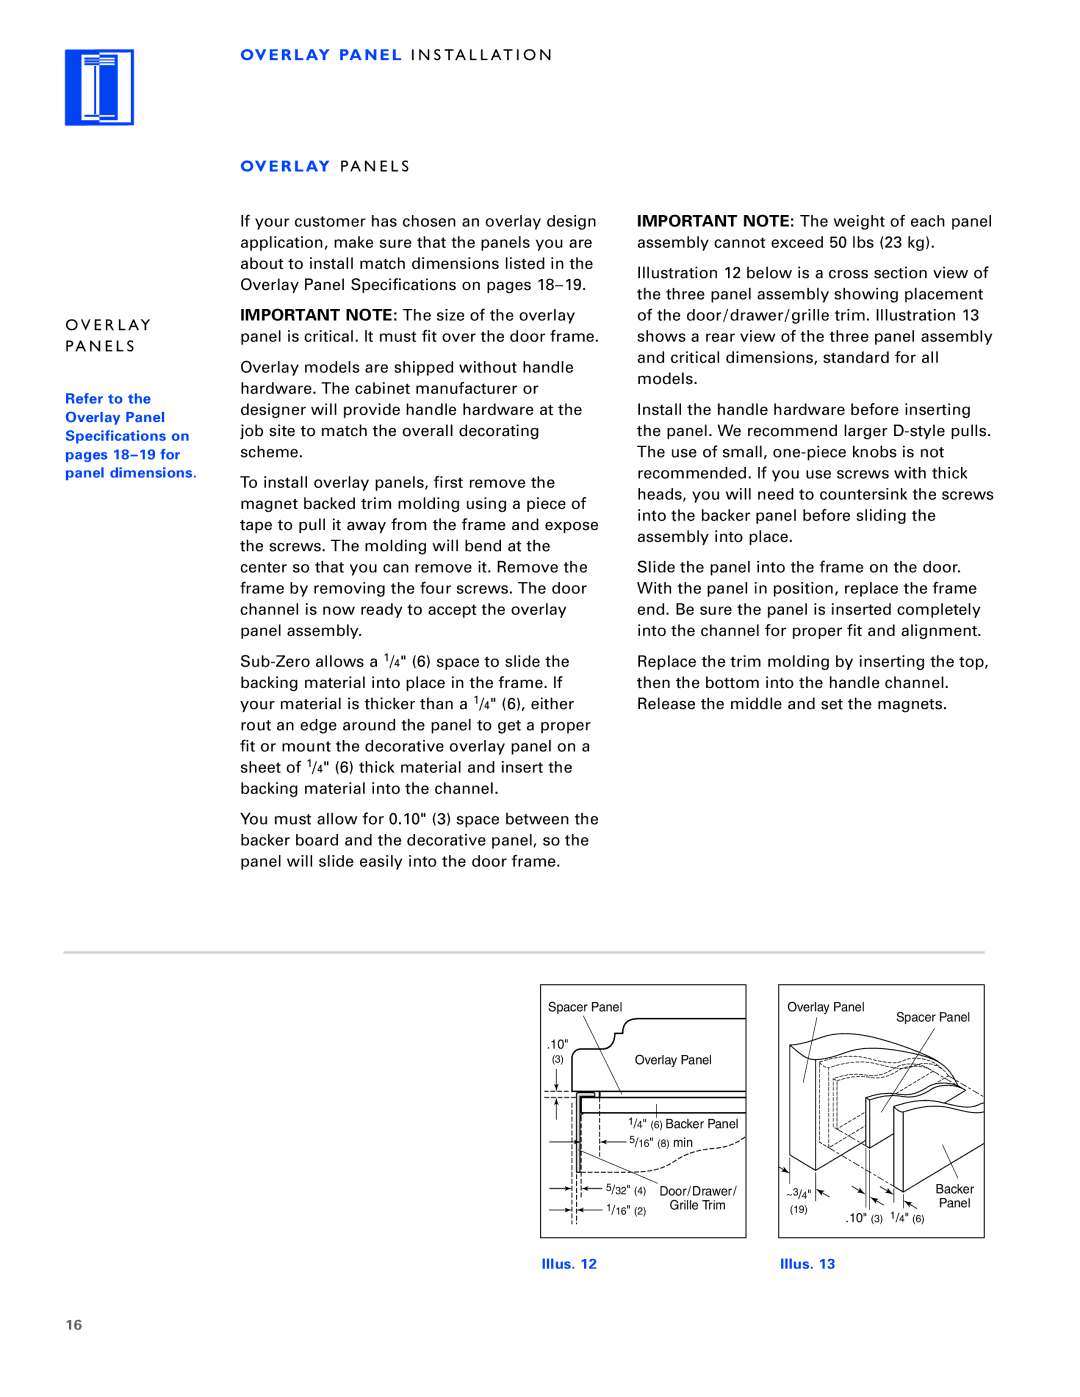
You must allow for 0.10" (3) space between the backer board and the decorative panel, so the panel will slide easily into the door frame.
IMPORTANT NOTE: The weight of each panel assembly cannot exceed 50 lbs (23 kg).
Illustration 12 below is a cross section view of the three panel assembly showing placement of the door/drawer/grille trim. Illustration 13 shows a rear view of the three panel assembly and critical dimensions, standard for all models.
Install the handle hardware before inserting the panel. We recommend larger
Slide the panel into the frame on the door. With the panel in position, replace the frame end. Be sure the panel is inserted completely into the channel for proper fit and alignment.
Replace the trim molding by inserting the top, then the bottom into the handle channel. Release the middle and set the magnets.
Spacer Panel |
| |
.10" |
|
|
(3) | Overlay Panel | |
| 1/4" (6) Backer Panel | |
| 5/16" (8) min | |
| 5/32" (4) | Door/Drawer/ |
| 1/16" (2) | Grille Trim |
Overlay Panel | Spacer Panel | |
| ||
~3/4" | Backer | |
(19) | Panel | |
1/4" (6) | ||
.10" (3) |
Illus. 12 | Illus. 13 |
16
