Now that you have powered up the DVR and properly connected to a TV or monitor you are ready to begin using and customizing the DVR for your specific needs. The DVR will automatically begin recording once it has been powered on and initialized. Initializing the DVR is the normal start up process and can take a few moments.
Using the Mouse
•The included USB mouse makes using the CV501 - 16CH simple and efficient. Make sure that the mouse is connected to the front right USB port before powering on the DVR
•All functions of the mouse are applicable to this DVR, including using the wheel and right and left clicking
Screen Viewing
By double clicking on one the of the 16 cameras, the viewing mode will switch to full screen mode. When in full screen mode, scrolling the mouse wheel up or down will move you from one camera to the next.
POP UP MENU BAR
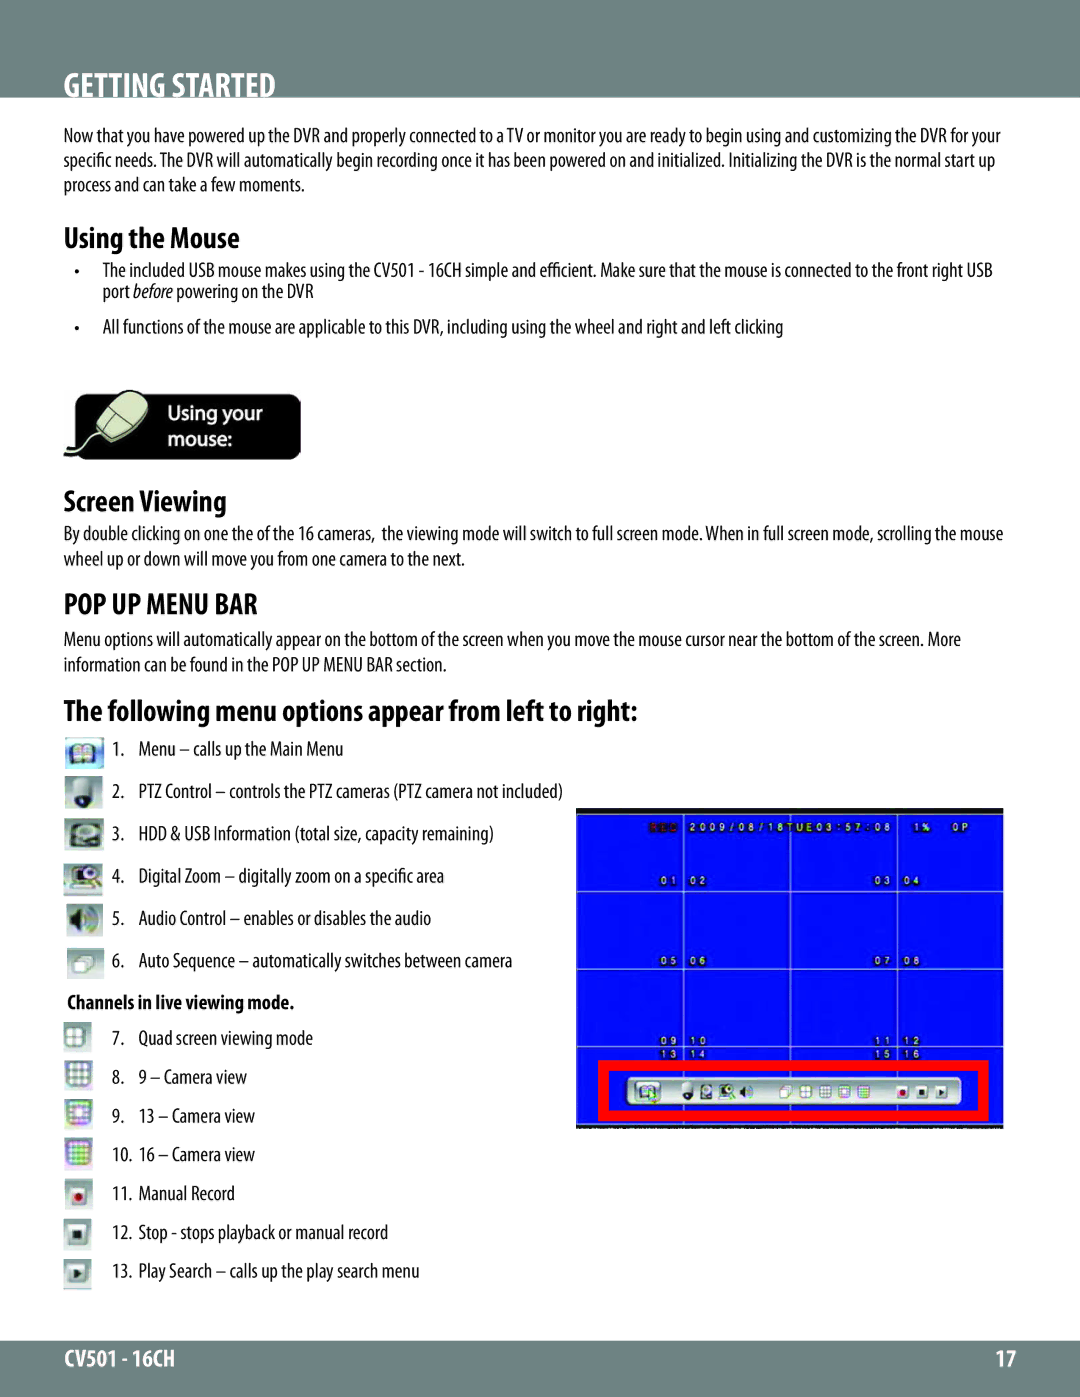
Menu options will automatically appear on the bottom of the screen when you move the mouse cursor near the bottom of the screen. More information can be found in the POP UP MENU BAR section.
The following menu options appear from left to right:
![]() 1. Menu – calls up the Main Menu
1. Menu – calls up the Main Menu
2. PTZ Control – controls the PTZ cameras (PTZ camera not included)
![]() 3. HDD & USB Information (total size, capacity remaining)
3. HDD & USB Information (total size, capacity remaining)
4. Digital Zoom – digitally zoom on a specific area
5. Audio Control – enables or disables the audio
![]() 6. Auto Sequence – automatically switches between camera
6. Auto Sequence – automatically switches between camera
Channels in live viewing mode.
7. Quad screen viewing mode
8. 9 – Camera view
9. 13 – Camera view
10. 16 – Camera view
11. Manual Record
12. Stop - stops playback or manual record
13. Play Search – calls up the play search menu
CV501 - 16CH | 17 |
|
|