SUPPLIED ACCESSORIES
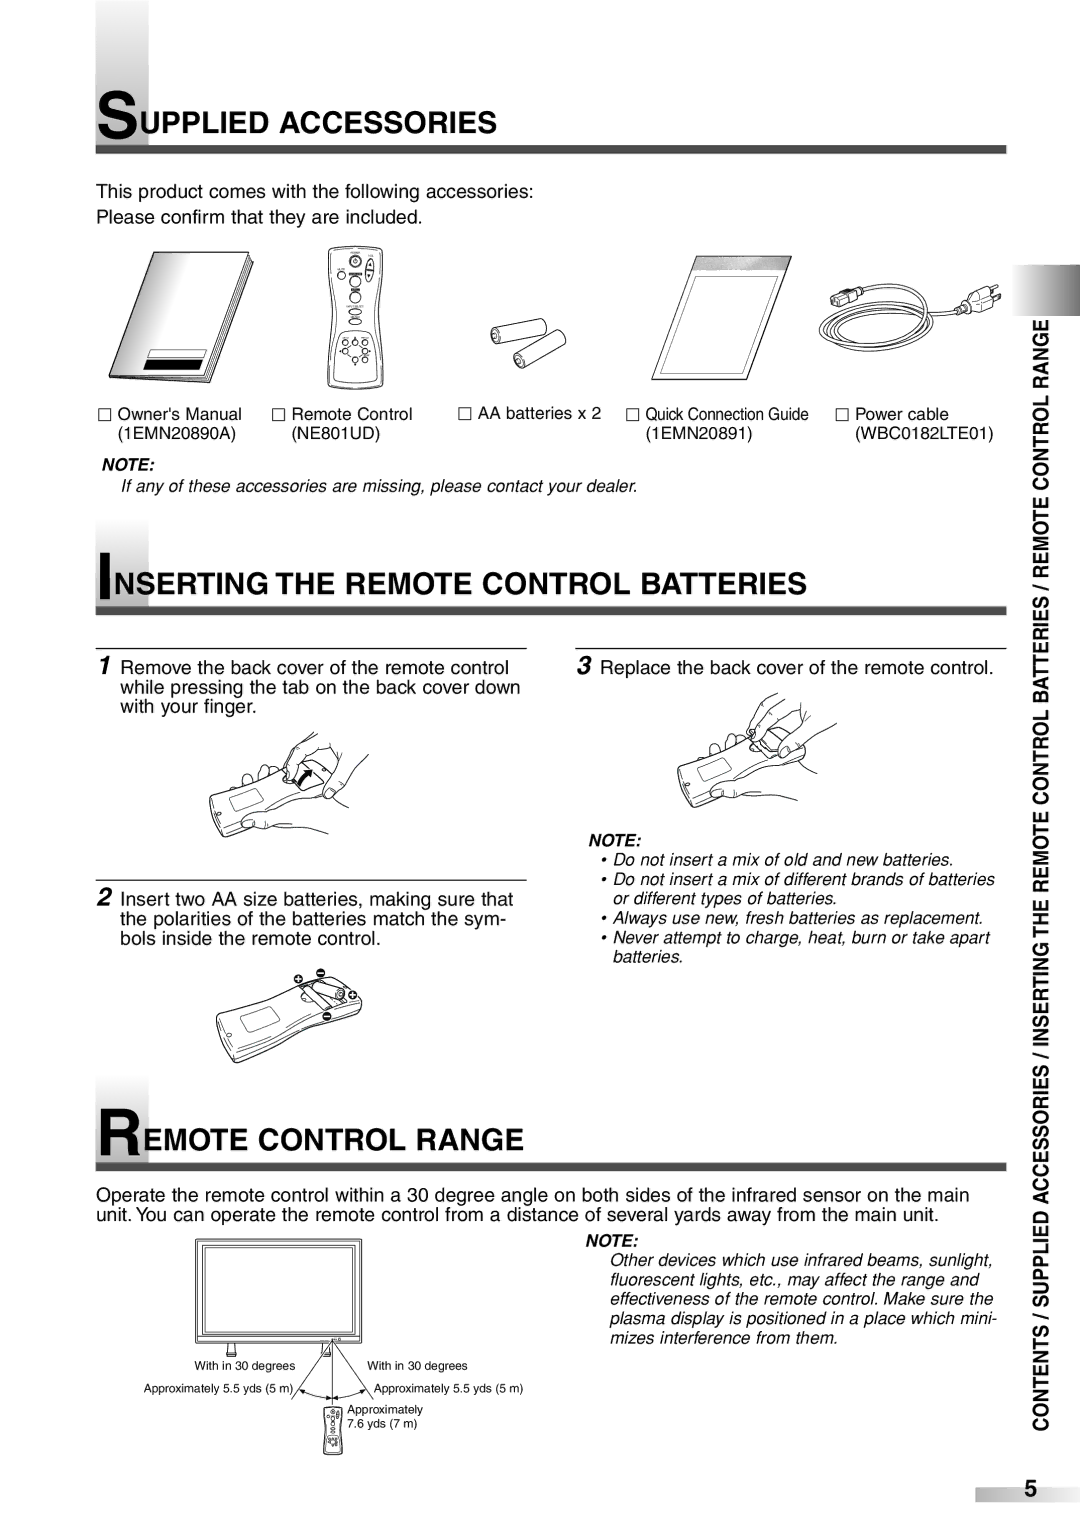
This product comes with the following accessories:
Please confirm that they are included.
POWER
VOL
MUTE
SCREEN MODE
STILL
INPUT SELECT
DISPLAY
P Owner's Manual | P Remote Control | P AA batteries x 2 P Quick Connection Guide | P Power cable |
(1EMN20890A) | (NE801UD) | (1EMN20891) | (WBC0182LTE01) |
NOTE:
If any of these accessories are missing, please contact your dealer.
INSERTING THE REMOTE CONTROL BATTERIES
1 Remove the back cover of the remote control | 3 Replace the back cover of the remote control. |
while pressing the tab on the back cover down |
|
with your finger. |
|
| NOTE: | |
| • Do not insert a mix of old and new batteries. | |
| • Do not insert a mix of different brands of batteries | |
2 Insert two AA size batteries, making sure that | ||
or different types of batteries. | ||
the polarities of the batteries match the sym- | • Always use new, fresh batteries as replacement. | |
bols inside the remote control. | • Never attempt to charge, heat, burn or take apart | |
| batteries. |
REMOTE CONTROL RANGE
Operate the remote control within a 30 degree angle on both sides of the infrared sensor on the main unit. You can operate the remote control from a distance of several yards away from the main unit.
NOTE:
Other devices which use infrared beams, sunlight, fluorescent lights, etc., may affect the range and effectiveness of the remote control. Make sure the plasma display is positioned in a place which mini- mizes interference from them.
With in 30 degrees | With in 30 degrees |
Approximately 5.5 yds (5 m) | Approximately 5.5 yds (5 m) |
Approximately 7.6 yds (7 m)
CONTENTS / SUPPLIED ACCESSORIES / INSERTING THE REMOTE CONTROL BATTERIES / REMOTE CONTROL RANGE
5
