Changing the Setup menu VCR functions Others Español
Supplied Accessory
Recordable disc
Editing
Number inside the globe refers to region of the world
IDVD+R/+RW discs can be played back only on this unit
After you have completed connections
Functions Attributes
Select any blank line with K / L and press Enter
After all recordings, finalize your disc
Hints for DVD Recording
Play Back DVD-R or DVD-RW
Laser Safety
Precautions
Before you start
Make your contribution to the environment
Before you
Precautions cont’d
Avoid the Hazards of Electrical Shock and Fire
Installation Location
Moisture Condensation Warning
About Copyright
Maintenance
With an AM radio
Dolby Digital Recording
Table of contents
Recording
Features
Editing
Compatibility
Rear Panel
Front Panel
Functional overview cont’d
Remote Control
Using a remote control
Installing batteries in the remote control
VCR / DVD recorder switching
Either side of the center approx feet 5m within
Setup menus
Display menu
DVD mode First DVD
Front Panel Display Guide
Display message
Functions Others Español
Connections
Plug in the AC power cord of this unit
Connection to a TV
Audio OUT Video OUT
Select Yes using / B , then press Enter
Select on using K / L , then press Enter
Connection to a TV cont’d
Connection to a cable box or satellite box
Connection to an Audio System
Audio OUT
Digital Audio OUT
Easy DVD recording
Getting started
Instructions continue on the next page. EN
Before you start
Select Record Recording Desired On DVD Speed Channel Disc
Easy DVD recording cont’d
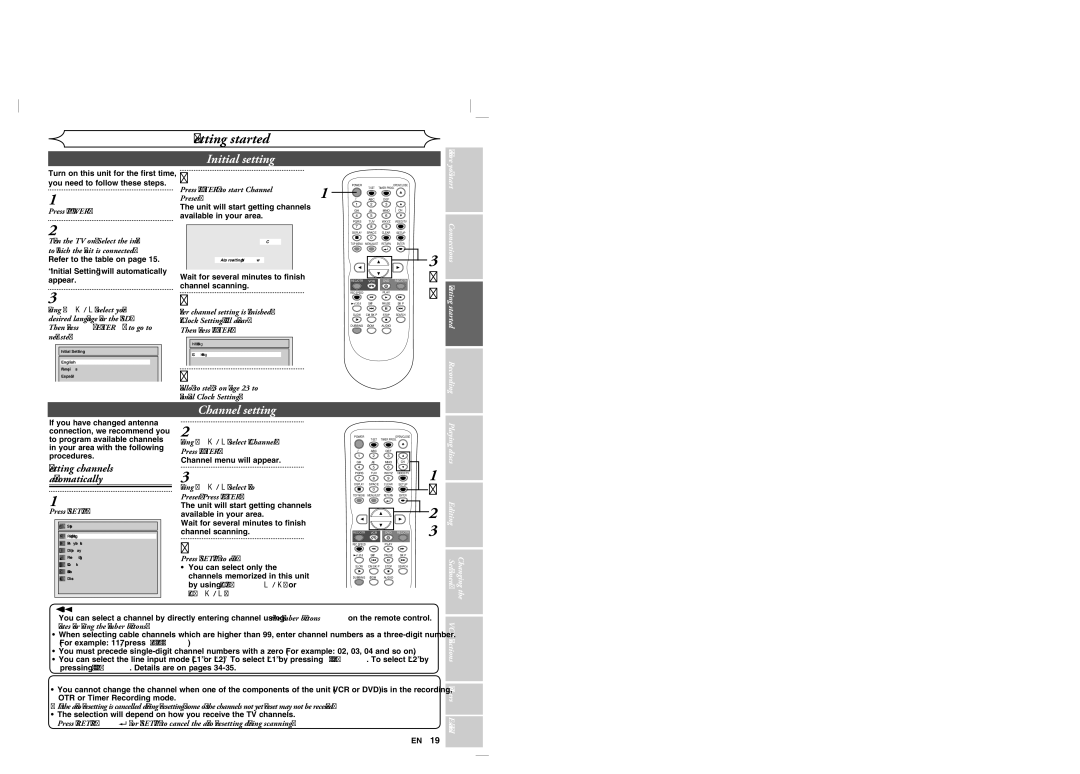
Initial setting
Channel setting
Getting channels automatically
Press Setup Using K / L, select Channel. Press Enter
Channel setting cont’d
Using K / L, select Manual Preset. Press Enter
Adding / deleting channels
Using K / L, select Stereo or SAP. Press Enter
Using K / L, select TV Audio Select. Press Enter
Selecting the TV stereo or SAP
SAP Secondary Audio Program
Auto Clock Setting
Setting the clock
Press Setup Using K / L, select Clock. Press Enter
Press Setup to exit Press Power to turn off the unit
Manual Clock Setting
Setting the clock cont’d
Changing the Setup menu
Playing discs
Using K / L, select Daylight Saving Time. Press Enter
Setting the Daylight Saving Time
Using K / L, select TV Aspect. Press Enter
Selecting the TV aspect ratio
Information on DVD recording
Recording
Information
Recordable disc
Restrictions on recording
Information on DVD recording cont’d
Making discs playable on other DVD player Finalize
Information on copy control
Choosing the recording format of a blank disc
Formatting a disc
Setting for Auto Chapter
Formatting a disc cont’d
Reformatting a disc
Disc tray guide
Basic recording
One-touch Timer Recording
First DVD Turn on the unit and load a recordable disc
Make sure that the TV input is set on the unit
Timer Recording
Timer Recording cont’d
Hints for Timer Recording
Priority of overlapped settings
Changing the Setup menu VCR
Connection to an external source
Settings for an external source
Setting a disc to protect
Settings for an external source cont’d
Changing the Editing Setup menu VCR functions
Recording from an external source
Finalizing the discs
Using K / L, select Finalize. Press Enter
DVD-RW only
36 EN
Using K / L, select ON. Press Enter
Press Setup Using K / L, select Recording. Press Enter
Finalizing the discs cont’d
Auto finalize
Make sure
Dubbing Mode
Discs
Dubbing Mode cont’d
Information on DVD playback
Playing discs
Playback
Basic playback
Menu / List
Start Connections Getting started Recording Playing discs
Basic playback cont’d
Playing MP3 / WMA disc
Press Play B to start play- back
Playing discs using the Disc menu
Playing back discs using the Title menu
Pause
Resume playback
Special playback
Skipping TV commercials during playback
X40
Rapid Play
Special playback cont’d
Step by step playback
Slow forward / Slow reverse play
Using / B, select . Press Enter
Marker Setup
Zoom
During playback, press Zoom
Using Display
Using Skip H / G
Search
Title / Chapter search
Search cont’d
Track search
Time search
Repeat playback
Repeat/Random/Program playback
Random play
Display
Repeat/Random/Program playback cont’d
Switching subtitles
Selecting the format of audio and video
Program play
Switching virtual surround system
Switching audio soundtrack
DVD-RW VR mode
Selecting a format of audio and video cont’d
Using K / L, select OFF Type1 Natural effect Type1 or Type2
Switching camera angles
Using / B, select
Visual Noise Reduction
Information on disc editing
Editing
Using K / L / / B, select the desired title. Press Enter
Editing discs in Video mode
Using K / L, select Edit. Press Enter
Deleting titles
Changing the Setup menu VCR functions
Editing discs in Video mode cont’d
Putting names on titles
Start Connections Getting
Marker will be added or deleting
Setting or clearing chapter markers
Editing discs in VR mode Original
Setting titles to protect
Editing discs in VR mode Original cont’d
Using K / L, select Protect. Press Enter
To exit
Releasing titles from protecting
You can cancel the title-protecting feature
Start Connections Getting started Recording
Confirm the indication On OFF. Press Enter
Editing discs in VR mode Playlist
Dividing a title
Editing discs in VR mode Playlist cont’d
Using K / L, select Title Combining. Press Enter
Using s / B, select Yes. Press Enter
Combining titles
Adding titles to a Playlist
Deleting a Playlist
Others
Using K /L, select Edit. Press Enter
Editing discs in VR mode Original / Playlist
Using K / L, select Delete. Press Enter
Deleting parts of titles
Editing discs in VR mode Original / Playlist cont’d
You Start
Return
Confirmation window will appear. Playlist Add
When you select Add at , a
Playlist Delete
You cannot delete the first Chapter of each title
Changing the Editing Setup menu VCR functions Others
Setting pictures for thumbnails
Recording Playing discs
Picture for thumbnail will be set. Playlist
Changing the Setup menu
Tour of the Setup menu
Setup Items highlight is the default Contents
Language setting
Display setting
Language setting cont’d
Subtitle Language Default OFF
Press Setup Using K / L, select Display. Press Enter
Display setting cont’d
Audio setting
Changing
Settings for PCM Default 48kHz
Audio setting cont’d
Settings for Dolby Digital Default Stream
Press Setup to exit
Settings for Parental lock level
Video setting
Still Mode Default Auto
Using K / L, select the desired level. Press Enter
Password has not been set yet
Settings for Parental lock level cont’d
Password has been set already
Yes
VCR functions
Recording and One-touch Timer Recording
Playback
Recording
Recording and One-touch Timer Recording cont’d
One-touch Timer Recording
Index search
Other operations
Symptom
Troubleshooting
Others
Remedy
Symptom Remedy
Or Setup to
You press OPEN/CLOSE a
Error message Cause Solution
Troubleshooting cont’d
80 EN
Disc MAY not work
Before you start Connections Getting started
RF output switch
Each time the RF output
Panel display
Language code
Glossary
Specifications
Frequently Asked Questions
General
Tuner
Fácil grabación de DVD
Español
Sugerencia 2 Edite el disco grabado
Sugerencia 1 Reproduzca el contenido grabado
Reproducción con videograbadora
Se hará una pausa de reproducción y se silenciará el sonido
86 ES
Grabación
Grabación con temporizador de un toque OTR
Stop C
Tel
Customer Service
Limits and Exclusions
Funai Corporation