E N G L I S H
SOFTWARE INSTALLATION GUIDE OSX
We recommend installing the software before connecting/installing the hardware.
MAC SETUP
We recommend installing the software before connecting or installing the hardware.
•Insert the PowerCore CD in your Mac’s
•The install disk should appear on your desktop automatically. If it does not, open a new Finder window and navigate to the CD.
•The following dialog appears:
•Click CONTINUE.
•Read the introduction and press CONTINUE.
•The Read Me screen appears.
•This describes the installation procedure as well as the Limited Hardware Warranty. Read and click CONTINUE.
Note: You may also print or save this information before continuing.
•Read the Software License Agreement and press CONTINUE.
•The following screen appears.
•Make sure that you have read and understood the Software License Agreement and click AGREE.
•Select your system drive and click CONTINUE.
E N G L I S H
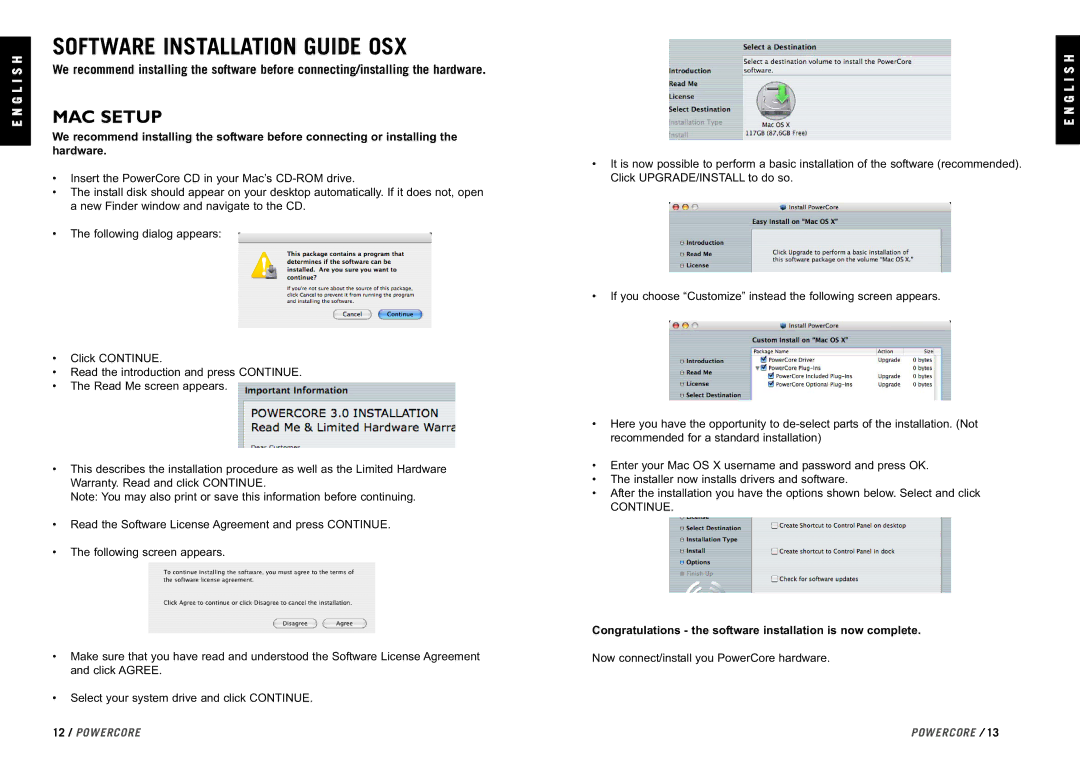
•It is now possible to perform a basic installation of the software (recommended). Click UPGRADE/INSTALL to do so.
•If you choose “Customize” instead the following screen appears.
•Here you have the opportunity to
•Enter your Mac OS X username and password and press OK.
•The installer now installs drivers and software.
•After the installation you have the options shown below. Select and click
CONTINUE.
Congratulations - the software installation is now complete.
Now connect/install you PowerCore hardware.
12 / POWERCORE | POWERCORE / 13 |